Your One Stop Local Business News

Tag: garage door Page 1 of 59

How To Add Another Phone To MYQ Garage Door Opener – Team Taylor Garage Doors of Lee’s Summit

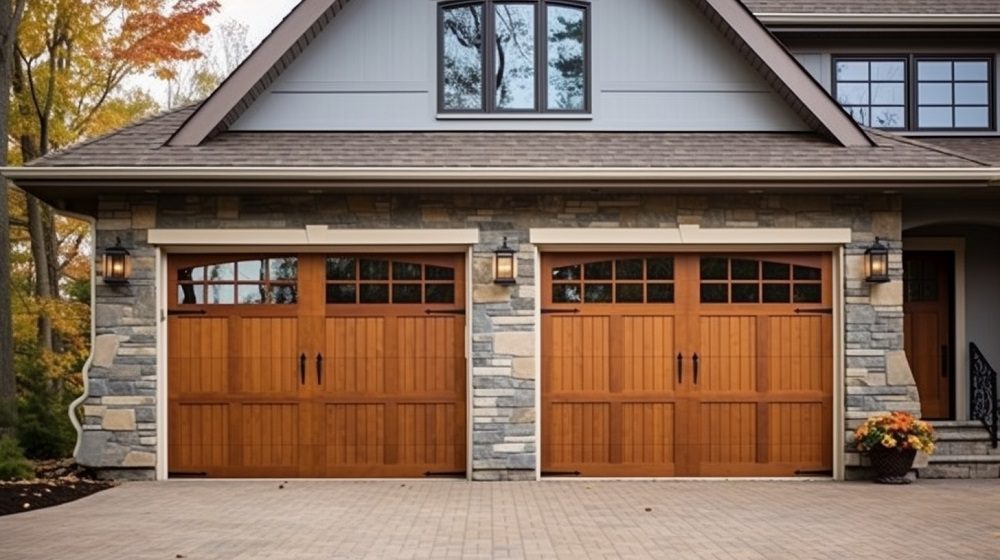
Adding another phone to your Garage Door Repair Lee’s Summit MO allows multiple users to conveniently control the garage door from their smartphones.

Whether you’re adding a family member’s phone or a new device for yourself, this step-by-step guide will walk you through the process to ensure smooth access to your garage door.

1. Download the MyQ App

Before adding another phone to your MyQ garage door opener, ensure that the MyQ app is downloaded and installed on the device you want to add. The MyQ app is available for both iOS and Android devices and can be downloaded from the respective app stores.

2. Create or Log in to Your MyQ Account

Open the MyQ app on the device you want to add and either create a new MyQ account or log in to your existing account. If you’re creating a new account, follow the on-screen prompts to enter your email address, create a password, and complete the account setup process. If you already have a MyQ account, simply log in using your email address and password.

3. Access the MyQ Menu

Once you’re logged in to your MyQ account, access the MyQ menu by tapping on the menu icon (usually three horizontal lines) located in the top-left or top-right corner of the app’s interface. This will open the main menu where you can access various settings and options.

4. Select “Add Device”

From the MyQ menu, select the option labeled “Add Device” or “Add Garage Door Opener.” This will initiate the process of adding a new device to your MyQ account.

5. Follow the On-Screen Instructions

Follow the on-screen instructions provided by the MyQ app to add your garage door opener to the account. This typically involves scanning the QR code located on the MyQ hub or entering the serial number manually. Make sure to place the phone close to the MyQ hub during this process for optimal connectivity.

6. Name the Device

Once the MyQ app has successfully detected and added the garage door opener to your account, you’ll be prompted to name the device for easy identification. Choose a descriptive name that will help you distinguish between multiple devices if you have more than one garage door opener connected to your MyQ account.

7. Share Access with Another User

To grant access to another user, navigate to the settings or account management section of the MyQ app and select the option to share access. Enter the email address associated with the other user’s MyQ account and specify the level of access they should have (e.g., full access, limited access, guest access).

8. Download the MyQ App on the Other Phone

On the phone belonging to the other user, download and install the MyQ app from the app store if it’s not already installed. Have the user log in to their MyQ account using their credentials.

9. Accept the Invitation

Once the other user has logged in to their MyQ account, they should receive an invitation to access the garage door opener that you shared with them. Have them accept the invitation through the MyQ app to complete the process.

10. Test Remote Access

After adding the other phone to your MyQ garage door opener, test remote access by opening the MyQ app on the other phone and attempting to open or close the garage door. Ensure that the operation is successful and that both phones can control the garage door effectively.

Conclusion:

Adding another phone to your MyQ garage door opener is a straightforward process that allows multiple users to enjoy convenient access to the garage door from their smartphones. By following the steps outlined in this guide and using the MyQ app’s intuitive interface, you can quickly add another phone to your MyQ account and ensure smooth operation of your garage door opener for all users.

Team Taylor Garage Doors of Lee’s Summit

1012 NE Jib Ct STE D, Lee’s Summit, MO 64064, United States

1-816-239-2959

How To Set Up Garage Door Opener – Martin Garage Door

Garage Door Repair Parker CO is a simple yet effective way to enhance the security of your home and protect your belongings. Whether you’ve recently moved into a new home, need to update your existing keypad code, or want to revoke access for individuals who no longer require entry, changing the code on your garage door keypad allows you to maintain control over who can enter your garage.

In this comprehensive guide, we’ll walk you through the step-by-step process of changing the code on a garage door keypad, ensuring that you can do so quickly and easily.

1. Locate the Keypad

The first step in changing the code on your garage door keypad is to locate the keypad itself. Garage door keypads are typically mounted on the exterior of the garage door frame, near the entrance to the garage. They may be attached to the wall surface or recessed into the frame, depending on the model and installation method.

2. Access the Programming Menu

Once you’ve located the keypad, you’ll need to access the programming menu to change the code. This usually involves entering a specific sequence of numbers or pressing a designated button on the keypad to enter programming mode. Refer to the user manual for your specific keypad model for instructions on accessing the programming menu.

3. Enter the Current Code (If Required)

If your garage door keypad requires you to enter the current code before changing it, do so now. This step verifies that you have authorized access to the keypad programming menu and prevents unauthorized individuals from changing the code without permission.

4. Select a New Code

With the keypad in programming mode, you can now select a new code for your garage door keypad. Choose a code that is easy for you to remember but difficult for others to guess. Avoid using obvious combinations such as sequential numbers or repeating digits, as these can compromise the security of your garage.

5. Enter the New Code

Once you’ve selected a new code, enter it into the keypad using the numeric keypad. Some keypads may require you to confirm the new code by entering it a second time to ensure accuracy. Follow the prompts on the keypad display or listen for audible feedback to confirm that the new code has been accepted.

6. Test the New Code

After changing the code on your garage door keypad, it’s important to test the new code to ensure that it works correctly. Stand within range of the keypad and enter the new code using the numeric keypad. The garage door should open or close in response to the code input, indicating that the new code has been successfully programmed.

7. Secure the Keypad

Once you’ve confirmed that the new code works correctly, secure the keypad to prevent unauthorized access. This may involve locking the keypad cover or activating a security feature that prevents entry after multiple incorrect code attempts. Refer to the user manual for your specific keypad model for instructions on securing the keypad.

8. Keep the Code Confidential

Finally, remember to keep the new code confidential and only share it with individuals who require access to your garage. Avoid writing down the code or sharing it with others unnecessarily, as this can compromise the security of your garage and home.

9. Periodic Code Changes

For added security, consider changing the code on your garage door keypad periodically, such as every six months or annually. This practice helps prevent unauthorized individuals from gaining access to your garage and reduces the risk of security breaches.

10. Seek Professional Assistance if Needed

If you encounter difficulties or have concerns about changing the code on your garage door keypad, don’t hesitate to seek professional assistance. Contact a reputable garage door technician or the manufacturer of your keypad for guidance on changing the code safely and effectively.

By following these steps and exercising proper caution, you can successfully change the code on your garage door keypad, enhancing the security of your home and providing peace of mind knowing that your garage is protected against unauthorized access.

Martin Garage Door

10411 S Parker Rd, Parker, CO 80134, United States

1-303-663-1310

How To Install Garage Door Springs – EDM Garage Doors, LLC

Garage Door Repair Volo IL play a crucial role in counterbalancing the weight of the garage door and facilitating smooth opening and closing movements. If you’re considering installing new garage door springs or replacing existing ones, it’s essential to understand the process involved and follow proper safety procedures.

While installing garage door springs can be challenging and potentially dangerous, with the right tools, materials, and knowledge, you can complete the task safely and effectively. In this guide, we’ll walk you through the step-by-step process of installing garage door springs, ensuring that your garage door operates smoothly and safely for years to come.

1. Gather Necessary Tools and Materials

Before you begin the installation process, gather all the necessary tools and materials. You’ll need:

  • Replacement garage door springs
  • Safety goggles
  • Leather gloves
  • Winding bars
  • Adjustable wrench
  • C-clamps
  • Step ladder
  • Socket set
  • Tape measure

2. Ensure Safety Precautions

Safety should be your top priority when installing garage door springs. Wear safety goggles and leather gloves to protect your eyes and hands from potential injury. Ensure that the area around the garage door is clear of any obstructions and use a sturdy step ladder to access the springs safely.

3. Determine Spring Type and Size

Before purchasing replacement springs, determine the type and size of the existing springs. Measure the length and diameter of the springs and note any specific markings or identifiers. Choose replacement springs that match the specifications of the original springs to ensure compatibility and proper operation.

4. Release Tension from Existing Springs

If you’re replacing existing garage door springs, it’s crucial to release tension from the springs before proceeding with the installation. Use winding bars to carefully unwind the tension from the springs, following manufacturer instructions and safety guidelines. Take caution to avoid sudden release of tension, as this can cause injury or damage.

5. Remove Old Springs

Once tension has been released from the existing springs, use an adjustable wrench or socket set to loosen and remove the bolts securing the springs to the garage door and track. Carefully disconnect the springs from the door and track, taking care to avoid damage to surrounding components.

6. Install New Springs

With the old springs removed, it’s time to install the new springs. Position the new springs on the garage door and track, ensuring that they are correctly aligned and securely fastened. Use C-clamps to hold the springs in place temporarily while you secure them with bolts and nuts.

7. Wind Tension into New Springs

After the new springs are securely installed, use winding bars to wind tension into the springs. Follow manufacturer instructions and safety guidelines carefully, ensuring that you wind the springs to the appropriate tension level. Take caution to avoid over-tightening the springs, as this can cause damage to the door and track.

8. Test Garage Door Operation

Once the new springs are installed and tensioned properly, test the operation of the garage door to ensure smooth and balanced movement. Open and close the door several times, observing for any signs of binding, uneven movement, or excessive noise. Adjust spring tension as needed to achieve optimal performance.

9. Perform Regular Maintenance

To prolong the lifespan of your garage door springs and ensure continued reliability, perform regular maintenance and inspections. Lubricate springs and moving parts with garage door lubricant, check for signs of wear or damage, and address any issues promptly to prevent further damage or safety hazards.

10. Seek Professional Assistance if Needed

If you’re unsure about installing garage door springs yourself or encounter difficulties during the installation process, don’t hesitate to seek professional assistance. Contact a reputable garage door technician to inspect and install the springs correctly, ensuring safe and reliable operation of your garage door.

By following these steps and exercising proper safety precautions, you can install garage door springs safely and effectively, ensuring smooth and reliable operation of your garage door for years to come. Whether you’re replacing existing springs or installing new ones, taking the time to perform the installation correctly will help prevent accidents, injuries, and costly repairs down the road.

EDM Garage Doors, LLC

596 Richard Brown Blvd, Volo, IL 60073, United States

1-847-416-3036

Can I Use My Smartphone As A Garage Door Opener – Garage Door Wizard

One innovative application of smartphone technology is using your Garage Door Repair Cypress TX.

In this comprehensive guide, we’ll explore the feasibility, benefits, and considerations of using your smartphone to control your garage door, transforming your smartphone into a powerful tool for home automation.

Understanding Smartphone Garage Door Openers

Smartphone garage door openers are innovative devices or apps that allow homeowners to control and monitor their garage doors remotely using their smartphones. These systems typically consist of a hardware device installed in the garage and a companion smartphone app that communicates with the device via Wi-Fi or Bluetooth connectivity. With a few taps on their smartphone screen, users can open, close, and monitor their garage doors from anywhere with an internet connection, adding convenience, security, and peace of mind to their daily lives.

Benefits of Using Your Smartphone as a Garage Door Opener

There are several compelling benefits to using your smartphone as a garage door opener:

1. Convenience:

With your smartphone always within reach, you can open and close your garage door with just a few taps on the screen, eliminating the need for separate remote controls or keypads. Whether you’re arriving home with groceries in hand or letting a guest in while you’re away, the convenience of using your smartphone as a garage door opener cannot be overstated.

2. Remote Access:

Whether you’re at work, on vacation, or simply away from home, you can access and control your garage door from anywhere with an internet connection. Smartphone garage door openers offer real-time monitoring and control, allowing you to open, close, and check the status of your garage door remotely, providing peace of mind and added security.

3. Integration with Smart Home Ecosystem:

Smartphone garage door openers can be integrated with other smart home devices and platforms, allowing you to create custom automation routines and control your entire home with ease. Whether you use Apple HomeKit, Google Assistant, Amazon Alexa, or other smart home platforms, you can seamlessly incorporate your garage door into your smart home ecosystem for enhanced convenience and functionality.

4. Guest Access and Permissions:

Many smartphone garage door opener apps offer features that allow you to grant temporary access or permissions to family members, friends, or service providers. Whether you’re hosting a party, expecting a delivery, or coordinating maintenance work, you can easily share access to your garage door with trusted individuals without compromising security.

Considerations for Using Your Smartphone as a Garage Door Opener

While smartphone garage door openers offer numerous benefits, there are several considerations to keep in mind:

1. Security:

As with any internet-connected device, security is paramount when using your smartphone as a garage door opener. Ensure that your smartphone, garage door opener device, and home network are protected with strong, unique passwords and updated security measures to prevent unauthorized access and protect your privacy.

2. Compatibility:

Before investing in a smartphone garage door opener system, ensure that it is compatible with your existing garage door opener hardware and smartphone platform. Check compatibility requirements, such as operating system versions, hardware specifications, and smart home platform integration, to ensure seamless operation and functionality.

3. Reliability:

While smartphone garage door opener systems offer convenience and flexibility, they rely on stable internet connectivity and reliable hardware to function properly. Ensure that your home Wi-Fi network is robust and that the garage door opener device is installed and maintained correctly to minimize downtime and ensure reliable operation.

How to Set Up and Use Your Smartphone as a Garage Door Opener

Setting up and using your smartphone as a garage door opener is typically a straightforward process:

  1. Select a Smartphone Garage Door Opener System:Choose a smartphone garage door opener system that meets your needs and preferences, considering factors such as compatibility, features, and user reviews.
  2. Install the Hardware Device:Install the hardware device or retrofit kit according to the manufacturer’s instructions, ensuring proper placement and connectivity to your garage door opener system and home Wi-Fi network.
  3. Download and Configure the Smartphone App:Download the companion smartphone app for your chosen garage door opener system from the App Store (for iOS devices) or Google Play Store (for Android devices). Follow the app’s instructions to create an account, configure settings, and pair the app with the hardware device.
  4. Test and Customize Settings:Once the smartphone app is configured, test the system to ensure that it’s functioning correctly. Open and close your garage door remotely from your smartphone, customize settings, and explore additional features such as scheduling, notifications, and guest access permissions.

Conclusion:

Using your smartphone as a garage door opener offers unparalleled convenience, security, and flexibility for homeowners seeking to streamline their daily routines and enhance their home automation capabilities. With smartphone garage door opener systems, you can control and monitor your garage door remotely from anywhere with an internet connection, integrate it with other smart home devices and platforms, and enjoy peace of mind knowing that your home is secure and accessible at all times. By considering factors such as security, compatibility, and reliability, and following the setup and usage instructions provided by the manufacturer, you can leverage the power of your smartphone to transform your garage door into a smart, connected, and automated feature of your home.

Garage Door Wizard

17302 House & Hahl Rd Suit 208, Cypress, TX 77433, United States

1-832-373-7681

How Do I Reprogram A Chamberlain Garage Door Opener – Tarrant County Door & Gate


Garage Door Repair Fort Worth TX are renowned for their robust construction and innovative technology. These devices provide seamless operation, allowing users to effortlessly open and close their garage doors with just the touch of a button.

However, like any electronic device, Chamberlain openers may require reprogramming at some point to maintain optimal performance.

Understanding the Need for Reprogramming

Reprogramming your Chamberlain garage door opener may become necessary for various reasons. One common reason is to enhance security by changing the access code periodically. Additionally, reprogramming may be required if the opener starts malfunctioning or fails to respond to commands effectively.

Preparing for Reprogramming

Before you begin the reprogramming process, it’s essential to gather the necessary tools and ensure safety measures are in place. You’ll typically need a ladder, a screwdriver, and the instruction manual provided with your Chamberlain garage door opener. Additionally, ensure that the area around the opener is clear of any obstructions to prevent accidents during the reprogramming process.

Step-by-Step Guide to Reprogramming

  1. Accessing the Control Panel: Start by locating the control panel on your Chamberlain garage door opener. This panel is usually found near the motor unit and contains the programming buttons.
  2. Entering Reprogramming Mode: Press and hold the “Learn” button on the control panel for about 10 seconds until the indicator light starts blinking. This action puts the opener into reprogramming mode, allowing you to reset the access code.
  3. Resetting the Code: Once the indicator light is blinking, enter a new access code using the keypad or remote control. Make sure to choose a unique code that is easy for you to remember but difficult for others to guess. After entering the new code, press the “Learn” button again to save the changes.

Testing the Reprogrammed Opener

After completing the reprogramming process, it’s crucial to test the functionality of your Chamberlain garage door opener. Use the remote control or keypad to operate the door and ensure that it opens and closes smoothly without any issues. If everything works correctly, you can rest assured that your opener has been successfully reprogrammed.

Troubleshooting Common Issues

If you encounter any problems during the reprogramming process or notice issues with the functionality of your Chamberlain garage door opener after reprogramming, don’t panic. Refer to the instruction manual for troubleshooting tips or contact Chamberlain’s customer support for assistance. Common issues such as keypad malfunction or interference from other electronic devices can usually be resolved with simple solutions.

Conclusion:

Reprogramming your Chamberlain garage door opener is a straightforward process that can be completed with minimal effort and the right guidance. By following the step-by-step instructions outlined in this guide, you can ensure that your opener remains secure and functional at all times. Remember to test the reprogrammed opener after completion and address any issues promptly to maintain optimal performance.

Tarrant County Door & Gate

6408 Marlette Ct, Fort Worth, TX 76182, United States

1-817-456-2958

How Much Horsepower Needed For Garage Door Opener – First Responder Garage Doors

Determining the appropriate Garage Door Repair Southlake TX is essential to ensure smooth and efficient operation.

In this comprehensive guide, we’ll explore the factors influencing horsepower requirements, the different horsepower options available, considerations for selecting the right horsepower, and tips for optimizing your garage door opener’s performance.

Understanding Horsepower

Horsepower (HP) is a measure of the motor’s strength and ability to lift and lower the garage door effectively. Choosing the right horsepower ensures that your opener can handle the weight and size of your door without strain or malfunction.

Factors Influencing Horsepower Requirements

Several factors influence the amount of horsepower needed for a garage door opener:

1. Door Weight and Size:

  • Heavier and larger doors require more horsepower to operate smoothly. Wooden or solid steel doors typically weigh more than aluminum or fiberglass doors and may require higher horsepower.

2. Door Material:

  • The material of the garage door affects its weight and resistance, impacting horsepower requirements.

3. Usage Frequency:

  • The frequency of door operation, such as daily use or occasional use, influences horsepower needs. Higher horsepower is advisable for doors used frequently to prevent motor strain and prolong the opener’s lifespan.

4. Opener Mechanism:

  • The type of opener mechanism, such as chain drive, belt drive, or screw drive, may have different horsepower requirements based on their design and efficiency.

Different Horsepower Options Available

Garage door openers typically come in three main horsepower options:

1. 1/3 HP:

  • Suitable for lightweight single-car garage doors made of aluminum or fiberglass.
  • Ideal for occasional use or smaller doors with minimal weight.

2. 1/2 HP:

  • Versatile option suitable for standard single or double-car garage doors.
  • Provides sufficient power for most residential applications, including moderate use.

3. 3/4 HP or Higher:

  • Recommended for heavier or larger doors, such as wooden or solid steel doors.
  • Ideal for frequent use or commercial applications where durability and strength are essential.

Considerations for Choosing the Appropriate Horsepower

When selecting the horsepower for your garage door opener, consider the following factors:

1. Door Size and Weight:

  • Determine the weight and size of your garage door to assess the horsepower needed for smooth operation.

2. Usage Patterns:

  • Evaluate how often the garage door will be used and whether it requires constant lifting and lowering throughout the day.

3. Climate and Environment:

  • Consider environmental factors such as extreme temperatures or high humidity, which may affect the opener’s performance and horsepower requirements.

4. Future Upgrades:

  • Anticipate any future upgrades or changes to your garage door, such as insulation or additional panels, which may increase its weight and affect horsepower needs.

Tips for Optimizing Performance

To ensure optimal performance and longevity of your garage door opener, consider the following tips:

1. Professional Installation:

  • Have your garage door opener installed by a professional to ensure proper setup and calibration for optimal performance.

2. Regular Maintenance:

  • Perform routine maintenance tasks, such as lubricating moving parts and checking for loose hardware, to keep your opener running smoothly.

3. Upgrade as Needed:

  • If you notice signs of strain or difficulty in lifting the door, consider upgrading to a higher horsepower opener to prevent motor damage and ensure safe operation.

4. Consult with Experts:

  • Seek advice from garage door professionals or technicians to determine the most suitable horsepower for your specific door and usage requirements.

Conclusion:

Choosing the appropriate horsepower for your garage door opener is crucial for efficient and reliable operation. By considering factors such as door size, weight, usage patterns, and environmental conditions, you can select the right horsepower to meet your needs and ensure smooth functionality of your garage door opener for years to come.

First Responder Garage Doors

180 State St Suite 225, Southlake, TX 76092, United States

1-817-991-5551

How To Install Chamberlain Garage Door Opener Keypad – Veterans Garage Door

Garage Door Repair Sarasota FL allows you to open and close your garage door conveniently without the need for a remote or keys.

It provides secure access to your garage and can be programmed with personalized entry codes for added convenience. Installing a Chamberlain keypad is a simple DIY project that requires basic tools and minimal time. Follow these instructions carefully to install your Chamberlain garage door opener keypad successfully.

Pre-Installation Preparation

Before you begin the installation process, gather all the necessary tools and materials:

  • Chamberlain garage door opener keypad kit
  • Screwdriver
  • Drill (if necessary)
  • Screws or adhesive strips (depending on mounting method)
  • Batteries (if not included)

Installation Steps

Follow these step-by-step instructions to install your Chamberlain garage door opener keypad:

: Choose a Mounting Location

Select a suitable location for mounting the keypad outside your garage door. Choose a spot that is easily accessible and within reach but out of reach of potential intruders. Ensure that the mounting surface is clean, dry, and free of any obstructions.

: Prepare the Mounting Surface

If necessary, clean the mounting surface using a mild detergent and water to remove any dirt, dust, or debris. Allow the surface to dry completely before proceeding with the installation. This will ensure a secure and stable mounting surface for the keypad.

: Install Batteries

Open the battery compartment of the keypad and insert the batteries according to the polarity markings. Ensure that the batteries are inserted correctly to avoid damage to the keypad. Close the battery compartment securely once the batteries are installed.

: Attach the Keypad

Depending on the mounting method provided with your Chamberlain keypad, you can either use screws or adhesive strips to attach the keypad to the mounting surface. Follow the manufacturer’s instructions for your specific keypad model to securely attach it in place.

: Program Entry Code

Once the keypad is securely mounted, it’s time to program your personalized entry code. Follow these steps to program the entry code:

  1. Press the “Learn” button on your garage door opener motor unit.
  2. Enter your desired four-digit PIN on the keypad within 30 seconds.
  3. Press the “Enter” button on the keypad to confirm the entry code.
  4. Test the entry code to ensure that it activates the garage door opener as intended.

: Test Operation

Test the keypad to ensure that it is functioning correctly. Enter your programmed entry code and press the “Enter” button to activate the garage door opener. The garage door should open or close smoothly in response to the keypad input. If necessary, repeat the programming steps to adjust the entry code or troubleshoot any issues.

: Secure Wiring (if applicable)

If your Chamberlain keypad requires wiring connection to the garage door opener motor unit, ensure that the wiring is securely connected and properly insulated to prevent damage or electrical hazards. Follow the manufacturer’s instructions for wiring connection and ensure that all connections are tight and secure.

: Finalize Installation

Once the keypad is installed and programmed successfully, perform a final inspection to ensure that everything is in order. Check the mounting screws or adhesive strips to ensure that the keypad is securely attached to the mounting surface. Test the keypad operation one final time to verify proper functionality.

Conclusion:

Installing a Chamberlain garage door opener keypad is a simple and straightforward process that can enhance the convenience and security of your garage access. By following the step-by-step instructions outlined in this guide, you can successfully install your Chamberlain keypad and enjoy easy access to your garage without the need for keys or remotes.

Veterans Garage Door

6497 Parkland Dr F, Sarasota, FL 34243, United States

1-941-699-6198

Can You Program Homelink Without Garage Door Opener – Garage Door Solutionz


Garage Door Repair Anniston AL is possible in certain situations, particularly if you have a compatible vehicle equipped with Homelink technology.

Homelink allows you to synchronize your vehicle’s built-in buttons with various home automation devices, including garage door openers, gate operators, and home lighting systems. While the traditional method of programming Homelink involves pairing it with a garage door opener, there are alternative methods available for programming Homelink buttons without a physical garage door opener. Let’s explore in more detail how to program Homelink without a garage door opener:

1. Verify Compatibility: Before attempting to program Homelink without a garage door opener, ensure that your vehicle is equipped with Homelink technology and that it’s compatible with your desired home automation device. Check your vehicle’s owner’s manual or the manufacturer’s website for compatibility information.

2. Identify Compatible Devices: While garage door openers are the most common devices paired with Homelink, you can also program Homelink buttons to control other compatible devices, such as gate operators or home lighting systems. Identify the specific device you want to control with Homelink and ensure that it’s compatible with Homelink technology.

3. Access Homelink Programming Mode: To program Homelink without a garage door opener, you’ll need to access programming mode on your vehicle’s Homelink system. This typically involves pressing and holding one or more buttons on the Homelink control panel until the indicator light begins to flash rapidly.

4. Follow Alternative Programming Instructions: If you’re unable to pair Homelink with a physical garage door opener, consult the vehicle’s owner’s manual or the manufacturer’s instructions for alternative programming methods. Some vehicles offer alternative programming instructions for situations where a physical garage door opener isn’t available.

5. Use a Remote Control: In some cases, you may be able to program Homelink buttons using a remote control that operates the desired home automation device. To do this:

  • Hold the remote control near the Homelink control panel in your vehicle.
  • Press and hold the button on the remote control that you want to program to Homelink.
  • Simultaneously press and hold the corresponding button on the Homelink control panel until the indicator light begins to flash rapidly.
  • Release both buttons once the indicator light starts flashing, indicating that the programming was successful.

6. Test Homelink Functionality: After programming Homelink without a garage door opener, test the functionality of the programmed buttons to ensure that they operate the desired home automation device. If necessary, repeat the programming process for additional buttons or devices.

7. Consider Professional Assistance: If you encounter difficulties or are unsure about how to program Homelink without a garage door opener, consider seeking assistance from a qualified technician or contacting the vehicle manufacturer’s customer support for guidance.

8. Conclusion:

In conclusion, while the traditional method of programming Homelink involves pairing it with a garage door opener, there are alternative methods available for programming Homelink buttons without a physical opener. By following the appropriate programming instructions and using compatible home automation devices, you can program Homelink buttons to control various home automation systems, including gate operators and home lighting systems. Enjoy the convenience and functionality of Homelink technology in your vehicle, even without a physical garage door opener.

Garage Door Solutionz

1-256-954-0264

Can You Leave Car Running With Garage Door Open – Affordable Garage Door Repairs of Kokomo

Leaving a car running with the Garage Door Repair Kokomo IN is a practice that poses various risks and considerations, both for personal safety and for the environment.

While it may seem convenient in certain situations, such as when warming up the car in cold weather or when working in the garage, there are several factors to consider before deciding to leave a running vehicle in an open garage. Let’s delve into these aspects in detail:

1. Carbon Monoxide Poisoning: One of the most significant risks associated with leaving a car running in an open garage is carbon monoxide (CO) poisoning. Carbon monoxide is a colorless, odorless gas produced by the combustion of gasoline in the engine. When a vehicle is left running in an enclosed space like a garage, CO can quickly accumulate to dangerous levels, posing a serious health hazard to anyone in the vicinity.

2. Ventilation: Even with the garage door open, proper ventilation may not be sufficient to prevent the buildup of carbon monoxide. Factors such as the size of the garage, airflow patterns, and weather conditions can affect ventilation effectiveness. Opening windows and using exhaust fans may help improve ventilation but may not eliminate the risk entirely.

3. Duration of Exposure: The longer a vehicle is left running in an open garage, the greater the risk of carbon monoxide exposure. Even brief exposure to high levels of CO can cause symptoms such as dizziness, nausea, headaches, and confusion. Prolonged exposure can lead to loss of consciousness, brain damage, or even death.

4. Engine Damage: Continuously idling a vehicle for extended periods can also cause engine damage and premature wear. Idling engines consume fuel without generating significant load or cooling airflow, leading to incomplete combustion and potential buildup of deposits in the engine. Over time, this can result in decreased fuel efficiency, increased emissions, and accelerated engine wear.

5. Theft and Security Concerns: Leaving a car running in an open garage may also present security risks, as it could attract the attention of thieves or opportunistic individuals looking to steal the vehicle or its contents. An unattended, running vehicle is an easy target for theft, especially if the garage is easily accessible from the street or if valuables are visible inside the car.

6. Noise and Disturbance: The noise generated by a running engine can be disruptive to neighbors or household members, particularly in residential areas where houses are in close proximity. Continuous idling can create unnecessary noise pollution and disturb the peace and quiet of the neighborhood.

7. Environmental Impact: From an environmental standpoint, unnecessary idling contributes to air pollution and greenhouse gas emissions. Vehicle emissions contain pollutants such as carbon dioxide (CO2), nitrogen oxides (NOx), and particulate matter, which can harm air quality and contribute to climate change. Minimizing idling helps reduce these harmful emissions and conserves fuel.

Conclusion:

Leaving a car running with the Garage Door Repair Kokomo IN poses significant risks and considerations, including the potential for carbon monoxide poisoning, engine damage, security concerns, and environmental impact. While there may be situations where it seems convenient or necessary to leave a vehicle running in an open garage, it’s essential to weigh the potential risks and take appropriate precautions to ensure safety. Whenever possible, avoid leaving a running vehicle unattended in an open garage and consider alternative solutions, such as using a remote starter, installing carbon monoxide detectors, or moving the vehicle to an outdoor location away from enclosed spaces. Prioritizing safety and environmental responsibility helps minimize risks and promotes a healthier, safer living environment for everyone.

Affordable Garage Door Repairs of Kokomo

1206 Peace Pipe Dr, Kokomo, IN 46902, United States

1-765-441–4637

How Powerful Garage Door Opener – Denzels Garage Doors


Determining the power of a Garage Door Repair Marina Del Rey EI is essential to ensure smooth and efficient operation of your garage door.

The power of a garage door opener is typically measured in horsepower (HP) and determines the opener’s ability to lift and lower the door. Understanding the power requirements of your garage door opener depends on factors such as the size and weight of the door, the type of drive system, and any additional features or accessories. Let’s delve into this topic in detail to understand the factors influencing the power of a garage door opener and how to choose the right one for your needs.

Understanding Garage Door Opener Power: Garage door openers come in various power ratings, ranging from 1/3 HP to 1 1/4 HP or more. The power of the opener affects its lifting capacity and speed, as well as its ability to operate smoothly under different conditions. Here’s a breakdown of the common power ratings and their typical applications:

  1. 1/3 HP: Suitable for lightweight single-car garage doors with minimal insulation and no additional features. This power rating is best for smaller doors made of lightweight materials such as aluminum or fiberglass.
  2. 1/2 HP: Ideal for standard single-car garage doors and lightweight double-car doors. This power rating provides sufficient lifting capacity for most residential garage doors made of steel or wood.
  3. 3/4 HP: Recommended for heavy double-car garage doors, insulated doors, or doors with additional features such as windows or decorative hardware. This power rating offers increased lifting capacity and durability for larger and heavier doors.
  4. 1 HP or higher: Designed for oversized or custom garage doors, commercial applications, or doors with extreme weight or insulation. These high-powered openers provide maximum lifting capacity and speed for demanding environments.

Factors Affecting Opener Power Requirements: Several factors influence the power requirements of a garage door opener:

  1. Size and Weight of Door: The size and weight of the garage door are primary considerations when determining the power of the opener. Larger and heavier doors require more power to lift and lower effectively, especially if they are insulated or have additional features.
  2. Type of Drive System: The type of drive system used in the garage door opener also affects its power requirements. Chain-drive openers typically require more power than belt-drive or screw-drive openers due to the additional friction and resistance of the chain mechanism.
  3. Insulation and Additional Features: Insulated garage doors and doors with additional features such as windows, decorative hardware, or insulation require more power to operate smoothly. The added weight and resistance of these features increase the demand on the opener’s motor.
  4. Frequency of Use: The frequency with which you use your garage door can impact the power requirements of the opener. High-traffic doors or doors used frequently throughout the day may benefit from a higher-powered opener to handle the increased workload.
  5. Climate and Environmental Conditions: Extreme temperatures, humidity, and environmental conditions can affect the performance of a garage door opener. Choosing a more powerful opener can provide added reliability and durability in challenging climates.

Choosing the Right Opener Power: To determine the right power rating for your garage door opener, consider the following steps:

  1. Measure the Door: Measure the height and width of your garage door to determine its size and weight. This information will help you select an opener with sufficient lifting capacity to handle the door’s dimensions.
  2. Assess Additional Features: Take into account any additional features or accessories installed on your garage door, such as insulation, windows, or decorative hardware. These features add weight and resistance, increasing the power requirements of the opener.
  3. Consider Future Needs: Anticipate any future changes or upgrades to your garage door, such as adding insulation or replacing panels. Choose an opener with enough power to accommodate potential changes without sacrificing performance.
  4. Consult with a Professional: If you’re unsure about the power requirements of your garage door opener, consult with a professional garage door technician. They can assess your door’s specifications and recommend the right opener for your needs and budget.

Conclusion: Choosing the right power for your Garage Door Repair Marina Del Rey EI is essential for ensuring smooth, reliable, and efficient operation of your garage door. Factors such as the size and weight of the door, type of drive system, insulation, additional features, frequency of use, and environmental conditions all influence the power requirements of the opener. By understanding these factors and carefully assessing your garage door’s specifications, you can select an opener with the appropriate power rating to meet your needs and provide years of trouble-free performance. Consulting with a professional garage door technician can help ensure that you choose the right opener for your specific requirements and enjoy the convenience and security of a properly powered garage door opener.

Denzels Garage Doors

1-619-496-9419

Page 1 of 59

Powered by WordPress & Theme by Anders Norén