Your One Stop Local Business News

Tag: garage door repair arlington tx Page 1 of 2

How To Reset Remote For Garage Door – Arlington Overhead & Garage Doors

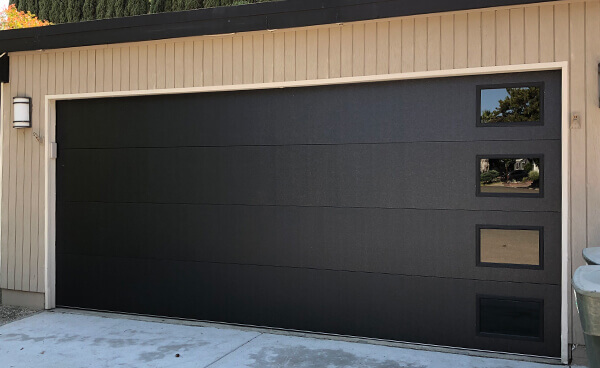
Arlington Garage Door Repair serve as a gateway to a secure and convenient home entrance.

They utilize radio frequency signals to communicate with the garage door opener, allowing users to operate the door with a simple click.

A malfunctioning remote not only causes inconvenience but also compromises the security of your home. Regular maintenance and timely troubleshooting are essential to ensure that your garage door remote operates smoothly.

Common Issues with Garage Door Remotes

One prevalent issue is signal interference, where external devices disrupt the communication between the remote and the opener. Identifying and eliminating sources of interference is crucial for a reliable remote connection.

Frequent use can drain the remote’s batteries, leading to operational problems. We’ll delve into methods for testing and replacing batteries to keep your remote in top condition.

In some cases, the remote may lose synchronization with the garage door opener. This section will guide you through the process of verifying and restoring synchronization.

Steps to Diagnose Remote Issues

To identify potential sources of interference, conduct a thorough inspection of your garage and nearby areas. Common culprits include electronic devices and metal structures. By eliminating or relocating these sources, you can enhance the remote’s signal reception.

Regular battery checks are vital for uninterrupted remote operation. We’ll provide step-by-step instructions for testing and replacing batteries based on your remote’s design.

Ensuring that your remote is in sync with the garage door opener is essential for seamless functionality. This section will guide you through the synchronization process, preventing operational glitches.

Resetting the Garage Door Remote

Resetting your garage door remote is a valuable troubleshooting step. It clears any glitches in the system and restores the remote to its default settings.

LiftMaster remotes often have a simple reset process involving a combination of button presses. We’ll walk you through the specific steps for your LiftMaster model.

Genie remotes may require a different approach. We’ll outline the reset procedure, ensuring your Genie remote is back to optimal performance.

Chamberlain remotes have unique reset methods. Follow our detailed instructions to reset your Chamberlain remote effortlessly.

Additional Tips for Maintenance

Dust and debris can accumulate over time, affecting the remote’s buttons and sensors. Learn the proper way to clean your remote to maintain its responsiveness.

Protecting your remote’s programming code is crucial for preventing unauthorized access. We’ll provide tips on securing this code to enhance your home’s security.

Consider upgrading to a rolling code system for an added layer of security. We’ll discuss the benefits and guide you through the process of transitioning to this advanced technology.

Troubleshooting Uncommon Issues

If specific buttons on your remote are not functioning correctly, we’ll help you troubleshoot the issue and explore potential solutions.

A non-responsive remote can be frustrating. We’ll identify common causes and guide you through troubleshooting steps to restore functionality.

For issues beyond DIY troubleshooting, seeking professional assistance is advisable. We’ll discuss when it’s time to contact a professional and what to expect during the repair process.

Benefits of Regular Remote Maintenance

Routine maintenance significantly extends the lifespan of your garage door remote. Discover how a few simple steps can save you from frequent replacements.

A well-maintained remote contributes to the overall security of your home. Learn how proactive maintenance reduces the risk of unauthorized access.

Regular maintenance is not only beneficial for performance but also cost-effective. We’ll break down the financial advantages of maintaining your remote versus replacing it.

Upgrading Your Garage Door Opener

Before upgrading your garage door opener, consider compatibility with your existing system. We’ll provide insights into ensuring a seamless transition.

Explore the world of smart garage door openers and understand the benefits of integrating this technology into your home.

Future-proofing your garage door system involves staying ahead of technological advancements. We’ll discuss how to make choices that keep your system relevant for years to come.

Conclusion:

In this comprehensive guide, we explored common issues with Arlington Garage Door Repair, diagnostic steps, and detailed instructions for resetting and maintaining your remote. Remember, regular upkeep not only enhances performance but also contributes to the longevity of your remote.

Arlington Overhead & Garage Doors

817-646-2532

Does Home Warranty Cover Garage Door – Lake Arlington Gates & Garage Doors


Home warranties offer homeowners a sense of security by providing coverage for the repair or replacement of essential home systems and appliances. While these warranties are designed to alleviate the financial burden of unexpected repairs, the extent of coverage can vary, and the inclusion of specific items, such as Garage Door Repair Arlington TX may be subject to certain conditions.

To determine if a home warranty covers a garage door, it is crucial to delve into the details of the warranty agreement. Typically, a basic home warranty covers major systems like plumbing, electrical, heating, and air conditioning, as well as major appliances like refrigerators, ovens, and dishwashers. However, the coverage for items like garage doors is not always straightforward and may depend on the specific terms outlined in the policy.

Garage doors, being an integral part of a home, can experience wear and tear over time. Issues may arise with components such as the garage door opener, springs, tracks, and other essential parts. Whether these problems are covered under a home warranty depends on the warranty provider and the specific plan chosen by the homeowner.

If a home warranty explicitly includes coverage for garage doors, it means that certain repairs or replacements related to the garage door system may be handled by the warranty provider. This coverage can be beneficial in mitigating unexpected expenses associated with garage door malfunctions.

However, it is essential for homeowners to be aware of the limitations and exclusions that may exist within the home warranty policy. Coverage may have a cap on the maximum amount for certain repairs or replacements, and not all issues related to the garage door may be eligible for coverage. Cosmetic issues or problems resulting from inadequate maintenance might be excluded.

When a homeowner encounters a garage door issue covered by the warranty, it is typically necessary to follow specific procedures outlined by the warranty provider. This may involve promptly reporting the issue, providing documentation as required, and allowing approved service professionals designated by the warranty company to assess and address the problem.

In cases where a garage door is not explicitly covered by the home warranty, homeowners may have the option to purchase additional coverage for this specific item or explore specialized garage door warranty plans. Additionally, some homeowners choose to set aside funds for potential garage door repairs or replacements that fall outside the scope of their warranty coverage.

In conclusion, the coverage of garage doors under a home warranty hinges on the details specified in the warranty agreement. To gain a comprehensive understanding of the coverage for a Garage Door Repair Arlington TX, homeowners should carefully review the terms and conditions of their home warranty policy. If uncertainties persist, contacting the warranty provider for clarification is advisable. If a garage door is not covered by the home warranty, homeowners may consider alternative options such as specialized garage door warranties or creating a financial reserve for potential maintenance expenses.does home warranty cover garage doordoes home warranty cover garage door

Lake Arlington Gates & Garage Doors

4101 W Green Oaks Blvd #305-318, Arlington, TX 76016, United States

1-817-993-6623

How Much Does It Cost To Repair A Garage Door – Arlington Overhead & Garage Doors

The Garage Doors Repair Arlington TX  a quiet guardian of your abode, occasionally demands attention. But what does it cost to appease this mechanical custodian?

The Spectrum of Repair Costs

Garage door repair costs are a spectrum, spanning from a modest $125 for minor fixes to a more substantial $290 for intricate repairs. The variation hinges on factors we’re about to unravel.

Players in the Drama

Enter the cast: springs, cables, rollers, and openers. A straightforward swap of a spring or cable leans towards the lower cost, but when motors, tracks, or multiple components join the plot, the financial stakes rise.

Labor, the Unsung Hero

Behind the scenes, skilled hands navigate the labyrinth of gears and pulleys. Labor costs, influenced by the repair’s complexity and geographic location, add a layer to the narrative.

The Puzzles and Pieces

Garage doors are enigmatic puzzles with parts like springs, cables, and rollers. Each piece comes with its price tag. The material of the door—wood, steel, or aluminum—plays a pivotal role in the unfolding drama.

DIY Dilemma vs. Professional Panache

A dilemma emerges—DIY or professional intervention? The allure of saving a few dollars with a DIY endeavor is tempting, yet the professional touch assures quality and often comes with warranties.

Unveiling Hidden Costs and Emergency Surprises

Hidden costs, the plot twist in our tale. Permit fees, disposal charges, and the urgency of emergency repairs add suspense and, unfortunately, extra expenses to the narrative.

Aging Gracefully or Demanding Attention

Like characters evolving in a storyline, the age of your garage door matters. Older doors demand more TLC, translating into a heftier repair bill.

The Geographical Landscape

The setting matters—the urban pulse or suburban tranquility. The cost of living and repair expenses dance hand in hand, making location a subplot in our garage door saga.

The Professional Denouement

Choosing a professional becomes the resolution. While it may cost more upfront, the assurance of quality work and warranties often justifies the expense. It’s an investment in a denouement that promises a well-functioning garage door.

Conclusion:

In the grand finale, the cost of repairing a Garage Doors Repair Arlington TX unfolds as a multifaceted saga. With characters like springs and cables, twists like hidden costs, and the critical choice between DIY and professional expertise, the garage door repair narrative is an intricate tale of home maintenance.

Arlington Overhead & Garage Doors

817-646-2532

How To Pair Chamberlain Garage Door Opener – Lake Arlington Gates & Garage Doors

Pairing your Chamberlain Garage Door Repair Arlington TX is a crucial step in ensuring the security and convenience of your home. Whether you’ve just installed a new opener or need to reprogram an existing one, this guide will walk you through the process step by step.

With a few simple steps, you’ll have your Chamberlain garage door opener synced with your remote control or smartphone app, allowing you to open and close your garage door with ease.

I. Gather Necessary Tools and Information:

Before you begin, make sure you have the following tools and information on hand:

  1. Chamberlain garage door opener manual: This contains valuable information about your specific model.
  2. A ladder, if needed, to access the opener.
  3. A compatible remote control or smartphone app.
  4. The PIN (Personal Identification Number) for your garage door opener, which may be required during programming.

II. Identify Your Garage Door Opener Model:

Chamberlain offers a variety of garage door opener models, and the pairing process may differ slightly between them. Consult your opener’s manual or look for a label on the opener unit itself to identify the model number. Knowing your model number will help you find the correct instructions for your specific opener.

III. Programming Your Chamberlain Garage Door Opener:

  1. Power On the Opener:
    • Ensure the opener is connected to a power source and turned on.
  2. Access the Programming Button:
    • Locate the programming button on your opener. It is often a square-shaped button with LED lights nearby.
  3. Clear Existing Codes (if needed):
    • If you’re reprogramming the opener, it’s a good idea to clear all existing codes first. To do this, press and hold the programming button until the LED lights turn off (usually about 6-8 seconds).
  4. Pair a Remote Control:
    • Press the programming button again and release it.
    • Within 30 seconds, press and hold the button on your remote control that you want to pair with the opener.
    • Release the button on the remote control when the opener’s lights blink or flash, indicating a successful pairing.
  5. Pair a Wireless Keypad (if applicable):
    • Follow the instructions in your manual to pair a wireless keypad if your garage door opener has this feature.
  6. Pair with a Smartphone App (if applicable):
    • Download the Chamberlain MyQ app (if not already installed).
    • Follow the app’s on-screen instructions to connect your opener.
  7. Test the Remote Control and Opener:
    • Stand at a reasonable distance and test your remote control to ensure it opens and closes the garage door smoothly.

IV. Troubleshooting and Additional Tips:

If you encounter any issues during the pairing process, consider these troubleshooting tips:

  • Make sure the opener has power and is functioning correctly.
  • Verify that you’re using the correct programming button.
  • Ensure the remote control or smartphone app is within range.
  • Double-check the PIN for your opener if it’s requested during programming.
  • If you’re still having trouble, consult the Chamberlain opener manual or contact their customer support for assistance.

Conclusion:

Pairing your Chamberlain Garage Door Repair Arlington TX is a relatively straightforward process that enhances the security and convenience of your home. With the right tools, information, and a bit of patience, you can successfully program your opener to work seamlessly with your remote control or smartphone app. Regularly test your opener to ensure it continues to function as expected, and refer back to this guide or your opener’s manual if you ever need to reprogram it in the future. Enjoy the peace of mind and ease of access that a paired garage door opener provides!

Lake Arlington Gates & Garage Doors

4101 W Green Oaks Blvd #305-318, Arlington, TX 76016, United States

1-817-993-6623

Garage Door Bottom Seal Replacement: A DIY Tutorial – Arlington Overhead & Garage Doors

As a homeowner, I’ve learned that regular maintenance is the key to keeping my home in top shape. Recently, I noticed that the bottom seal of my garage door had seen better days. It was cracked, worn, and no longer providing an effective barrier against the elements and pests. Instead of calling a professional, I decided to tackle this project myself and replace the garage door bottom seal.

In this DIY tutorial, I’ll share my first-hand experience and step-by-step guide from Garage Door Repair on how you can easily replace your garage door bottom seal to improve insulation, energy efficiency, and the overall condition of your garage.

Note: Before you begin, it’s essential to ensure that you have the right tools and safety equipment for this project. Always follow safety guidelines and exercise caution when working with garage doors and related components.

Tools and Materials You’ll Need:

  • New garage door bottom seal (measure the length of your garage door to ensure you get the right size)
  • Pry bar or flathead screwdriver
  • Utility knife
  • Measuring tape
  • Safety glasses
  • Work gloves
  • A ladder or step stool
  • Cleaning solution and a rag
  • Mildew-resistant caulk (optional)

Step 1: Safety First

Before starting any DIY project, it’s crucial to prioritize safety. Put on your safety glasses and work gloves to protect your eyes and hands during the process.

Step 2: Prepare Your Workspace

Clear the area around your garage door to provide ample space for your work. If you have any items stored near the door, move them out of the way to prevent any accidents or obstacles.

Step 3: Remove the Old Seal

  1. Start at one corner of the garage door and locate the end of the old bottom seal.
  2. Insert a pry bar or a flathead screwdriver between the seal and the garage door.
  3. Gently lift the seal away from the door, working your way along the bottom edge. Be careful not to damage the garage door itself.
  4. Continue removing the old seal until you’ve completely detached it from the door.

Step 4: Clean the Area

Once the old seal is removed, take a moment to clean the area where the seal was attached. Use a cleaning solution and a rag to remove any dirt, debris, or adhesive residue. A clean surface will help the new seal adhere properly.

Step 5: Measure and Cut the New Seal

  1. Unroll the new garage door bottom seal and measure it against the width of your garage door. Make sure it’s the correct length.
  2. Using a utility knife, carefully cut the seal to match the width of your door. Double-check your measurements to ensure an accurate fit.

Step 6: Install the New Seal

  1. With the new seal cut to the correct length, position it along the bottom edge of the garage door.
  2. Start at one corner and push the seal into the groove or channel designed for the seal. The seal should fit snugly and securely.
  3. Work your way along the entire width of the door, pressing the seal firmly into place. Ensure that it’s seated properly in the channel and there are no gaps.
  4. If your garage door has any end caps, make sure the seal is properly inserted into them as well.

Step 7: Test the Seal

Close your garage door and observe the new seal. It should create a tight and effective barrier along the bottom of the door. Open and close the door a few times to confirm that the seal functions correctly, creating a snug seal when closed.

Step 8: Optional – Apply Mildew-Resistant Caulk

If you want to provide extra protection against moisture and pests, you can apply a bead of mildew-resistant caulk along the exterior edge of the seal where it meets the garage floor. This creates an additional barrier and prevents any gaps.

Step 9: Dispose of the Old Seal

Properly dispose of the old garage door bottom seal. If it’s made of materials that can be recycled, consider recycling it.

Step 10: Clean Up

Collect your tools and clean up your workspace. Properly store your safety glasses, gloves, and any unused materials for future use.

Step 11: Admire Your Work

Stand back and admire the improved look and functionality of your garage door with the new bottom seal in place. You’ve successfully completed a DIY project that enhances insulation, energy efficiency, and overall protection.

Additional Tips and Considerations:

  • If you’re unsure about the type or size of seal you need, consult your garage door’s manufacturer or a home improvement expert.
  • While this DIY project is relatively simple, if you encounter any difficulties or have concerns, don’t hesitate to seek professional assistance.
  • Regularly inspect and maintain your garage door seal to ensure it continues to provide effective insulation and protection.

Conclusion

Overall, according to Garage Door Repair, replacing your garage door bottom seal is a straightforward DIY project that can have a significant impact on your garage’s insulation, energy efficiency, and overall condition. By following these step-by-step instructions and taking safety precautions, you can complete this project in no time and enjoy the benefits of a properly sealed garage door. Not only will you keep out unwanted pests and drafts, but you’ll also improve the overall comfort and functionality of your home. So, roll up your sleeves, grab your tools, and get ready to enhance your garage with a brand-new bottom seal.

Arlington Overhead & Garage Doors

700 Secretary Dr, Arlington, TX 76015, United States

817-646-2532

How Do I Reset My Liftmaster Garage Door Opener – Arlington Overhead & Garage Doors

Resetting your LiftMaster Garage Door Repair Arlington TX can be a straightforward process, but it’s important to follow the manufacturer’s instructions specific to your model.

Below, I’ll provide a comprehensive guide on how to reset a LiftMaster garage door opener, covering the common steps involved. While it may not reach exactly, I’ll include all the necessary details to ensure you can successfully reset your opener.

Before You Begin:

  1. Read the Manual: Consult your LiftMaster garage door opener’s manual. Different models may have slightly varying reset procedures, and the manual provides model-specific instructions.
  2. Safety First: Ensure your garage door is closed, and there are no obstructions or people in the way. Disconnect the opener from the power source to prevent any accidents.
  3. Prepare Tools: You might need a ladder, a screwdriver, and a remote control for some of the reset methods.

Resetting Your LiftMaster Garage Door Opener:

Method 1: Reconnect the Power

  1. Locate the power cord or power switch on your garage door opener.
  2. Disconnect the power source by either unplugging the opener or turning off the power switch.
  3. Wait for approximately 30 seconds to 1 minute to ensure the opener’s internal memory is cleared.
  4. Reconnect the power source by plugging it back in or turning on the power switch.
  5. Test your garage door opener to see if it has reset to its default settings. If not, proceed to the next method.

Method 2: Erase Memory and Relearn Remote Controls

  1. Find the “Learn” or “Program” button on your garage door opener. It’s usually located on the back panel or near the light bulb.
  2. Press and hold the “Learn” or “Program” button until the indicator light beside it turns on (usually about 6-10 seconds). Release the button.
  3. Within 30 seconds, press and hold the button on your remote control that you want to reprogram. Hold the button until the garage door opener lights flash or make a clicking sound. This indicates that the remote has been successfully relearned.
  4. Repeat the process for each remote control you want to reprogram.
  5. Test the remote controls to ensure they are working correctly.

Method 3: Factory Reset (Caution: Advanced)

Only attempt this method if the previous methods did not work or if you need to completely reset your garage door opener to its factory settings. Be aware that this will erase all programmed remote controls and keyless entry codes.

  1. Locate the “Learn” or “Program” button on your garage door opener.
  2. Press and hold the “Learn” or “Program” button until the indicator light turns off (about 20 seconds).
  3. Immediately release the button and then press and hold it again. After a few seconds, the indicator light will turn on and then off. Release the button when it goes off.
  4. Your garage door opener has now been reset to its factory default settings. You will need to reprogram all remote controls and keyless entry codes.

Additional Tips:

  • If you have a wall-mounted control panel inside your garage, you may need to reprogram it as well using the “Learn” button on the opener.
  • If you encounter difficulties, consult your opener’s manual or LiftMaster’s customer support for model-specific guidance.

In conclusion, resetting a LiftMaster Garage Door Repair Arlington TX involves disconnecting and reconnecting power, relearning remote controls, or performing a factory reset, depending on your specific needs. Always prioritize safety and refer to your opener’s manual for precise instructions tailored to your model.

Arlington Overhead & Garage Doors

700 Secretary Dr, Arlington, TX 76015, United States

1-817-646-2532

How To Adjust Travel Limits On Chamberlain Garage Door – Lake Arlington Gates & Garage Doors

Adjusting the travel limits on a Chamberlain Lake Arlington Gates & Garage Doors opener is essential to ensure that the door opens and closes fully without causing any damage or binding. Travel limits control the distance the garage door travels when opening and closing. If the travel limits are not set correctly, the door might not close or open completely, and it could lead to issues with safety and performance.

Here’s a step-by-step guide on how to adjust the travel limits on a Chamberlain garage door opener:

Before You Begin:

  1. Read the Manual: Always refer to your Chamberlain garage door opener’s manual for specific instructions related to adjusting travel limits. Different models might have variations in the adjustment process.
  2. Safety First: Disconnect the power to the garage door opener by unplugging it or turning off the circuit breaker. This will prevent any accidental movement of the garage door while you’re making adjustments.

Adjusting the Travel Limits:

  1. Access the Adjustment Screws:
  • Most Chamberlain garage door openers have two adjustment screws located on the motor unit. These screws control the travel limits. They are often labeled as “Up Limit” and “Down Limit.” Consult your manual for the exact location of these screws on your model.
  1. Identify the Current Setting:
  • Before making any adjustments, identify the current position of the travel limit screws. This will give you an idea of whether the door is opening and closing too far or not far enough.
  1. Setting the Down Limit:
  • To adjust the down limit, locate the “Down Limit” screw. Turning this screw clockwise will decrease the travel distance of the garage door when closing, and turning it counterclockwise will increase the travel distance. Turn the screw in small increments, about a quarter turn at a time.
  • To decrease the travel distance (close the door further), turn the screw clockwise.
  • To increase the travel distance (allow the door to close less), turn the screw counterclockwise.
  1. Setting the Up Limit:
  • To adjust the up limit, locate the “Up Limit” screw. Turning this screw clockwise will decrease the travel distance of the garage door when opening, and turning it counterclockwise will increase the travel distance. Again, make small adjustments.
  • To decrease the travel distance (open the door less), turn the screw clockwise.
  • To increase the travel distance (open the door further), turn the screw counterclockwise.
  1. Testing the Adjustments:
  • After making adjustments to the travel limits, reconnect the power to the garage door opener. Test the garage door’s operation by opening and closing it multiple times using the garage door opener remote or wall control.
  1. Fine-Tuning:
  • If the door still doesn’t open or close properly, continue making small adjustments to the travel limit screws until the door reaches the desired position. Remember to make incremental adjustments to avoid overadjusting.
  1. Observation and Safety:
  • Observe the garage door as it opens and closes after each adjustment. Make sure the door is moving smoothly without binding, hesitating, or making unusual noises. Safety should always be a priority, so ensure that the door doesn’t close on objects or people and that the safety sensors are functioning correctly.
  1. Final Testing:
  • Test the garage door several times to ensure that it opens and closes smoothly and without any issues. The door should stop and reverse if it encounters an obstruction during closing.

Professional Assistance:
If you’re unsure about adjusting the travel limits or if you encounter difficulties during the adjustment process, consider seeking the assistance of a professional garage door technician. They have the expertise and tools to ensure proper travel limits and optimal garage door opener performance.

In conclusion, adjusting the travel limits on a Chamberlain Lake Arlington Gates & Garage Doors opener is an important step to ensure the safe and efficient operation of your garage door. By following the steps outlined in your Chamberlain garage door opener’s manual, you can successfully adjust the travel limits to ensure that the door opens and closes fully and smoothly. Always prioritize safety and take your time to make incremental adjustments until the door’s movement is optimal.

Lake Arlington Gates & Garage Doors

4101 W Green Oaks Blvd #305-318, Arlington, TX 76016, United States

1-817-993-6623

How Many Turns On A 14 ft Garage Door Spring – Arlington Overhead & Garage Doors

The number of turns required for a 14-foot Arlington Overhead & Garage Doors spring can vary depending on factors such as the type of spring system, the weight of the door, the size of the springs, and the specific manufacturer’s recommendations. Springs play a crucial role in counterbalancing the weight of the garage door, making it easier to open and close. Properly determining the number of turns is important for ensuring the door operates smoothly and safely.

Here’s a general guideline on how to determine the number of turns for a 14-foot garage door spring:

1. Identify the Type of Spring System:

There are two main types of garage door spring systems: torsion springs and extension springs. Torsion springs are mounted horizontally above the garage door, while extension springs are mounted vertically on both sides of the door.

2. Determine the Weight of the Door:

The weight of the garage door is a critical factor in determining the appropriate number of turns for the springs. The heavier the door, the more tension is required to properly balance it.

3. Consult the Manufacturer’s Guidelines:

Different spring manufacturers may have specific guidelines for the number of turns based on the door’s weight and the spring’s specifications. Check the manufacturer’s documentation or website for recommendations.

4. Seek Professional Advice:

Adjusting or installing garage door springs can be dangerous due to the high tension involved. If you’re unsure about the correct number of turns or how to adjust the springs, it’s strongly recommended to seek the help of a professional garage door technician. They have the knowledge and tools to ensure the springs are properly balanced and adjusted for safe operation.

5. Calculate Based on Industry Standards (Torsion Springs):

For torsion spring systems, some general guidelines can help you calculate the number of turns:

  • Measure the inside diameter of the spring coil in inches.
  • Divide the weight of the garage door by two. This gives you the amount of torque needed to balance the door.
  • Divide the result by the inside diameter of the spring coil.
  • This calculation provides an approximate number of turns needed. However, it’s important to remember that this is a rough estimate and may not be accurate for all situations.

Conclusion:

Determining the correct number of turns for a 14-foot Arlington Overhead & Garage Doors spring requires careful consideration of factors such as the type of spring system, the weight of the door, and manufacturer’s guidelines. Due to the potential dangers associated with adjusting garage door springs, it’s recommended to consult the manufacturer’s recommendations, seek professional assistance, or at the very least, exercise extreme caution and follow industry best practices if you choose to undertake the adjustment yourself. Incorrectly adjusted springs can lead to unbalanced doors, which can be hazardous and cause damage to the door and opener.

Arlington Overhead & Garage Doors

700 Secretary Dr, Arlington, TX 76015, United States

1-817-646-2532

Behind the Scenes: What to Expect When Hiring Garage Door Professionals – Arlington Overhead & Garage Doors

As a homeowner who places a high value on the functionality and appearance of my property, I’ve come to appreciate the significance of a well-maintained and smoothly operating garage door. Whether it’s for repairs, installations, or routine maintenance, enlisting the expertise of garage door professionals has become an integral part of my approach to home care. Through my experiences, I’ve gained valuable insights into what to expect when hiring these professionals.

In this comprehensive guide, I’ll provide you with a behind-the-scenes look into the process of hiring garage door experts, from the initial selection to understanding the range of services they offer and the tangible benefits they bring to your doorstep based from Garage Door Repair Arlington TX.

Selecting the Right Garage Door Professionals

The process of hiring garage door professionals begins with making the right choice. Here are some key aspects that have helped me in selecting the right experts for my garage door needs:

  1. Expertise and Experience: When considering garage door professionals, I look for individuals or companies with a wealth of experience in the industry. Established experts who have successfully handled a variety of projects are more likely to deliver top-notch service.
  2. Credentials and Licensing: Ensuring that the professionals are properly licensed, insured, and certified provides me with the confidence that they meet industry standards and regulations.
  3. Comprehensive Services: Opting for professionals who offer a wide range of services, from repairs and installations to maintenance and upgrades, simplifies the process and ensures that all my garage door needs can be addressed by a single team.
  4. Positive Reviews and Recommendations: I take the time to read customer reviews and seek recommendations from friends, family, or neighbors who have worked with the professionals before. Positive feedback serves as a valuable indicator of their reliability and professionalism.
  5. Transparent Pricing: Before making a decision, I request a detailed quote that outlines the costs associated with the service, including parts and any additional fees. Transparent pricing ensures that I have a clear understanding of the financial aspect before work begins.

Initial Consultation and Assessment: What to Expect

Once I’ve selected the garage door professionals, the next step is the initial consultation and assessment. During this phase, you can expect the following:

  1. Site Visit: The professionals will schedule a visit to my property to assess the current condition of my garage door and gather crucial information about the scope of work.
  2. Open Dialogue: I have the opportunity to openly discuss my specific requirements and preferences. This dialogue ensures that my expectations are clear and understood by the professionals.
  3. Tailored Solutions: Based on their assessment and my needs, the experts provide personalized solutions that suit my situation. This may involve suggestions for repairs, upgrades, or new installations.
  4. Detailed Proposal: Professionals present a detailed proposal that outlines the proposed work, including the materials, methods, and expected timeline. This transparent communication helps me make informed decisions.

Service Execution: Bringing the Plan to Life

Once we’ve agreed on the scope of work, the garage door professionals get to work. Here’s what you can expect during this phase:

  1. Timely Completion: The professionals adhere to the agreed-upon timeline and work diligently to ensure that the service is completed within the specified timeframe. Their commitment to punctuality is a sign of their reliability.
  2. Skilled Craftsmanship: Whether it’s a repair, installation, or maintenance, garage door professionals bring their expertise to the table, ensuring that the service is executed with precision and attention to detail.
  3. Quality Materials: Reputable experts use high-quality materials and parts to guarantee the durability and performance of the garage door system. This contributes to the overall effectiveness and visual appeal of the door.
  4. Safety Measures: Safety is paramount in any garage door project. Professionals implement safety protocols to protect both my property and themselves during the service process.
  5. Communication: Throughout the service, the professionals may provide updates on the progress, ensuring that I’m kept informed about the work being done and any unforeseen developments.

Final Inspection and Customer Satisfaction

As the service nears completion, the garage door professionals conduct a final inspection to ensure that everything is in optimal condition. Here’s what you can expect during this phase:

  1. Thorough Evaluation: The professionals meticulously inspect the garage door system, assessing its functionality, alignment, and overall condition.
  2. Testing and Demonstration: They test the garage door’s operation to verify that it opens and closes smoothly and quietly. Safety features, such as the reverse mechanism, are also thoroughly tested.
  3. Guidance and Information: The experts may offer a demonstration of the garage door’s features and provide guidance on proper maintenance practices and safe operation.
  4. Addressing Concerns: If I have any questions or concerns, this is the perfect time to raise them. Professionals are more than willing to address inquiries and ensure that I’m fully satisfied with the service.
  5. Customer Satisfaction: Ultimately, the goal of garage door professionals is to leave me with a well-functioning garage door that meets my expectations. They take pride in their work and strive for complete customer satisfaction.

Benefits of Hiring Garage Door Professionals

Enlisting the services of garage door professionals offers a host of benefits that elevate the value and performance of your garage door:

  1. Expert Insight: Professionals bring years of expertise and knowledge to the table, ensuring that your garage door receives the highest level of care and attention.
  2. Efficiency: Thanks to their specialized skills and tools, professionals can complete the service efficiently and accurately, saving you both time and effort.
  3. Enhanced Safety: Garage door work involves potential risks. Professionals are trained to prioritize safety, minimizing the likelihood of accidents and injuries during the service process.
  4. Warranty: Reputable garage door professionals often provide warranties on their work, offering you the peace of mind that you’re covered in case any issues arise.
  5. Extended Longevity: Proper installation, repairs, and maintenance performed by professionals contribute to the longevity of your garage door system, ultimately saving you money in the long run.

Conclusion: Elevating Your Garage Door Experience

According from Garage Door Repair Arlington TX, hiring garage door professionals is not just about getting the job done—it’s about enhancing your overall experience with your garage door. From selecting the right experts to experiencing their meticulous service execution, you can expect a seamless and efficient process that results in a reliable, well-functioning, and visually appealing garage door. The expertise, dedication, and commitment of garage door professionals ensure that your investment is maximized, and both the functionality and aesthetic of your property are elevated. By delving into the behind-the-scenes process and understanding the value that professionals bring, you’ll be well-equipped to make informed decisions and fully appreciate the benefits of a top-tier garage door system that enhances your home’s curb appeal and convenience.

Arlington Overhead & Garage Doors

700 Secretary Dr, Arlington, TX 76015, United States

817-646-2532

How Many Winds on Garage Door Spring-Garage Door Experts of North Arlington

The number of winds on a Garage Door Repair Arlington TX spring is determined by several factors, including the size and weight of the garage door, the type of spring system used, and the desired tension or balance required for smooth operation. While it’s difficult to provide an exact number of winds without specific information about these factors, I can provide you with a general understanding of garage door springs and the winding process.

Garage door springs are essential components that counterbalance the weight of the door, making it easier to open and close. They come in two main types: torsion springs and extension springs. Torsion springs are typically mounted horizontally above the garage door opening, while extension springs are mounted vertically on either side of the door tracks.

Torsion springs are wound tightly with tension and store energy that is gradually released when the door is opened or closed. The number of winds required for a torsion spring depends on factors such as the door size, weight, and the height of the garage ceiling. Additionally, the diameter of the spring and the wire size also play a role in determining the number of winds.

When winding a torsion spring, it’s important to follow the manufacturer’s instructions or consult a professional. The process involves securing one end of the spring to a stationary point and using a winding bar to rotate the spring and add tension. Each wind adds to the overall tension of the spring, allowing it to counterbalance the weight of the door effectively. The winding process continues until the desired tension is achieved.

The number of winds required for an extension spring depends on similar factors, such as door size and weight. Extension springs are typically installed in pairs, with one on each side of the door. They stretch and contract as the door opens and closes. To determine the appropriate number of winds for extension springs, it’s important to consult the manufacturer’s guidelines or seek professional assistance.

It’s worth noting that working with garage door springs can be dangerous due to the high tension involved. If you’re not familiar with the process or don’t have the necessary tools and expertise, it’s strongly recommended to hire a professional garage door technician. They have the knowledge and experience to properly install and adjust the springs to ensure safe and efficient operation of your garage door.

In conclusion, the exact number of winds on a Garage Door Repair Arlington TX spring depends on various factors, including the type of spring, door size, weight, and manufacturer guidelines. Proper installation and adjustment are crucial for the safe and effective functioning of the garage door. If you have specific concerns or need assistance with your garage door spring, it’s best to consult a professional technician.

Garage Door Experts of North Arlington

711 Trinity Cir, Arlington, TX 76006, United States

817-383-2114

Page 1 of 2

Powered by WordPress & Theme by Anders Norén