Your One Stop Local Business News

Tag: garage door repair bedford tx

How To Lock Automatic Garage Door Manually – DFW Garage Door Experts


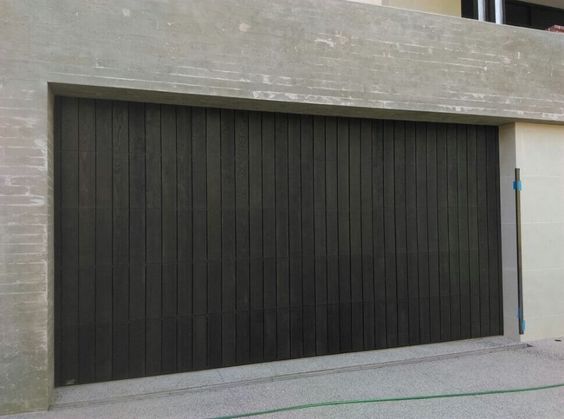
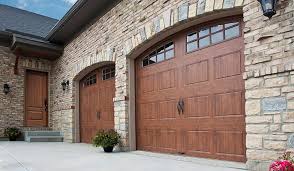
Locking an automatic Garage Door Repair Bedford TX manually is an essential security measure in case of power outages or malfunctions with the garage door opener. While automatic garage doors typically rely on the opener for locking and unlocking, there are manual locking mechanisms that you can engage to secure the door manually. In this comprehensive guide, I’ll walk you through the steps to lock an automatic garage door manually, ensuring peace of mind and security for your home.

Step 1: Identify the Manual Locking Mechanism

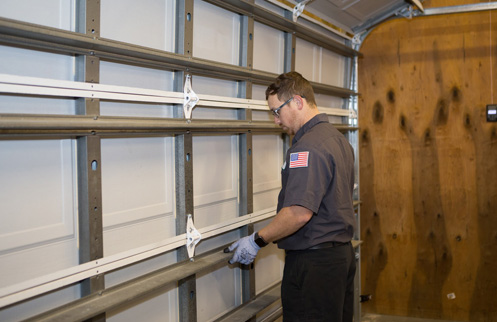
  1. Locate the Lock: Inspect your garage door to identify the manual locking mechanism. This may be a T-handle lock, slide lock, or lock bar located on the inside of the garage door.
  2. Check the Owner’s Manual: Refer to the owner’s manual of your garage door or opener for specific instructions on locating and engaging the manual locking mechanism.

Step 2: Close the Garage Door

  1. Close the Door: Close the garage door fully using the garage door opener or by manually lowering it until it reaches the closed position.
  2. Ensure Safety: Make sure there are no obstructions or objects in the path of the garage door before proceeding with the manual locking process.

Step 3: Engage the Manual Lock

  1. Use the T-Handle Lock: If your garage door is equipped with a T-handle lock, grasp the handle and turn it clockwise to engage the lock. The T-handle will typically extend a locking bar or mechanism to secure the door in place.Note: Some T-handle locks may require a key to lock and unlock. If a key is required, insert the key into the lock cylinder and turn it clockwise to lock the door.
  2. Activate Slide Lock or Lock Bar: If your garage door has a slide lock or lock bar, slide it into place or position it across the door track to prevent the door from opening. This type of lock may have a lever or handle that you can use to engage or disengage the lock mechanism.

Step 4: Test the Manual Lock

  1. Test the Lock: Once the manual locking mechanism is engaged, attempt to open the garage door from the outside using the garage door opener or by manually lifting the door. The door should remain securely locked in place.
  2. Verify Security: Confirm that the lock is holding the door securely closed by checking for any movement or rattling when attempting to open the door.

Step 5: Unlocking the Door Manually

  1. Disengage the Lock: To unlock the garage door manually, reverse the process used to engage the manual locking mechanism.
    • For T-handle locks, turn the handle counterclockwise to unlock and retract the locking bar.
    • For slide locks or lock bars, move the lever or handle to release the lock from the door track.
  2. Open the Door: Once the lock is disengaged, you can manually lift the garage door to open it. Use caution to avoid any sudden movements or accidents.

Step 6: Regular Maintenance and Inspection

  1. Inspect and Maintain: Periodically inspect the manual locking mechanism to ensure it is functioning correctly and free from damage or wear.
  2. Lubricate if Necessary: Apply lubricant to the moving parts of the manual locking mechanism, such as the T-handle or slide lock, to ensure smooth operation and prevent rust or corrosion.

Step 7: Emergency Release Cord (Optional)

  1. Use Emergency Release Cord: Some garage door openers are equipped with an emergency release cord that disengages the opener mechanism in case of power outages or emergencies. Refer to the owner’s manual for instructions on using the emergency release cord if needed.

Conclusion:

Regular maintenance and inspection of the manual lock will ensure its proper function and reliability when needed. If you encounter any difficulties or have questions about locking your Garage Door Repair Bedford TX manually, consult a professional for assistance.

DFW Garage Door Experts

2165 Loma Alta Dr, Bedford, TX 76021, United States

https://maps.app.goo.gl/CJiQmxsf3p2hxXfYA

How To Reset Universal Garage Door Opener – Bedford Gates & Garage Doors

Resetting a universal Garage Door Repair Bedford TX is a task that requires precision and attention to detail. In this comprehensive guide, I’ll walk you through the process step by step, ensuring that you have a clear understanding of each action.

Please note that the specific steps might vary depending on the make and model of your garage door opener, so always refer to the user manual for your particular device.

1. Understanding Your Garage Door Opener: Begin by identifying the type and model of your universal garage door opener. The user manual that came with the opener is your key resource here. If you can’t find the manual, don’t worry; you can often locate it online by searching for the model number.

2. Locating the Reset Button: Most garage door openers have a reset button, a small, inconspicuous feature often found on the main unit or motor. This button is crucial for initiating the reset process. It may require a tool like a paperclip to press it effectively.

3. Powering Off the Opener: Before proceeding with the reset, ensure safety by disconnecting the power to the garage door opener. You can do this by either unplugging the unit from the electrical outlet or turning off the circuit breaker that supplies power to the garage.

4. Press and Hold the Reset Button: With the power off, press and hold the reset button. The duration for which you need to hold it varies, but a common timeframe is 10-15 seconds. This action clears any existing settings and prepares the opener for a fresh start.

5. Releasing the Reset Button: After the specified time, release the reset button. This signals the garage door opener that you intend to initiate the reset process.

6. Powering On the Opener: Now, restore power to the garage door opener by either plugging it back in or turning on the circuit breaker. This step is crucial for allowing the reset to take effect.

7. Reprogramming Remotes and Keypads: Once the garage door opener has been reset, you’ll need to reprogram any remotes or keypads that control the door. Consult your user manual for precise instructions on adding new devices to the system.

8. Testing the Garage Door Opener: To ensure a successful reset, test the garage door opener using the remotes or keypads you reprogrammed. Pay attention to the smoothness of operation and address any issues that arise during testing.

9. Consulting the User Manual: If you encounter difficulties or if the steps outlined above don’t match your specific model, refer to the user manual for detailed, model-specific instructions. The manual is a valuable resource tailored to your garage door opener.

10. Seeking Professional Assistance: If the reset process proves challenging or if you’re uncomfortable performing it yourself, consider seeking professional help. Garage door technicians are well-versed in handling various opener models and can assist with the reset process efficiently.

conclusion:

Resetting a universal Garage Door Repair Bedford TX involves a systematic approach to ensure a successful outcome. By following these detailed steps and consulting your user manual, you can navigate the reset process with confidence and restore your garage door opener to its default settings.

Bedford Gates & Garage Doors

817-886-3064

How To Relock A Garage Door – Bedford Gates & Garage Doors

Garage door Repair Bedford TX are an integral part of home security, often overlooked until an issue arises. As technology evolves, so do the methods burglars use to gain unauthorized access.

In this guide, we’ll explore the process of relocking a garage door, providing you with the knowledge and tools needed to enhance your home’s security.

Understanding Garage Door Locks

Before delving into the relocking process, it’s crucial to understand the types of locks available. Traditional locks, such as t-handle locks and deadbolts, offer basic security. However, with the advent of smart home technology, smart locks have become increasingly popular for their advanced features and remote monitoring capabilities.

Signs It’s Time to Relock Your Garage Door

Identifying when to relock your garage door is essential for maintaining a secure home. Worn-out or damaged locks, increased vulnerability to break-ins, and advancements in garage door security technology are key indicators that it’s time for an upgrade.

Tools Needed for Relocking

Embarking on a garage door relocking project requires specific tools. From screwdrivers to power drills, having the right equipment ensures a smooth and effective process. Investing in quality tools is a small price to pay for the enhanced security of your home.

Step-by-Step Guide to Relocking a Garage Door

Securing the area is the first step in any relocking project. Taking safety precautions ensures a hazard-free environment. Once the area is secure, removal of the old lock system follows, paving the way for the installation of the new lock or an upgrade to a smart lock. Thoroughly testing the new lock ensures its functionality.

Common Mistakes to Avoid

While relocking a garage door is a manageable task, common mistakes can compromise the effectiveness of the new lock. Using incompatible locks, neglecting routine maintenance, and ignoring professional advice are pitfalls to avoid.

Benefits of Relocking Your Garage Door

Relocking your garage door goes beyond just enhancing security. It provides peace of mind for homeowners, knowing that their property is well-protected. Additionally, there may be potential insurance benefits, as insurers often reward proactive security measures.

DIY vs. Professional Assistance

Deciding whether to undertake a relocking project yourself or seek professional assistance depends on various factors. This section explores when a DIY approach is suitable and instances where it’s wise to enlist the help of a professional locksmith.

Cost Considerations

Budget considerations play a significant role in any home improvement project. We break down the estimated costs of a DIY relocking project, comparing them with the expenses associated with hiring professional locksmith services.

Latest Trends in Garage Door Security

Stay ahead of the curve by exploring the latest trends in garage door security. From cutting-edge technologies to the integration of smart home security systems, understanding these trends can further fortify your home against potential threats.

  1. Can I relock my garage door without any prior experience?
    • Yes, our guide provides step-by-step instructions for both beginners and experienced DIY enthusiasts.
  2. Do smart locks really provide better security?
    • Smart locks offer advanced features such as remote monitoring and alerts, making them a robust choice for enhanced security.
  3. How often should I replace my garage door lock?
    • Regular maintenance is crucial, and if signs of wear or vulnerability arise, consider a replacement.
  4. Is it possible to integrate my garage door lock with a home security system?
    • Yes, many modern smart locks can be seamlessly integrated into existing home security systems.
  5. Are professional locksmith services expensive?
    • The cost varies, but investing in professional services often ensures proper installation and added security.

Conclusion:

In conclusion, relocking your Garage door Repair Bedford TX is a proactive step towards fortifying your home against potential threats. Whether opting for a DIY approach or seeking professional assistance, the key is to stay informed and take action to ensure the security of your property.

Bedford Gates & Garage Doors

817-886-3064

Garage Door Opener Wall Control Installation – Bedford Gates & Garage Doors

As a homeowner with a penchant for DIY projects, I’ve always enjoyed the sense of accomplishment that comes from tackling various home improvement tasks. Recently, it was time to replace the outdated wall control for my garage door opener. This seemingly straightforward project turned out to be an enlightening experience.

In this article, I’ll share the process of garage door opener wall control installation according to Garage Door Repair.

1. The Importance of Wall Control

Before delving into the installation process, it’s essential to understand the significance of the wall control for your garage door opener. The wall control serves as a convenient interface for operating your garage door without the need for a remote. It’s also a crucial component for ensuring safety and security, as it often includes features like the door lock button and the ability to turn on the garage light.

My Experience: My old wall control had become unreliable and unresponsive, leading to frustrations when I needed to open or close the garage door quickly.

2. Gathering the Necessary Tools and Components

The first step in any DIY project is gathering the tools and components required for the task at hand. In the case of garage door opener wall control installation, the following items are typically needed:

  • New wall control unit
  • Screwdriver
  • Wire stripper (if necessary)
  • Wire nuts (if necessary)
  • Mounting screws
  • Drill and drill bits (if mounting on a surface without existing holes)
  • Level (for ensuring proper alignment)

My Experience: I made a checklist of these items before starting the project to ensure that I had everything I needed within reach.

3. Turning off the Power

Safety should always be a top priority when working with electrical components. Before beginning the installation, I turned off the power to the garage door opener. This is typically done by unplugging the opener or disconnecting it from the circuit breaker.

My Experience: Double-checking that the power was off gave me peace of mind while working on the installation.

4. Removing the Old Wall Control

The next step was to remove the old wall control. In my case, the existing unit was attached to the wall with screws. I used a screwdriver to carefully remove these screws and detach the old control from the wall.

Expert Tip: If your old wall control is wired, take a photo of the wiring connections before disconnecting them. This will make it easier to connect the wires to the new unit correctly.

My Experience: Taking a photo of the wiring connections proved to be a helpful tip. It ensured that I could confidently connect the wires to the new wall control without any confusion.

5. Preparing the Wires (If Necessary)

In some cases, the wires from the old wall control may need to be prepared for connection to the new unit. This could involve stripping the ends of the wires or using wire nuts to connect them securely to the new control.

Expert Tip: Follow the manufacturer’s instructions for your specific wall control unit to ensure proper wire preparation and connection.

My Experience: My new wall control required wire stripping, so I carefully followed the manufacturer’s instructions to prepare the wires correctly.

6. Attaching the New Wall Control

With the old wall control removed and the wires prepared (if necessary), it was time to attach the new wall control unit. I positioned it at a convenient height on the wall, ensuring that it was level. Using a level helped me achieve a neat and professional appearance.

Expert Tip: Most new wall control units come with pre-drilled holes for mounting screws. If your wall does not have existing holes, use a drill and appropriate drill bits to create holes for mounting.

My Experience: Mounting the new wall control was a straightforward process, thanks to the pre-drilled holes provided by the manufacturer. It looked clean and secure once installed.

7. Connecting the Wires

The next step involved connecting the wires from the new wall control to the corresponding terminals on the garage door opener. This step is critical for ensuring that the wall control communicates effectively with the opener.

Expert Tip: Refer to the wiring diagram provided in the manufacturer’s instructions to make the correct wire connections. It’s essential to match the wires from the wall control to the correct terminals on the opener.

My Experience: The wiring diagram was a valuable reference as I connected the wires. It ensured that I made the right connections, minimizing the risk of errors.

8. Restoring Power and Testing

With the new wall control securely mounted and the wires properly connected, it was time to restore power to the garage door opener. I plugged it back in or turned the circuit breaker back on, depending on how I had disconnected the power initially.

My Experience: As I restored power, I felt a sense of anticipation, wondering if the installation would be successful and if the new wall control would operate as expected.

9. Testing the Wall Control

To ensure that the installation was successful, I tested the new wall control. I pressed the various buttons to check if they operated the garage door opener and the garage light as intended.

Expert Tip: During the testing phase, pay close attention to the responsiveness of the wall control. It should operate smoothly without delays or issues.

My Experience: Testing the new wall control was a satisfying moment. It responded promptly to my commands, confirming that the installation had been successful.

10. Programming Additional Features (If Necessary)

Depending on the model of your garage door opener and wall control, you may need to program additional features or settings. This could include setting the clock, adjusting the garage door opener’s travel limits, or configuring the door lock feature.

Expert Tip: Refer to the manufacturer’s instructions for guidance on programming additional features. Take your time to ensure that all settings are configured correctly.

My Experience: I spent some time programming the additional features, such as setting the time on the wall control and adjusting the garage door opener’s travel limits to ensure it stopped at the desired positions.

11. Final Observations and Cleanup

Before concluding the installation, I took a few moments to observe the newly installed wall control. I ensured that it was securely attached to the wall, that the wiring connections were tight, and that all buttons and features worked as expected. Once I was satisfied, I tidied up the workspace by disposing of any packaging materials and tools.

My Experience: The final observations gave me confidence that the installation had been a success. Cleaning up the workspace was a small but important step in completing the project.

Conclusion

Overall, as per Garage Door Repair, garage door opener wall control installation, though initially intimidating, turned out to be a manageable DIY project. With careful preparation, attention to safety, and adherence to the manufacturer’s instructions, I successfully replaced my old wall control with a new, efficient unit. The sense of accomplishment that comes from completing such a project reaffirmed my belief in the value of DIY home improvement tasks. If you find yourself in a similar situation, don’t hesitate to tackle this project with the right tools, guidance, and a little patience.

Bedford Gates & Garage Doors

2201 Harwood Rd, Bedford, TX 76021, United States

817-886-3064

How to Adjust Garage Door Opener Force Settings – Bedford Gates & Garage Doors

As a homeowner, I’ve always been a do-it-yourself enthusiast. Over the years, I’ve taken on various home improvement projects, but one aspect of home maintenance that had always intimidated me was dealing with the garage door opener. It wasn’t until I encountered issues with my garage door’s force settings that I decided to conquer this challenge.

By following Garage Door Repair, I’ll share how to adjust garage door opener force settings, demystifying the process for fellow DIYers.

1. Understanding the Garage Door Opener Force Settings

Before delving into the adjustment process, it’s crucial to understand what the garage door opener force settings are and why they matter. The force settings control how much force the opener uses to open and close the garage door. If set incorrectly, it can lead to issues like the door not closing properly, reversing unnecessarily, or even causing safety hazards.

My Experience: I first encountered problems with my garage door when it would suddenly reverse while closing, leaving me frustrated and concerned about the safety of my family and pets.

2. Safety First: Disconnect the Opener

Before attempting any adjustments, it’s essential to prioritize safety. Start by disconnecting the garage door opener from its power source. This ensures that the door remains stationary during the adjustment process and prevents any accidental movement that could result in injury.

My Experience: I initially hesitated to disconnect the opener, but safety should always be the top priority when working on garage doors.

3. Locating the Adjustment Controls

The next step is to locate the adjustment controls on your garage door opener. These controls are typically found on the opener unit itself or on the wall-mounted control panel. Consult your garage door opener’s user manual to identify the specific location of these controls, as it can vary from one model to another.

My Experience: Reading the user manual might not be the most exciting task, but it’s essential for understanding your garage door opener’s specific features and controls.

4. Identifying the Force Adjustment Dials

Once you’ve located the adjustment controls, you’ll need to identify the force adjustment dials. These dials are usually labeled “Up Force” and “Down Force” or something similar. They control the amount of force applied when opening and closing the garage door.

Expert Tip: The garage door expert I consulted recommended starting with small adjustments. Turning the dials clockwise increases the force, while turning them counterclockwise decreases it. Make incremental changes and test the door’s operation after each adjustment.

My Experience: I was initially cautious about making adjustments, so I started with small turns of the dials to see how it affected the door’s performance.

5. Balancing Act: Finding the Right Force Setting

Finding the right force setting for your garage door opener is a bit of a balancing act. You want to apply enough force to ensure that the door opens and closes smoothly but not so much that it causes unnecessary strain on the system or poses a safety risk.

Expert Tip: To determine the correct force setting, you can perform the “reverse test.” Place a 2×4 piece of wood on the ground where the garage door closes. When the door comes into contact with the wood, it should automatically reverse. If it doesn’t reverse or reverses too aggressively, the force setting needs adjustment.

My Experience: I conducted the reverse test carefully to ensure that the door responded appropriately when it encountered the piece of wood. This test helped me fine-tune the force settings.

6. Testing and Fine-Tuning

Testing and fine-tuning the force settings is a crucial part of the adjustment process. You’ll want to open and close the garage door several times to ensure that it operates smoothly and reverses when it encounters an obstruction.

Expert Tip: During the testing phase, pay close attention to any unusual sounds, jerky movements, or signs of resistance. These can be indicators that the force settings need further adjustment.

My Experience: It took a few rounds of testing and minor adjustments before I was satisfied with how smoothly and safely my garage door was operating.

7. Reconnect the Opener and Observe

After you’ve adjusted and tested the force settings to your satisfaction, it’s time to reconnect the garage door opener to its power source. Once the opener is reconnected, observe the door’s operation for any signs of improvement or lingering issues.

Expert Tip: Keep an eye on the garage door for a few days to ensure that the adjustments have resolved the previous problems. If you notice any recurring issues, revisit the force settings and make further adjustments as needed.

My Experience: Reconnecting the opener and watching the door in action gave me a sense of accomplishment and reassurance that I had successfully tackled the issue.

8. The Importance of Regular Maintenance

Once you’ve adjusted the garage door opener force settings, it’s essential to include this task in your regular garage door maintenance routine. Periodic checks and adjustments can help prevent issues from recurring and ensure the continued smooth and safe operation of your garage door.

Expert Tip: The garage door expert emphasized the significance of regular maintenance, not only for force settings but also for lubricating moving parts, inspecting cables and springs, and ensuring the overall safety of the door.

My Experience: I now schedule regular maintenance checks for my garage door, which includes verifying the force settings to keep it in optimal condition.

Conclusion

Adjusting garage door opener force settings may seem like a daunting task, but with the right guidance and a cautious approach, it’s a manageable DIY project for homeowners. Understanding the purpose of these settings, prioritizing safety, and following a systematic process of identification, adjustment, testing, and observation can lead to a smoother and safer garage door operation.

Overall, in Garage Door Repair, overcoming the challenge of adjusting garage door opener force settings provided me with a sense of empowerment and confidence in tackling more aspects of home maintenance. It’s a valuable skill that has not only resolved issues with my garage door but also contributed to the overall safety and functionality of my home.

Bedford Gates & Garage Doors

2201 Harwood Rd, Bedford, TX 76021, United States

817-886-3064

How Install Garage Door – Bedford Gates & Garage Doors

Installing a Garage Door Repair Bedford TX is a complex task that requires careful planning, attention to detail, and the right tools.

Before you begin, it’s crucial to familiarize yourself with the installation manual provided by the garage door manufacturer, as specific instructions may vary based on the type and brand of the door you have. This guide will provide a general overview of the steps involved in installing a typical residential garage door.

Tools and Materials You’ll Need:

  1. Garage door kit (includes door panels, tracks, rollers, and hardware)
  2. Garage door opener (if not included in the kit)
  3. Step ladder
  4. Power drill with screwdriver bit
  5. Tape measure
  6. Level
  7. Hammer
  8. Wrenches and pliers
  9. Safety glasses
  10. Helper (recommended)

: Preparation

  • Ensure your garage opening is properly framed and the header above the opening is strong enough to support the weight of the door.
  • Clear the area in front of the garage and inside it, removing any obstacles that may hinder the installation process.
  • Unbox and organize all the components included in the garage door kit.

: Assemble the Tracks

  • Attach the vertical tracks to the jamb using the provided brackets, ensuring they are plumb (vertically straight).
  • Install the horizontal tracks to the ceiling with the appropriate brackets, making sure they are level.

: Install the Rollers

  • Attach the rollers to the door panels according to the manufacturer’s instructions.
  • Slide the rollers into the vertical tracks, ensuring they move smoothly.

: Hang the Door Panels

  • With the help of a friend, carefully lift the first door panel and place it into the vertical tracks.
  • Connect the hinges between panels as per the instructions, then repeat this process for the remaining panels.
  • Make sure the panels are aligned properly and the bottom of the door is level.

: Install the Torsion Springs (if applicable)

  • Torsion springs are usually installed above the door and require special tools. If you’re not experienced with this, it’s recommended to hire a professional.

: Attach the Garage Door Opener

  • Follow the manufacturer’s instructions to install the garage door opener.
  • Mount the opener to the ceiling, ensuring it’s securely attached.
  • Connect the opener’s drive mechanism to the door using the provided arm and hardware.

: Install Safety Features

  • Attach the safety sensors on either side of the garage door opening, ensuring they face each other.
  • Connect the sensors to the garage door opener according to the manufacturer’s instructions.

: Test the Door

  • Manually open and close the garage door to ensure it operates smoothly and without any obstructions.

: Adjust and Fine-Tune

  • Adjust the tension on the springs, if necessary, to achieve the proper balance and operation of the door.
  • Ensure that the door is level and that all hardware is securely tightened.

: Final Checks

  • Test the garage door opener’s remote control and safety features to ensure they work correctly.
  • Lubricate moving parts, such as rollers and hinges, with a recommended garage door lubricant.
  • Review the manufacturer’s maintenance recommendations and safety guidelines.

: Cleanup and Safety

  • Dispose of any packaging materials and debris properly.
  • Educate yourself and your family on garage door safety, including how to use the emergency release and avoid placing objects in the door’s path.

Remember that Garage Door Repair Bedford TX can be a complex and potentially dangerous task. If you are not confident in your abilities, it’s highly recommended to hire a professional garage door installer to ensure the job is done correctly and safely. Safety should always be a top priority when working with garage doors.

Bedford Gates & Garage Doors

2201 Harwood Rd, Bedford, TX 76021, United States

1-817-886-3064

How To Delete Garage Door Code From Car – Bedford Gates & Garage Doors

Deleting a Bedford Gates & Garage Doors code from a car’s built-in garage door opener buttons involves clearing the stored code that allows the car to operate your garage door. This might be necessary if you’re selling the car, have lost a remote, or want to ensure security. The process can vary based on the car’s make and model.

Below is a general guide on how to delete a garage door code from a car:

Materials You’ll Need:

  • Car owner’s manual
  • Safety goggles and gloves

Step-by-Step Guide:

1. Refer to the Owner’s Manual:

  • Consult your car’s owner’s manual to find specific instructions on how to delete a garage door code from the car’s built-in garage door opener buttons. Different car models have varying procedures.

2. Locate the Garage Door Opener Buttons:

  • The garage door opener buttons are usually located in the car’s overhead console, visor, or rearview mirror area. They might also be integrated into the car’s dashboard or on the rearview mirror.

3. Access Programming Mode:

  • Some cars have a programming or learning mode that allows you to add or delete garage door codes. Refer to your car’s manual to determine how to access this mode.

4. Delete the Code:

  • Once you’re in the programming mode, follow these steps to delete the garage door code:
  • Press and hold the specific garage door opener button you want to delete for several seconds.
  • The button’s indicator light might start blinking or change its behavior to indicate that the code is being cleared.
  • Release the button when the indicator light confirms that the code has been deleted.

5. Test the Deletion:

  • After deleting the code, test the garage door opener button to ensure that it no longer operates the garage door.

6. Verify in the Car’s Settings:

  • Some cars have settings menus that allow you to manage the garage door codes. Verify that the code has been deleted by checking these settings.

7. Factory Reset (if applicable):

  • If you can’t find the specific garage door code deletion process in your car’s manual, you might need to perform a factory reset on the car’s built-in garage door opener buttons. Be cautious when performing a factory reset, as it might also erase other personalized settings.

8. Consult the Manual or Dealer:

  • If the steps above don’t work or if you’re unsure about the process, refer to your car’s manual or contact the car dealership for assistance.

9. Safety Check:

  • Test the garage door opener button to confirm that the code has been successfully deleted and that it no longer operates the garage door.

10. Seek Professional Help (if needed):

  • If you’re uncertain about the process or if you encounter difficulties, consider seeking help from a professional automotive technician or the car’s manufacturer.

Conclusion:

Deleting a Bedford Gates & Garage Doors code from a car’s built-in garage door opener buttons involves following the specific instructions provided in your car’s owner’s manual. By referring to the manual and following the general steps outlined above, you can successfully delete the code to ensure security and prevent unauthorized access to your garage. Always prioritize accurate execution and safety during the process.

Bedford Gates & Garage Doors

2201 Harwood Rd, Bedford, TX 76021, United States

1-817-886-3064

Navigating Garage Door Materials and Maintenance: A Personal Exploration – Bedford Gates & Garage Doors

As a proud homeowner in the United States, I’ve come to recognize the delicate balance between form and function when it comes to enhancing my property. Amidst the numerous decisions that define home improvement, the garage door emerges as a central feature that not only elevates the visual appeal of my home but also contributes significantly to its daily functionality. What might not always be immediately apparent is how the choice of garage door material can profoundly influence the long-term maintenance requirements.

By following Garage Door Repair Bedford TX, I’m excited to share my personal insights into the profound impact of garage door materials on maintenance considerations, offering a comprehensive perspective on how different materials shape the care and attention my garage door demands over time.

Material Selection: Beyond Aesthetics

When I first embarked on the journey of choosing a garage door, I was captivated by the aesthetics of the various materials available. However, as I delved deeper into the decision-making process, I realized that the choice of material carries far-reaching implications that extend well into the future.

Wooden Doors: Timeless Elegance with Diligent Care

Opting for a wooden garage door allowed me to infuse timeless elegance into my home’s exterior. The rich texture and warm appeal of wood were undeniable. Yet, I soon understood that this beauty came with a responsibility:

Regular Inspection and Refinishing: Wooden doors demand my attention. Regular inspections are essential to identify cracks, warping, or signs of peeling paint. Refinishing becomes a routine task to shield the wood from the elements and maintain its allure.

Weather Vigilance: Wooden doors are sensitive to weather-induced damage. The threat of moisture absorption leading to rot and decay prompted me to invest in vigilant sealing and protection.

Defense Against Pests: The natural charm of wood can attract unwelcome guests like termites and pests. I found myself implementing strategies to prevent infestations and safeguard the door’s structural integrity.

Mechanical Balance: The weight of wooden doors necessitates careful monitoring of springs, hinges, and tracks. Routine maintenance is vital to ensure smooth and reliable operation.

Steel Doors: Durability with Minimal Demands

My next venture led me to a steel garage door, prized for its durability and minimal maintenance requirements. This choice presented a more streamlined approach to upkeep:

Painting Isn’t a Worry: Unlike wooden doors, steel doors don’t beckon frequent painting or refinishing. Factory-applied coatings offered protection against rust and corrosion, alleviating maintenance concerns.

Weather and Pest Resilience: Steel doors inherently resist weather-related damage and pests. I found that this choice struck a balance between aesthetic aspirations and ease of maintenance.

Inspections for Resilience: While steel doors require less attention, occasional inspections are necessary. Identifying dents, scratches, or rust spots ensures that their appearance and performance remain intact.

Fluid Operation: The operation of steel doors is notably smooth and efficient. Regular lubrication of moving parts became a simple task to ensure consistent performance.

Embracing Aluminum: Modern Appeal with Careful Oversight

My curiosity led me to explore aluminum garage doors—a choice that harmoniously blends modern aesthetics and lightweight construction. While maintenance proved more manageable, certain considerations were crucial:

Corrosion Shield: Aluminum’s innate resistance to corrosion made it an ideal choice for my coastal area. The salty air posed less threat to the door’s longevity.

Painting Simplified: Like steel doors, aluminum doors arrived with factory finishes. Although frequent painting was unnecessary, minor touch-ups addressed any scratches or chips.

Vulnerability to Dents: The lightweight nature of aluminum doors came with the trade-off of being more susceptible to dents and impacts. I learned to be cautious and swift in addressing minor damages.

Insulation and Efficiency: Opting for insulation options offered efficient temperature control. Safeguarding insulation materials became a priority to maintain energy efficiency.

Composite Doors: The Perfect Fusion

My exploration eventually led me to composite garage doors—an ideal fusion of authentic aesthetics and enhanced durability:

Effortless Upkeep: Composite materials resist rot, decay, and weather-related harm. My maintenance efforts were significantly reduced compared to traditional wooden doors.

Endless Customization: Like wooden doors, composite doors allowed for painting or staining. Occasional touch-ups or refinishing maintained their appearance and preserved their charm.

Insulation Bonus: Many composite doors offered impressive insulation, contributing to energy efficiency. Ensuring insulation integrity was vital to reap this benefit.

Considered Weight: While lighter than solid wood, I still recognized the importance of maintaining springs and hinges for proper door operation.

In summary, based from Garage Door Repair Bedford TX, the journey of selecting my garage door material taught me that my choice extends far beyond the immediate aesthetic appeal. Each material carries its own set of maintenance demands and considerations that shape my ongoing responsibilities as a homeowner. Wooden doors require diligent care to preserve their beauty, steel and aluminum doors offer a balanced combination of durability and ease of upkeep, and composite doors provide a harmonious blend of aesthetics and resilience. By delving into the profound impact of garage door materials on maintenance considerations, I’ve not only elevated my understanding of these choices but also honed my ability to make informed decisions that align with my commitment to responsible and informed homeownership.

Bedford Gates & Garage Doors

2201 Harwood Rd, Bedford, TX 76021, United States

817-886-3064

Can I Insulate My Garage Door-Bedford Best Garage & Overhead Doors

Insulating your Garage Door Repair Bedford TX is a great way to improve energy efficiency, maintain temperature control, and create a more comfortable environment inside your garage. It can also help reduce noise and provide additional protection for your belongings.

In this guide, we will walk you through the process of insulating your garage door step by step.

Step 1: Measure and Assess

Start by measuring the dimensions of your garage door. This will help you determine the amount of insulation material you will need. Insulation kits are available in various sizes, so make sure to choose the one that matches your door’s measurements.

Next, assess the current condition of your garage door. Look for any cracks, gaps, or damages that may need to be repaired before proceeding with the insulation. It’s important to have a well-maintained door to maximize the effectiveness of the insulation.

Step 2: Gather the Materials

To insulate your garage door, you will need the following materials:

  1. Insulation kit: Choose an insulation kit specifically designed for garage doors. These kits typically include insulation panels or sheets, adhesive, fasteners, and installation instructions.
  2. Safety gear: Wear gloves, safety glasses, and a dust mask to protect yourself during the installation process.
  3. Utility knife: You will need a utility knife to cut the insulation material to the appropriate size.
  4. Measuring tape: Use a measuring tape to ensure accurate measurements for cutting the insulation.
  5. Straightedge: A straightedge will help you make clean and precise cuts.

Step 3: Prepare the Garage Door

Before installing the insulation, clean the garage door thoroughly. Remove any dust, debris, or existing insulation. This will ensure proper adhesion of the insulation material and improve its effectiveness.

Step 4: Install the Insulation Panels

Follow the instructions provided in the insulation kit to install the panels or sheets. Generally, the process involves applying adhesive to the back of the panels and pressing them firmly against the garage door. Some kits may require you to use fasteners to secure the panels in place.

Start from one corner and work your way across the door, ensuring that each panel fits snugly against the door surface. Use a straightedge and utility knife to trim the insulation material if necessary. Pay attention to the edges and corners to achieve a neat and uniform appearance.

Step 5: Seal the Edges

To enhance the insulation’s effectiveness, seal the edges of the panels with weatherstripping. This will prevent air leaks and improve the overall insulation performance. Apply the weatherstripping along the sides and top of each panel, ensuring a tight seal when the door is closed.

Step 6: Insulate the Windows (If Applicable)

If your garage door has windows, consider insulating them as well. You can use window insulation film or apply insulating panels designed for windows. Follow the manufacturer’s instructions for the specific type of insulation you choose.

Step 7: Test and Evaluate

Once the insulation is installed, test the garage door to ensure it opens and closes smoothly without any interference. Check for any gaps or areas where the insulation might need adjustments. Additionally, monitor the temperature and noise level inside the garage to determine the effectiveness of the insulation.

Step 8: Maintain and Reevaluate

Regularly inspect your insulated garage door for any signs of wear or damage. Replace any damaged insulation panels or weatherstripping promptly to maintain the door’s insulation properties. Also, reevaluate the insulation’s effectiveness periodically and make adjustments if necessary.

By following these steps, you can effectively insulate your Garage Door Repair Bedford TX and enjoy the benefits of improved energy efficiency and a more comfortable garage environment. Remember, proper insulation not only saves energy but also adds value to your home.

Bedford Best Garage & Overhead Doors

2200 Airport Fwy Suite 555, Bedford, TX 76022

817-373-5968

How to Fix Your Own Garage Door – Bedford Overhead & Garage Door

Fixing your own garage door can save you money and give you a sense of accomplishment. However, it’s important to note that some repairs, such as those involving the springs or opener, can be dangerous and should be left to a professional garage door technician.

Here are some steps to help you fix your own garage door according to Bedford Garage Door:

  1. Identify the problem: The first step to fixing your garage door is to identify the problem. Common problems include a door that won’t open or close, a noisy door, or a door that’s off track. Once you have identified the problem, you can begin to troubleshoot the issue.
  2. Inspect the tracks: One common problem with garage doors is that the tracks become misaligned or damaged. Check the tracks for any bends or damage, and make sure they are properly aligned. If necessary, you can use a rubber mallet to gently tap the tracks back into place.
  3. Check the rollers: The rollers of the garage door can become worn or damaged over time. Check the rollers for any signs of wear or damage, and replace them if necessary. It’s also a good idea to lubricate the rollers with silicone spray or white lithium grease to keep them functioning smoothly.
  4. Inspect the springs: The springs of the garage door are under a lot of tension and can be dangerous to work with. If you suspect that the springs are broken or damaged, it’s best to contact a professional garage door technician. Attempting to replace the springs on your own can be dangerous and should only be done if you have the proper training and equipment.
  5. Check the opener: If the problem with the garage door is related to the opener, you should check the sensors and wiring to make sure everything is properly connected. If the problem persists, you may need to replace the opener.
  6. Tighten hardware: Over time, the hardware of the garage door can become loose. Check all nuts and bolts to make sure they are tight.
  7. Test the garage door: After making any necessary repairs, test the garage door to make sure it is functioning properly. If there are any issues, repeat the troubleshooting process until the problem is resolved.

Overall, as per Bedford Garage Door, it’s important to take safety precautions when working on a garage door. Wear protective gear such as gloves and eye protection, and make sure to disconnect the opener before starting any repairs. If you’re not comfortable working on the door yourself, it’s best to contact a professional garage door technician to handle the repairs. A trained technician can safely and efficiently fix any problems with your garage door and ensure that it’s functioning properly.

Bedford Overhead & Garage Door

2200 Airport Fwy Suite 555, Bedford, TX 76022

817-373-5968

Powered by WordPress & Theme by Anders Norén