Your One Stop Local Business News

Tag: garage door repair Azle TX

How to Clean Garage Door Tracks-Azle TX Garage Door Repair


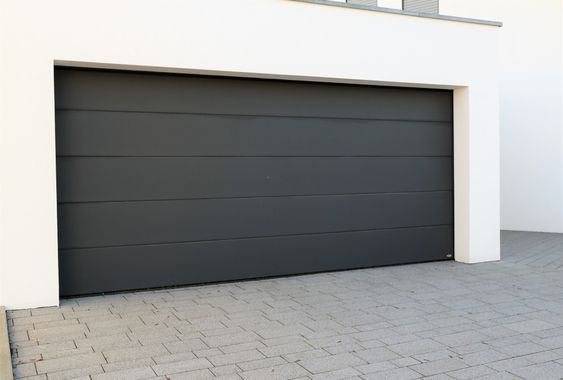
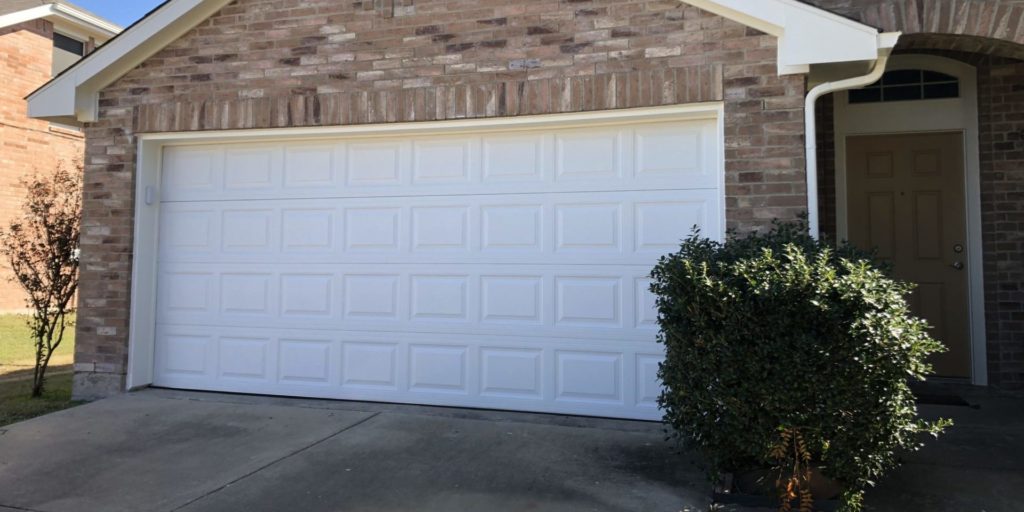
Garage Door Repair Azle TX are an important part of any home, providing security and protection to your vehicles and other valuable belongings.

However, over time, the tracks of the garage door can become dirty and clogged with dirt, debris, and other materials, which can affect its smooth functioning. In this article, we will discuss how to clean garage door tracks in detail, step by step.

Before starting, it is important to note that you will need a few tools and materials to properly clean garage door tracks. These include a vacuum cleaner, a stiff-bristled brush, a bucket of warm water, a mild detergent or soap, a sponge, and a rag or towel.

Step 1: Inspect the Tracks

The first step in cleaning garage door tracks is to inspect them thoroughly. Check for any debris, dirt, or other materials that may be clogging the tracks. You should also check for any signs of rust, corrosion, or damage to the tracks themselves. If you notice any serious damage, it may be best to call a professional to repair or replace the tracks.

Step 2: Remove Loose Debris

Once you have inspected the tracks, the next step is to remove any loose debris or dirt. You can use a vacuum cleaner or a stiff-bristled brush to sweep away any loose dirt or debris. Be sure to remove any larger objects or pieces of debris that may be clogging the tracks.

Step 3: Soak the Tracks

After removing any loose debris, it is time to soak the tracks in warm water. Fill a bucket with warm water and add a small amount of mild detergent or soap. Mix the solution until the soap or detergent is dissolved. Then, using a sponge, apply the solution to the tracks, making sure to cover all areas thoroughly.

Step 4: Scrub the Tracks

Once the tracks are soaked in the solution, it is time to scrub them clean. Use a stiff-bristled brush to scrub the tracks, paying close attention to any areas where there is built-up dirt or debris. Be sure to scrub gently to avoid damaging the tracks or the garage door.

Step 5: Rinse the Tracks

After scrubbing the tracks, it is time to rinse them clean. Use a clean sponge or rag to rinse the tracks with clean water, making sure to remove all soap or detergent residue. Be sure to rinse thoroughly to avoid leaving any soap residue on the tracks, which can attract more dirt and debris.

Step 6: Dry the Tracks

After rinsing the tracks, it is important to dry them thoroughly. Use a clean towel or rag to wipe away any excess water, and then allow the tracks to air dry completely. Be sure to avoid using any heat sources, such as a hair dryer, to dry the tracks, as this can cause damage or warping.

Step 7: Lubricate the Tracks

Once the tracks are clean and dry, it is important to lubricate them properly. Use a high-quality lubricant designed for garage door tracks and apply a small amount to each track. Be sure to use only a small amount, as too much lubricant can attract dirt and debris.

Step 8: Test the Garage Door

After cleaning and lubricating the tracks, it is important to test the garage door to ensure that it is working properly. Open and close the garage door several times to make sure that it is functioning smoothly. If you notice any problems or issues, it may be best to call a professional to inspect and repair the garage door.

In conclusion, cleaning Garage Door Repair Azle TX tracks is an important part of maintaining your garage door and ensuring its smooth functioning. By following the steps outlined above, you can effectively clean and maintain your garage door tracks, ensuring that they last for years to come.

Azle TX Garage Door Repair

390 Twin Creek Dr, Azle, TX 76020

817-646-8862

How to Replace Brick Molding Around Garage Door – Garage Door Experts of Azle

Replacing brick molding around a garage door can seem like a daunting task, but I was able to do it successfully.

Here are the steps from Azle Garage Door to follow:

Step 1: Gather Materials and Tools I made sure to gather all the necessary materials and tools before starting the project. This included brick molding, a hammer, a pry bar, a chisel, a nail gun, caulk, and paint.

Step 2: Remove the old brick molding I started by carefully removing the old brick molding using a pry bar and hammer. I made sure to be gentle to avoid damaging the surrounding bricks or garage door frame. Any remaining pieces or adhesive were removed using a chisel.

Step 3: Cut and fit the new brick molding Using a saw, I measured and cut the new brick molding to the correct size. I then fit the new molding into place and used a nail gun to secure it to the garage door frame. To prevent splitting the molding, I spaced the nails evenly and avoided over-nailing.

Step 4: Caulk and paint Once the new brick molding was installed, I applied a bead of caulk around the edges to fill any gaps between the molding and the surrounding bricks. I then allowed the caulk to dry completely before painting the molding to match the color of the garage door frame. I applied at least two coats of paint using a paint that is appropriate for outdoor use.

In conclusion, as per Azle Garage Door, replacing brick molding around a garage door requires some careful planning and attention to detail, but with the right tools and materials, it can be done by most do-it-yourselfers. By following these steps, I was able to successfully replace the old, worn out brick molding around my garage door and give it a fresh, new look.

Garage Door Experts of Azle

102 Manor Dr #18, Azle, TX 76020

817-646-8862

How to Reset Your Garage Door Remote – Garage Door Experts of Azle

If you need to reset your garage door remote, don’t worry – it’s a relatively simple process that you can do yourself.

Here’s a step-by-step guide on how to do it based from Garage Door Azle TX:

First, I located the learn button on the back or side of the motor unit. It’s usually a large, round button that’s colored red, yellow, or purple. I pressed and held the learn button until the indicator light turned on.

Next, I needed to erase the existing codes from my remote. To do this, I held down the button on my remote that I wanted to reset until the indicator light on the garage door opener blinked once, indicating that the code had been erased.

Once the codes were erased, I was ready to program the remote. I pressed the button on the remote that I wanted to use to operate the garage door, and held it until the indicator light on the garage door opener blinked twice, indicating that the remote had been programmed.

After programming the remote, I tested it to make sure it was working properly. I stood near the garage door opener and pressed the button on the remote. The door started moving, and I could hear the motor unit activating.

If I had multiple remotes that I wanted to reset, I repeated these steps for each remote.

Finally, I pressed the learn button on the garage door opener to exit programming mode. The indicator light turned off, indicating that I had successfully exited programming mode.

In conclusion, as stated in Garage Door Azle TX, resetting my garage door remote was a quick and easy process that I was able to do myself. However, if you encounter any issues or are not comfortable performing the task yourself, it’s always a good idea to contact a professional garage door technician to assist you.

Garage Door Experts of Azle

328 W Main St., Azle, TX 76020

817-646-8862

How to Re-tension Your Garage Door – Garage Door Experts of Azle

Re-tensioning a garage door is an essential maintenance task that ensures your door stays balanced and operates smoothly. Over time, the tension on your garage door springs can become too loose or too tight, causing the door to become unbalanced, noisy, or even damaged.

Here is a step-by-step guide from Azle Garage Door on how to retension a garage door:

  1. Check the condition of your springs: Before retensioning your garage door, it’s important to inspect the condition of your springs. If your springs are rusted, damaged, or worn, it’s recommended that you replace them rather than attempt to retension them. Additionally, if your garage door is equipped with extension springs, it’s important to ensure that the safety cables are properly installed and in good condition.
  2. Disconnect the garage door opener: To avoid any accidental activation of the garage door opener, it’s important to disconnect it from the power source. This can be done by unplugging it from the outlet or turning off the breaker that powers the opener.
  3. Open the garage door: Once the garage door opener is disconnected, manually open the garage door all the way to the top. Use a clamp or locking pliers to hold the door in place.
  4. Identify the type of springs: Garage doors are typically equipped with either extension springs or torsion springs. Extension springs are located on either side of the door and are connected to cables that run through pulleys at the bottom corners of the door. Torsion springs are mounted above the door and are connected to a metal shaft that runs the width of the door.
  5. Measure the tension: To measure the tension on your garage door springs, use a spring tension gauge. Place the gauge on the spring and read the measurement. If the tension is too loose or too tight, you will need to adjust it.
  6. Adjust the tension: To adjust the tension on extension springs, move the spring hook to the next hole on the bracket if you need to increase the tension or to the previous hole if you need to decrease the tension. To adjust the tension on torsion springs, use a winding bar to turn the spring clockwise to increase the tension or counterclockwise to decrease the tension. It’s important to make small adjustments and check the tension with the spring tension gauge after each adjustment.
  7. Test the tension: Once you’ve made the necessary adjustments, carefully remove the locking pliers or clamp and test the door. The door should open and close smoothly and remain in place when it’s partially opened.
  8. Reconnect the garage door opener: After you’ve tested the tension, reconnect the garage door opener to the power source and test it to ensure it’s working properly.

In conclusion, as per Azle Garage Door, re-tensioning your garage door springs can be a dangerous task, and it’s important to take the necessary safety precautions. Wear safety glasses and gloves, and use caution when working with garage door springs. If you’re not comfortable performing this task yourself, it’s recommended that you hire a professional garage door technician.

Garage Door Experts of Azle

328 W Main St., Azle, TX 76020

817-646-8862

How Much to Install Garage Door Opener – Garage Door and Overhead Door Services

Installing a Garage Door Repair Azle TX opener can be a relatively simple task for someone with experience and the right tools. However, for those who are unfamiliar with the process, it can be quite challenging and time-consuming.

There are a few factors that can affect the cost of installing a garage door opener, including the type of opener, the size of the garage door, and the complexity of the installation process.

Types of Garage Door Openers

There are three main types of garage door openers: chain-driven, belt-driven, and screw-driven. Chain-driven openers are the most common and affordable, but they tend to be loud and can require more maintenance than other types. Belt-driven openers are quieter and require less maintenance, but they are more expensive. Screw-driven openers are in the middle in terms of price and noise level, but they can be less reliable in extreme temperatures.

Size of the Garage Door

The size of the garage door can also affect the cost of installing a garage door opener. Larger doors require more powerful openers, which can be more expensive. Additionally, if the garage door is an irregular size or shape, it may require a custom installation, which can add to the cost.

Complexity of the Installation Process

Finally, the complexity of the installation process can also impact the cost of installing a garage door opener. If the installation requires additional electrical work or if the garage door opener needs to be installed in a unique location, the installation may require more time and labor, which can increase the cost.

On average, the cost of installing a garage door opener can range from $200 to $500, depending on the factors mentioned above. However, it is important to keep in mind that these prices are just estimates, and the cost can vary depending on your location and the specific installer you choose.

It is also worth noting that some homeowners choose to install their garage door opener themselves to save money. While this can be a cost-effective option, it is important to have a basic understanding of electrical wiring and to carefully follow the manufacturer’s instructions to avoid any potential safety hazards. Additionally, some manufacturers may void the warranty if the opener is not installed by a professional, so it is important to weigh the potential cost savings against the potential risks.

In conclusion, the cost of installing a Garage Door Repair Azle TX opener can vary depending on a variety of factors, including the type of opener, the size of the garage door, and the complexity of the installation process. It is important to research your options and to choose an experienced installer who can provide a reliable and safe installation.

Garage Door and Overhead Door Services

817-409-8089

How to Fix Garage Door Cable-Garage Door Experts of Azle

Fixing a Garage Door Repair Azle TX cable can be a complex and potentially dangerous task. It is important to exercise caution and follow the proper procedures to ensure the safety of yourself and others.

The following steps provide a general guide for fixing a Garage Door Repair Azle TX cable, but it is recommended to consult a professional if you are not experienced with this type of repair.

Step 1: Safety Precautions

Before you begin working on your garage door cable, make sure to take the necessary safety precautions. Turn off the power to your garage door opener, and place a clamp or locking pliers on the track of the door to prevent it from moving. Wear gloves and safety glasses to protect your hands and eyes.

Step 2: Identify the Problem

The first step in fixing a garage door cable is to identify the problem. If the cable has come off the drum, you will need to unwind the cable from the drum and reattach it. If the cable is frayed or damaged, it will need to be replaced.

Step 3: Release Tension on the Cable

In order to fix a garage door cable, you will need to release the tension on the cable. Start by pulling the emergency release cord to disconnect the door from the opener. This will allow you to manually open and close the door. Next, locate the torsion spring and use a winding bar to loosen the tension on the cable. Turn the winding bar in the direction of the cable until the tension is released.

Step 4: Remove the Old Cable

If the cable is damaged or frayed, you will need to remove the old cable. Start by cutting the cable near the bottom of the door, and then loosen the cable from the cable drum. Pull the cable through the brackets and remove it from the garage door.

Step 5: Install the New Cable

To install the new cable, start by threading it through the bracket and wrapping it around the cable drum. Use pliers to pull the cable tight, and then wind the drum to tighten the cable. Make sure the cable is wrapped around the drum correctly and is not twisted.

Step 6: Reattach the Cable to the Door

Once the new cable is installed and properly tensioned, you will need to reattach it to the garage door. Start by wrapping the cable around the bottom of the door, and then thread it through the brackets. Use a cable clamp to secure the cable to the door.

Step 7: Wind the Torsion Spring

After the new cable is attached to the door, you will need to wind the torsion spring. Use a winding bar to turn the spring in the opposite direction of the cable until it is tight. Be careful not to over-tighten the spring, as this can cause damage to the garage door opener.

Step 8: Test the Door

Once the spring is wound, test the garage door to make sure it opens and closes smoothly. If the door is not opening or closing properly, adjust the cable tension and torsion spring as needed.

In conclusion, fixing a garage door cable can be a challenging task that requires a certain level of experience and caution. If you are not comfortable with this type of repair, it is recommended to consult a professional. However, if you do choose to fix the garage door cable yourself, make sure to follow the proper procedures and safety precautions to ensure a successful and safe repair.

Garage Door Experts of Azle

525 Commerce St #5, Azle, TX 76020, United States

1-817-518-4880

How to Adjust a Garage Door-Garage Door Experts of Azle

Adjusting a Garage Door Repair Azle TX can be a bit tricky, but it’s essential to ensure that your door is operating smoothly and safely. A poorly adjusted door can cause damage to your property, pose a safety risk to your family, and decrease your home’s energy efficiency.

Here is a Step-by-Step guide on how to adjust your Garage Door Repair Azle TX:

  1. Inspect the Door

Before making any adjustments, inspect the garage door for damage, wear, and tear. Check the hinges, rollers, cables, and springs to see if they are in good condition. If any parts are damaged or worn, it’s best to replace them first before proceeding with adjustments.

  1. Check the Balance of the Door

A balanced door is essential for smooth operation. To test the balance, close the door and disconnect the opener by pulling the release cord. Lift the door manually to about halfway and release it. If the door stays in place, it’s balanced. If it falls or rises, it needs balancing.

To balance the door, adjust the tension on the springs. Most garage doors have two types of springs, extension and torsion. Extension springs are located above the tracks, while torsion springs are above the door. Adjusting the tension on torsion springs is dangerous, so it’s best to leave it to a professional. However, adjusting the tension on extension springs is relatively safe.

To adjust the tension on extension springs, use a winding bar to turn the spring in the direction that tightens it. Start with half a turn, and then test the door’s balance. Keep adjusting until the door stays in place when released.

  1. Adjust the Track

The track is the metal rail that the door runs on. If the track is not aligned correctly, the door may not open or close correctly. To adjust the track, use a level to check if it’s level both vertically and horizontally.

To adjust the track, loosen the bolts that hold it in place. Use a rubber mallet to tap the track into the correct position. Tighten the bolts again to secure the track in place.

  1. Lubricate the Moving Parts

Lubricating the moving parts of the garage door is essential for smooth operation. Apply a silicone-based lubricant to the hinges, rollers, springs, and track. Do not use WD-40 or other oil-based lubricants as they can attract dirt and dust.

  1. Adjust the Limit Switch

The limit switch is a safety feature that prevents the door from opening or closing too far. If the switch is not set correctly, the door may not close or open all the way.

To adjust the limit switch, locate the switch on the side of the motor unit. Use a flathead screwdriver to adjust the up and down limits. Test the door to see if it’s closing and opening correctly.

  1. Test the Safety Features

Garage doors have safety features such as photo-eye sensors that prevent the door from closing if something is in the way. Test these safety features to ensure that they are working correctly. Place an object in the door’s path and test if the door reverses when it comes in contact with the object.

  1. Test the Door

After making adjustments, test the door to see if it’s opening and closing smoothly. If the door is still not operating correctly, repeat the steps above.

In conclusion, adjusting a garage door is essential to ensure that it’s operating smoothly and safely. If you are not comfortable making adjustments, it’s best to hire a professional to do it for you. A well-adjusted door can help prevent damage to your property, ensure your family’s safety, and increase your home’s energy efficiency.

Garage Door Experts of Azle

525 Commerce St #5, Azle, TX 76020, United States

1-817-518-4880

How to Reset Garage Door Code – Garage Door Experts of Azle

Garage door codes are an essential security feature of modern garage doors, as they allow the homeowner to enter their home without the need for a physical key. However, sometimes it is necessary to reset the garage door code, whether it is because the code has been forgotten, or because it is suspected that the security of the code has been compromised.

This article will provide a Step-by-Step guide on how to reset your garage door code.

Before proceeding with the reset, it is essential to ensure that your Garage Door Repair Azle TX opener model supports code resetting. Some older models may not support this feature, and therefore it is essential to check your opener manual or consult a professional to ensure the procedure is available for your garage door opener model.

Step 1: Disable the Power

Before starting the reset process, you must first disable the power supply to the garage door opener. This can be done by unplugging the power cord or turning off the circuit breaker that powers the garage door opener. This step is critical as it ensures your safety while working on the garage door opener.

Step 2: Locate the “Learn” Button

After disabling the power supply, locate the “Learn” button on your garage door opener. The location of the button may vary depending on the manufacturer and model of your garage door opener, but it is usually located on the back panel or under the light cover. The button is typically black or red and is labeled “Learn” or “Set.”

Step 3: Press and Hold the “Learn” Button

Press and hold the “Learn” button until the indicator light beside the button turns on. The length of time you need to hold the button depends on your garage door opener model. Refer to your opener’s manual for the exact time required.

Step 4: Erase the Existing Code

Once the indicator light is on, release the “Learn” button and press it again. This action erases the existing code in the garage door opener’s memory, which includes all previously programmed remotes and keypads.

Step 5: Program a New Code

After erasing the existing code, press the “Learn” button once again and release it immediately. The indicator light should remain on.

Enter a new code on the keypad or remote that you want to use to operate the garage door opener. The length and type of the code may depend on your garage door opener model, so refer to the manual for specific instructions.

Step 6: Test the New Code

Once you have programmed the new code, test it to ensure that it works correctly. Make sure to test the code with each device that you have programmed, including the keypad and remote.

Step 7: Restore Power

After you have confirmed that the new code works correctly, restore power to the garage door opener by plugging in the power cord or turning on the circuit breaker. Test the code again to ensure it still works after restoring power.

Conclusion

Resetting a Garage Door Repair Azle TX code is a straightforward process that can be completed by following the steps outlined in this article. However, it is essential to ensure that your garage door opener model supports code resetting and to follow the manufacturer’s instructions when resetting the code. By taking the necessary precautions and following the steps carefully, you can maintain the security of your garage door and ensure your safety while working on the garage door opener.

Garage Door Experts of Azle

525 Commerce St #5, Azle, TX 76020, United States

1-817-518-4880

Powered by WordPress & Theme by Anders Norén