Your One Stop Local Business News

Tag: garage door repair Decatur TX

How To Completely Seal A Garage Door – Decatur Door & Gate

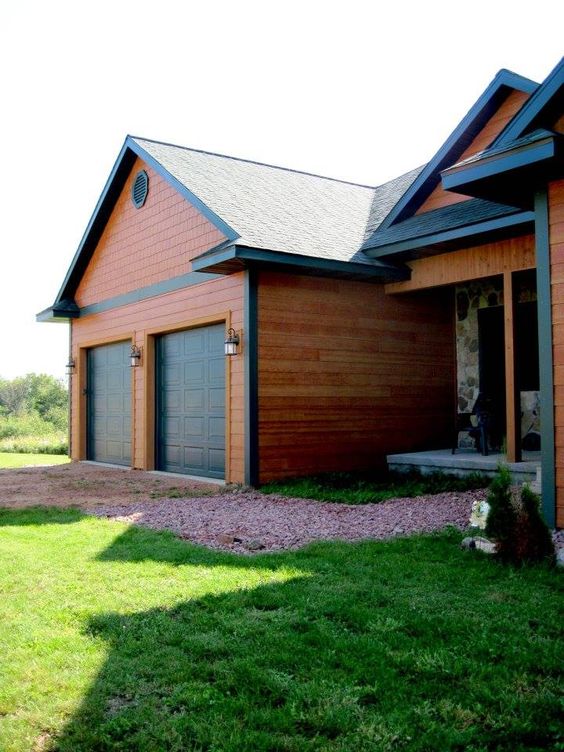
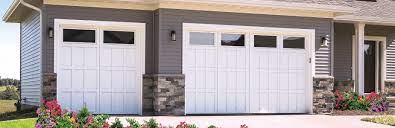
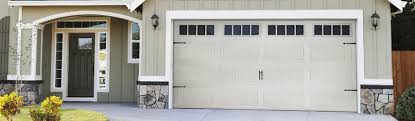
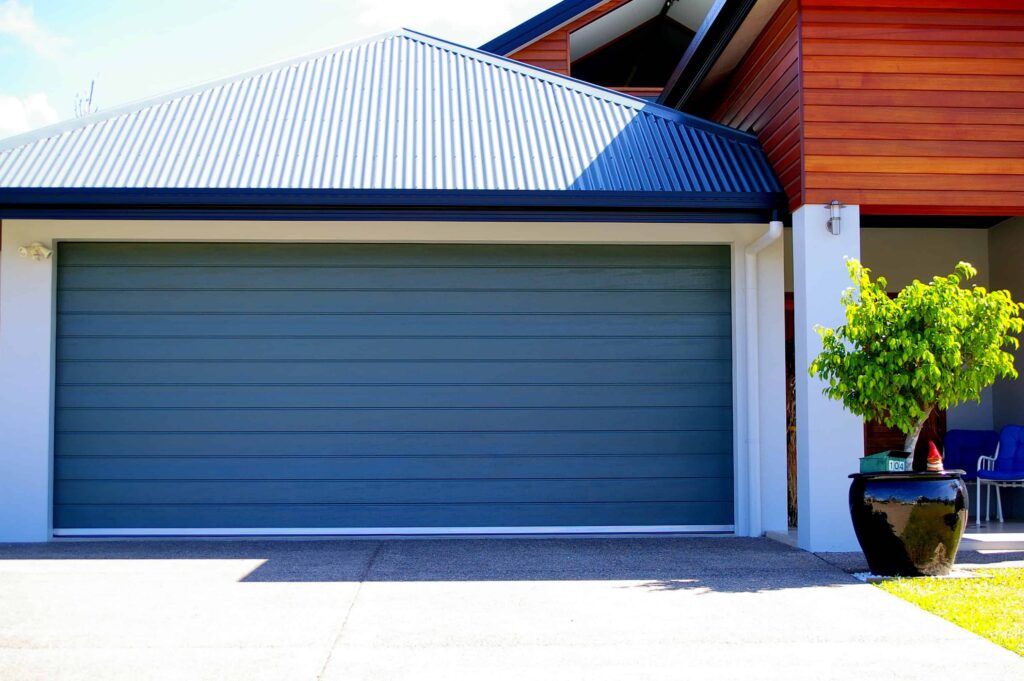
A well-sealed Garage Door Repair Decatur TX is crucial for maintaining the security, energy efficiency, and comfort of your home. When properly sealed, it prevents outside elements such as dust, pests, drafts, and moisture from entering the garage and adjacent living spaces.

In this comprehensive guide, we will discuss various methods to completely seal a garage door to ensure optimal performance. Whether you have a wooden, metal, or insulated garage door, these techniques can be adapted to suit your specific needs.

  1. Weatherstripping:

Weatherstripping is an effective way to seal gaps around the garage door, providing an airtight seal and reducing energy loss. It comes in various materials, such as rubber, vinyl, or foam, and is easily available at hardware stores. To apply weatherstripping:

a. Clean the door surface thoroughly to ensure proper adhesion. b. Measure the length needed and cut the weatherstripping to size. c. Apply the weatherstripping along the edges of the door frame and bottom using adhesive or screws, depending on the type of weatherstripping used.

  1. Bottom Seal:

The bottom of the garage door is often a vulnerable area for drafts and pests. Installing a bottom seal can help create a tight seal and prevent unwanted elements from entering. There are two main types of bottom seals: threshold seals and T-shaped rubber seals.

a. Threshold seals: These are made of sturdy materials like aluminum or vinyl. They are placed on the garage floor, creating a barrier that the bottom of the door seals against when closed.

b. T-shaped rubber seals: These are attached to the bottom of the garage door itself. As the door closes, the T-shaped seal compresses against the garage floor, forming a secure seal.

  1. Garage Door Insulation:

Insulating your garage door not only helps with temperature regulation inside the garage but also improves energy efficiency in your home. There are DIY insulation kits available for different types of garage doors. Foam board insulation and reflective insulation are common options. Follow the manufacturer’s instructions to ensure proper installation.

  1. Garage Door Threshold:

A threshold seal is a sturdy, weather-resistant barrier installed at the base of the garage door. It creates a seal against the garage floor, preventing water, dirt, and pests from entering the garage. Installing a threshold is relatively simple and can be done with adhesive or screws, depending on the type of threshold you choose.

  1. Garage Door Gasket:

Garage door gaskets are flexible rubber seals designed to create a tight seal along the sides and top of the garage door. They effectively block drafts, dust, and rain from entering the garage. Gaskets come in different sizes and can be trimmed to fit your specific door measurements.

  1. Garage Door Panel Reinforcement:

For added security and insulation, consider reinforcing the panels of your garage door. Some garage door manufacturers offer reinforcement kits designed to add strength to the door’s structure, making it more resistant to break-ins and preventing warping over time.

  1. Replace Worn Weatherstripping:

Regularly inspect and replace worn weatherstripping to maintain an effective seal. Over time, weatherstripping can deteriorate due to exposure to the elements and constant use. By replacing damaged or worn weatherstripping, you ensure your garage door remains adequately sealed.

Conclusion:

Sealing your Garage Door Repair Decatur TX is a proactive step toward enhancing the security and energy efficiency of your home. By employing weatherstripping, bottom seals, insulation, thresholds, gaskets, and panel reinforcements, you can effectively create a completely sealed garage door. Regular maintenance and inspections will help keep your garage door seal in optimal condition for years to come. Invest time and effort in sealing your garage door, and you will reap the benefits of a more secure, comfortable, and energy-efficient living environment.

Decatur Door & Gate

1200 FM 51 Suite F, Decatur, TX 76234, United States

1-940-283-6188

The Role of Garage Door Rollers in Smooth Operation – Decatur Door & Gate

As a homeowner who appreciates the convenience and functionality of a well-operating garage door, I’ve come to understand the crucial role that garage door rollers play in ensuring smooth movement.

According to Garage Door Repair Decatur TX, these seemingly small components are essential for the overall performance, longevity, and quiet operation of my garage door. Let me share my personal experience and insights into the importance of garage door rollers and how they contribute to the smooth operation of the door.

  1. Facilitating Smooth Movement: Garage door rollers serve as the mechanism that enables the smooth and effortless movement of the door along its tracks. They are strategically positioned on the sides of the door panels and work in tandem with the tracks to guide the door as it opens and closes. By reducing friction and resistance, the rollers ensure that the door glides seamlessly and smoothly, providing a hassle-free experience.
  2. Minimizing Friction: One of the primary functions of garage door rollers is to minimize friction between the door panels and the tracks. They are designed with either ball bearings or nylon wheels that roll along the tracks, allowing the door to move with minimal resistance. This not only eases the strain on the garage door opener system but also ensures a smoother and quieter operation. By reducing friction, the rollers contribute to the longevity and efficiency of the entire garage door system.
  3. Types of Garage Door Rollers: There are different types of garage door rollers available on the market, each offering unique characteristics and benefits. Here are the most common types:a. Nylon Rollers: Nylon rollers are a popular choice for their smooth and quiet operation. They are constructed using durable nylon material and often feature ball bearings for improved performance. Nylon rollers are resistant to corrosion and require minimal maintenance, making them a reliable and convenient option for homeowners.b. Steel Rollers: Steel rollers are known for their strength and ability to handle heavier loads. They are made with a steel wheel and stem, providing durability and longevity. However, steel rollers tend to produce more noise compared to nylon rollers due to the absence of noise-dampening properties. Regular lubrication is essential to maintain their smooth operation and prevent rust.c. Plastic Rollers: Plastic rollers, also referred to as polymer rollers, are made from high-quality plastic materials. They are lightweight, corrosion-resistant, and require minimal maintenance. Many plastic rollers are equipped with ball bearings to enhance their performance. While they may not be as durable as steel rollers, they provide a quiet and smooth operation that homeowners appreciate.d. Ball-Bearing Rollers: Ball-bearing rollers are designed with small ball bearings enclosed within the wheel or housing. These bearings significantly reduce friction, allowing for smoother and more efficient movement. Ball-bearing rollers are available in various materials, such as nylon or steel, and are known for their quiet operation and extended lifespan.
  4. Importance of Proper Maintenance: Proper maintenance of garage door rollers is essential to ensure their optimal performance and longevity. Here are some key maintenance tips that I follow:a. Regular Inspection: I make it a habit to inspect the rollers periodically for any signs of wear, damage, or misalignment. This includes checking for worn-out wheels, loose brackets, or any debris that might hinder their movement.b. Lubrication: To reduce friction and promote smooth operation, I apply a silicone-based lubricant to the rollers and tracks. It’s important to avoid using greasy or oil-based lubricants, as they can attract dirt and debris, causing more harm than good.c. Cleaning: I regularly clean the rollers and tracks to remove any dirt, dust, or debris that might affect their performance. A soft cloth or brush is usually sufficient to wipe away any buildup and maintain optimal functioning.d. Tightening Loose Brackets: Loose brackets can lead to misalignment and affect the smooth movement of the garage door. Therefore, I check the brackets that hold the rollers in place and tighten them if necessary to ensure everything is secure and aligned properly.e. Professional Maintenance: In addition to regular maintenance, I also schedule professional maintenance for my garage door system. A trained technician can inspect and adjust the rollers, tracks, and other components to ensure optimal performance and address any potential issues.

In summary, in reference to Garage Door Repair Decatur TX, by understanding the role of garage door rollers and following proper maintenance practices, I have been able to enjoy a garage door that operates smoothly and efficiently. Whether you choose nylon, steel, plastic, or ball-bearing rollers, regular inspection, lubrication, cleaning, and professional maintenance will contribute to their longevity and ensure that your garage door functions flawlessly. A well-maintained garage door not only adds convenience to your daily life but also enhances the security and curb appeal of your home.

Decatur Door & Gate

1200 FM 51 Suite F, Decatur, TX 76234, United States

940-283-6188

How to Adjust Old Genie Garage Door Opener? – Decatur Door & Gate

As someone who has adjusted an old Genie garage door opener, let me share my personal experience and guide you through the process.

Here’s what you need to do according to Decatur Garage Door:

  1. Identify the Type of Opener: Take a moment to determine the specific type of Genie garage door opener you have. Genie has produced various models over the years, and the adjustment process may differ slightly depending on the model. Look for any labels or markings on the powerhead or consult the opener’s manual for identification.
  2. Locate the Adjustment Screws: On most old Genie garage door openers, you’ll find adjustment screws that control the travel limits of the door. These screws are responsible for determining how far the door opens and closes. Look for two screws labeled “up limit” and “down limit.” They are typically located near the powerhead or motor assembly of the opener.
  3. Adjust the Down Limit: Begin by adjusting the down limit to ensure the door closes properly. Using a screwdriver, turn the down limit adjustment screw clockwise to decrease the travel distance of the door or counterclockwise to increase it. Start with small adjustments, such as a quarter turn, and test the door’s movement after each adjustment. Continue making adjustments until the door closes fully without hitting the floor or stopping too early.
  4. Adjust the Up Limit: Once the down limit is properly set, it’s time to adjust the up limit. This determines how far the door opens. Locate the up limit adjustment screw and use the same clockwise and counterclockwise turns as before. Make small adjustments and test the door’s movement to ensure it stops at the desired open position.
  5. Fine-Tune the Force Settings: Some old Genie garage door openers have separate force adjustment knobs or screws that control the force applied when opening or closing the door. If your door encounters resistance or doesn’t move smoothly, it may require fine-tuning of the force settings. Consult the opener’s manual to locate the force adjustment mechanism. Use a screwdriver or adjust the force knobs as instructed to find the optimal force balance for smooth and reliable door operation.
  6. Lubricate Moving Parts: Regular lubrication is essential for the smooth operation of your garage door opener. Apply a silicone-based lubricant to the opener’s chain, screw, or belt drive, as well as to the rollers, hinges, and springs. This will reduce friction and keep the components operating smoothly. Follow the lubrication instructions provided in the opener’s manual for the best results.
  7. Test the Safety Features: Genie garage door openers are equipped with safety features, including infrared sensors. These sensors detect any obstructions in the path of the closing door and prevent accidents by reversing its movement. Test the sensors by placing an object in the path of the closing door. If the sensors are functioning correctly, the door should automatically reverse. Clean the sensors and ensure they are properly aligned for optimal operation.

Remember, according to Decatur Garage Door, safety is of utmost importance when adjusting a garage door opener. If you encounter any difficulties or are unsure about the process, it’s always recommended to consult the opener’s manual or seek assistance from a professional technician. They have the expertise to guide you through the adjustment process and ensure it is done correctly and safely.

Decatur Door & Gate

1200 FM 51 Suite F, Decatur, TX 76234, United States

940-283-6188

How to Turn on Garage Lights When Door Opens-Decatur Door & Gate

In modern homes, automation has become increasingly popular, offering convenience and energy efficiency. One area where automation can be especially useful is in the Garage Door Repair Decatur TX. Imagine driving into your garage and having the lights automatically turn on as soon as you open the door.

In this guide, we will explore various methods to achieve this automation, ensuring a well-lit garage every time you arrive.

  1. Motion Sensor Lighting: One of the simplest and most effective ways to automate garage lights is by installing motion sensor lighting. Motion sensors use infrared technology to detect movement within their range. By placing a motion sensor near the garage door, the lights can be programmed to turn on when motion is detected. This setup ensures that the lights activate whenever the door opens, providing instant illumination as you enter the garage.
  2. Door Contact Sensor: Another method to automate garage lights is by using a door contact sensor. This sensor is installed on the garage door and communicates with the lighting system. When the door opens or closes, the sensor sends a signal to the lights, triggering them to turn on or off accordingly. By integrating the door contact sensor with the lighting system, you can achieve seamless automation, ensuring the lights are always synchronized with the door’s movement.
  3. Smart Home Integration: If you have a smart home system in place, you can take advantage of its capabilities to automate your garage lights. Smart home hubs, such as Google Home or Amazon Echo, can connect to various devices and appliances, including garage lights. By integrating your garage lights with your smart home system, you can create custom routines or commands. For example, you can program the lights to turn on when the garage door is opened, or even use voice commands to control the lights.
  4. Wi-Fi-enabled Garage Door Opener: Many modern garage door openers now come with Wi-Fi connectivity, allowing you to control them remotely using a smartphone app. By pairing a Wi-Fi-enabled garage door opener with compatible smart bulbs or switches, you can set up a system where the lights automatically turn on when the door is opened. The smartphone app can be programmed to send a signal to the lights as soon as the door starts to move, ensuring instant illumination.
  5. Light Timer Switch: If you prefer a simpler and more cost-effective solution, a light timer switch can be an excellent choice. These switches can be installed in the garage, replacing the existing light switch. A light timer switch allows you to set specific times for the lights to turn on and off. By synchronizing the timer with your typical garage usage patterns, you can ensure that the lights turn on whenever you usually open the door, providing consistent lighting when needed.
  6. Professional Installation: For those who prefer a hassle-free solution or lack the technical expertise, hiring a professional electrician or home automation expert is an excellent option. These professionals can assess your garage’s specific needs and recommend and install the most suitable automation system for your lights. They will ensure that all components are correctly wired and integrated, giving you peace of mind and a perfectly functioning automated lighting system.

Conclusion: Automating your Garage Door Repair Decatur TX lights to turn on when the door opens is a practical and convenient feature that enhances both safety and convenience. Whether you choose motion sensor lighting, door contact sensors, smart home integration, Wi-Fi-enabled garage door openers, light timer switches, or professional installation, there are various options available to suit your needs and preferences. By implementing one of these methods, you can enjoy a well-lit garage every time you arrive, eliminating the need to fumble in the dark and enhancing your overall home automation experience.

Decatur Door & Gate

1200 FM 51 Suite F, Decatur, TX 76234, United States

1-940-283-6188

Do Garage Door Openers Need Special Light Bulbs-Decatur Garage Door & Gates

Garage Door Repair Decatur TX openers do not typically require special light bulbs. However, there are a few considerations to keep in mind when selecting light bulbs for your garage door opener.

First and foremost, it’s important to check the specifications and recommendations provided by the manufacturer of your garage door opener. While most garage door openers are compatible with standard incandescent, fluorescent, or LED light bulbs, there may be some models that have specific requirements or restrictions.

In general, it is recommended to choose light bulbs that are vibration-resistant. Garage door openers produce vibrations when in operation, and regular incandescent bulbs may not be able to withstand this constant shaking, resulting in reduced lifespan. Vibration-resistant bulbs are designed to handle these conditions and are more durable.

LED (Light Emitting Diode) bulbs are becoming increasingly popular for use in garage door openers. They offer several advantages over traditional incandescent or fluorescent bulbs. LED bulbs are more energy-efficient, have a longer lifespan, and are more resistant to vibrations. They also provide instant brightness and are available in a variety of color temperatures.

When selecting LED bulbs for your garage door opener, it’s essential to consider the bulb’s compatibility with the opener’s circuitry. Some older garage door openers may not be compatible with certain LED bulbs due to the way they handle the electrical load. In such cases, it may be necessary to use an LED bulb specifically labeled as “garage door opener compatible” or consult the opener’s manufacturer for recommendations.

Another factor to consider is the level of brightness required for your garage. Different light bulbs have different lumen outputs, which determine their brightness. The recommended brightness level for a garage can vary depending on the size of the space and the intended use. It’s advisable to choose bulbs with a higher lumen output for better visibility and adequate lighting.

Additionally, you may want to consider the color temperature of the light bulbs. Color temperature is measured in Kelvin and determines the color appearance of the light emitted. Lower Kelvin values (around 2700-3000K) produce warm white light, similar to traditional incandescent bulbs, while higher Kelvin values (around 5000-6500K) produce cool white light, which is brighter and closer to natural daylight. The choice of color temperature depends on personal preference and the desired ambiance in your garage.

It’s worth noting that some garage door openers come with built-in lighting fixtures, while others may require separate light sockets or fixtures to be installed. In the case of built-in lighting, the manufacturer may provide specific recommendations or limitations regarding the type and wattage of bulbs to be used.

Lastly, it’s essential to prioritize safety when installing light bulbs in your garage door opener. Make sure to turn off the power supply to the opener before replacing bulbs to avoid the risk of electrical shock. Follow the manufacturer’s instructions for bulb installation, and ensure that the bulbs are securely screwed in to prevent them from becoming loose or falling out during operation.

In conclusion, while Garage Door Repair Decatur TX openers generally do not require special light bulbs, it is advisable to choose vibration-resistant bulbs, such as LED bulbs, for longer lifespan and durability. Consider the compatibility with the opener’s circuitry, the desired level of brightness, and the color temperature of the bulbs. Always follow safety precautions and consult the manufacturer’s recommendations for the best lighting solution for your garage door opener.

Decatur Garage Door & Gates

300 S Trinity St, Decatur, TX 76234

940-202-7890

How to Replace Old Style Garage Door Springs-Decatur Garage Door & Gates

Garage Door Repair Decatur TX springs play a crucial role in the proper functioning of your garage door. Over time, these springs can wear out and need replacement. If you have an old-style garage door with extension springs, this guide will walk you through the process of replacing them. Remember, safety should always be a top priority when working with garage door springs.

If you’re uncertain or uncomfortable performing the replacement yourself, it’s best to seek professional assistance.

Before You Begin:

  1. Gather the necessary tools: You’ll need a ladder, adjustable wrench, vise grips, safety glasses, winding bars, and new extension springs that match the specifications of your old ones.
  2. Disable the automatic opener: Unplug or disconnect the power source to the automatic opener to prevent accidental activation while you’re working on the springs.

Step 1: Release Tension from the Old Springs:

  1. Close the garage door completely.
  2. Place a ladder under the garage door tracks on one side, near the springs.
  3. Identify the safety cables: These are attached to the extension springs and run through the pulleys. Disconnect them from the brackets.
  4. Use the vise grips to clamp onto the track just above the bottom roller to prevent the door from opening unexpectedly.
  5. Insert a winding bar into the hole of the winding cone on the end of the spring.
  6. Slowly unwind the spring tension by turning the winding bar in the opposite direction of the winding cone.
  7. Once the tension is released, repeat the process for the second spring on the same side.

Step 2: Remove the Old Springs:

  1. With the tension released, loosen the set screws on the end brackets that hold the springs in place.
  2. Slide the springs off the brackets and carefully lower them down.
  3. Ensure you have a firm grip on the springs to prevent them from accidentally flying off.

Step 3: Install the New Springs:

  1. Start by attaching the new springs to the end brackets.
  2. Make sure the springs are oriented correctly with the winding cones facing towards the center of the door.
  3. Slide the springs onto the brackets and secure them with the set screws.
  4. Repeat the process for the second spring.

Step 4: Reapply Tension to the New Springs:

  1. Insert a winding bar into the hole of the winding cone on the end of the first spring.
  2. Begin winding the spring in the direction specified by the manufacturer, applying enough tension to counterbalance the weight of the garage door.
  3. Once the spring is wound, secure it with the set screws on the end bracket.
  4. Repeat the winding process for the second spring.

Step 5: Reattach the Safety Cables and Test:

  1. Reconnect the safety cables to the brackets, ensuring they are properly routed through the pulleys.
  2. Carefully remove the vise grips from the track.
  3. Slowly open and close the garage door to test the new springs’ functionality.
  4. Observe the door’s balance and motion to ensure smooth and even operation.

Conclusion: Replacing old-style Garage Door Repair Decatur TX springs requires caution and attention to detail. By following the steps outlined in this guide, you can safely replace the springs and restore your garage door’s functionality. Remember, if you are unsure or uncomfortable with the process, it is always best to seek professional assistance to ensure your safety and the proper installation of the springs.

Decatur Garage Door & Gates

300 S Trinity St, Decatur, TX 76234

940-202-7890

How to Replace Battery in Garage Door Opener-Decatur Garage Door & Gates

Replacing the battery in a Garage Door Repair Decatur TX opener is a relatively simple task that can be completed with a few basic tools and a new battery.

Follow these step-by-step instructions to safely replace the battery in your garage door opener:

  1. Safety First: Before starting any work on your garage door opener, ensure that the power to the unit is disconnected. This can typically be done by unplugging the opener from the power outlet or turning off the circuit breaker that supplies power to the garage.
  2. Locate the Battery Compartment: Depending on the model of your garage door opener, the battery compartment may be located on the front or back of the unit. It is often located near the top or side of the opener and can usually be accessed by removing a cover or panel.
  3. Remove the Cover: Use a screwdriver or the appropriate tool to remove the screws or fasteners holding the cover in place. Set the screws aside in a safe place to prevent them from getting lost.
  4. Identify the Battery Type: Once the cover is removed, you will see the battery inside the compartment. Take note of the type and size of the battery to ensure you purchase a compatible replacement. Common battery types used in garage door openers include 12-volt alkaline or lithium batteries.
  5. Remove the Old Battery: Carefully disconnect the wires connected to the old battery. If the battery is connected using a clip or harness, gently release it to remove the battery. If the battery is soldered, use a soldering iron to remove the connections, taking care not to damage any surrounding components.
  6. Dispose of the Old Battery Properly: Batteries should not be thrown in the regular trash. Check with your local recycling center or a designated battery disposal facility to ensure you dispose of the old battery in an environmentally friendly manner.
  7. Install the New Battery: Take the new battery and connect it to the same wires or clips from which you removed the old battery. Ensure that the polarity (+ and -) is matched correctly to prevent damage to the opener. If the battery has a protective plastic cover, remove it before installation.
  8. Secure the New Battery: Once the new battery is connected, ensure it is securely positioned inside the battery compartment. If there are any battery straps or holders, use them to keep the battery in place. Ensure there is no loose wiring that could interfere with the operation of the opener.
  9. Replace the Cover: Carefully align the cover with the battery compartment and reinsert the screws or fasteners to secure it in place. Tighten the screws snugly but not excessively, as overtightening could damage the cover or the opener.
  10. Restore Power: Reconnect the power to the garage door opener by plugging it back into the outlet or turning on the circuit breaker. Test the opener to ensure the new battery is functioning correctly.

Congratulations! You have successfully replaced the battery in your Garage Door Repair Decatur TX opener. Regularly check the battery for signs of wear and replace it as needed to ensure optimal performance.

Decatur Garage Door & Gates

300 S Trinity St, Decatur, TX 76234

940-202-7890

How to Repair Garage Door Spring – Decatur’s Best Garage Door

Garage door springs play an essential role in the operation of your garage door. They are responsible for supporting the weight of the door and providing the necessary tension for the opener to lift and lower the door. When a garage door spring breaks or becomes damaged, it can cause the door to malfunction and become a safety hazard.

In this guide, we will discuss how to repair garage door springs.

Before we begin, it is important to note that Garage Door Repair Decatur TX springs are under a significant amount of tension and can be dangerous to handle. If you are not comfortable working with garage door springs or do not have the necessary tools, it is best to call a professional for assistance.

Step 1: Identify the type of garage door spring

There are two main types of garage door springs: torsion and extension. Torsion springs are located above the garage door and are wound tightly to provide the necessary tension. Extension springs are located on either side of the door and stretch to provide tension. It is important to identify which type of spring you have before attempting any repairs.

Step 2: Gather necessary tools and supplies

To repair a garage door spring, you will need the following tools and supplies:

  • Safety glasses
  • Leather gloves
  • Vice grips
  • Adjustable wrench
  • Winding bars
  • Replacement springs
  • Socket set

Step 3: Release the tension on the garage door spring

Before attempting any repairs, it is important to release the tension on the garage door spring. This can be done by disconnecting the opener and manually lifting the door until the spring is fully extended.

Step 4: Remove the old spring

Once the tension is released, you can remove the old spring. For a torsion spring, use a winding bar to loosen the set screws and slide the spring off the shaft. For an extension spring, use vice grips to clamp onto the spring and remove the safety cable. Then, use a socket set to remove the spring from the pulley system.

Step 5: Install the new spring

After removing the old spring, it is time to install the new spring. Start by installing the new spring onto the pulley system or shaft, depending on the type of spring you have. For a torsion spring, wind the new spring tightly using the winding bars and tighten the set screws. For an extension spring, attach the safety cable and tighten the screws.

Step 6: Test the garage door

Once the new spring is installed, it is important to test the garage door to ensure it is working properly. Reconnect the opener and lift the door manually to ensure it is balanced and operating smoothly. If there are any issues, make any necessary adjustments and retest.

Step 7: Repeat for the other spring (if applicable)

If your garage door has two springs, it is important to replace both springs at the same time to ensure balanced tension. Repeat the above steps for the other spring.

In conclusion, repairing a Garage Door Repair Decatur TX spring can be a challenging task that requires the right tools and knowledge. If you are not comfortable handling garage door springs or do not have the necessary tools, it is best to call a professional for assistance. However, if you do decide to tackle this repair yourself, be sure to follow the above steps carefully to ensure a safe and successful repair.

Decatur’s Best Garage Door

248 Private Rd 1377, Alvord, TX 76225, United States

1-940-242-3016

Powered by WordPress & Theme by Anders Norén