Your One Stop Local Business News

Tag: Garage Door Repair North Richland Hills TX

How Do You Reset A Craftsman Garage Door Opener Remote – Tarrant County Door & Gate

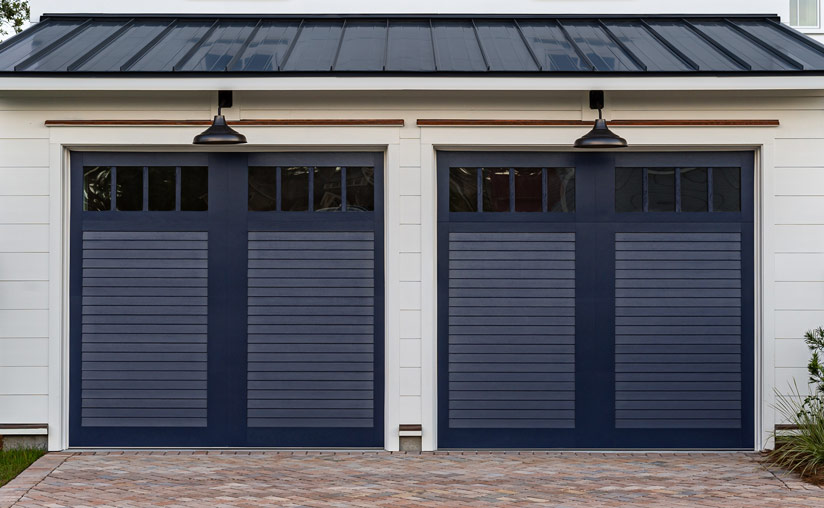
Garage Door Repair North Richland Hills TX is a simple process that allows you to clear existing programming and reprogram the remote control with new settings or codes.

Whether you’re troubleshooting issues with your remote or updating security settings, resetting the remote can help restore functionality and ensure smooth operation of your garage door opener. In this comprehensive guide, we will walk you through the step-by-step process of resetting a Craftsman garage door opener remote, providing detailed instructions and troubleshooting tips along the way.

Understanding Your Craftsman Garage Door Opener Remote

Before attempting to reset your Craftsman garage door opener remote, it’s essential to understand its components and operation:

  • Remote Control: The remote control is a handheld device that sends signals to the garage door opener to open or close the garage door.
  • Buttons: The remote control typically features buttons for opening, closing, and stopping the garage door, as well as programming and other functions.
  • Battery Compartment: The battery compartment houses the batteries that power the remote control. Ensure that the batteries are in good condition and properly installed before attempting to reset the remote.

Steps to Reset a Craftsman Garage Door Opener Remote

1. Clear Existing Programming

The first step in resetting a Craftsman garage door opener remote is to clear any existing programming:

  1. Locate the “Learn” or “Program” button on the main unit of the garage door opener. The location of this button may vary depending on the model of your Craftsman opener.
  2. Press and hold the “Learn” or “Program” button for approximately 10 seconds until the indicator light on the opener blinks or flashes, indicating that the programming has been cleared.

2. Reset the Remote Control

Once the existing programming has been cleared, you can reset the remote control to restore it to its factory settings:

  1. Remove the battery cover from the back of the remote control to access the batteries.
  2. Remove the batteries from the remote control and wait for approximately 30 seconds.
  3. Reinsert the batteries into the remote control, ensuring that they are properly aligned and seated in the battery compartment.
  4. Replace the battery cover on the remote control.

3. Reprogram the Remote Control

With the remote control reset to factory settings, you can now reprogram it to work with your Craftsman garage door opener:

  1. Press and release the “Learn” or “Program” button on the main unit of the garage door opener.
  2. Within 30 seconds, press the button on the remote control that you wish to program. The indicator light on the opener will blink or flash to confirm that the remote control has been successfully programmed.
  3. Test the programming by pressing the button on the remote control to open or close the garage door. Ensure that the garage door operates smoothly and without any issues.

Troubleshooting Tips

If you encounter any issues during the resetting process, consider the following troubleshooting tips:

  • Check Battery Connection: Ensure that the batteries are properly installed in the remote control and that the battery contacts are clean and free of debris.
  • Replace Batteries: If the batteries are old or worn out, replace them with new ones to ensure reliable operation of the remote control.
  • Check Remote Range: Ensure that you are within range of the garage door opener when attempting to program the remote control. Move closer to the opener if necessary.

Conclusion:

Resetting a Craftsman garage door opener remote is a simple process that can help restore functionality and ensure smooth operation of your garage door opener. By following the step-by-step guide provided in this comprehensive guide and troubleshooting any issues that may arise, you can reset your remote control with confidence. Whether you’re updating security settings, troubleshooting issues, or replacing lost remotes, resetting your Craftsman garage door opener remote allows you to maintain convenience and security for your home.

Tarrant County Door & Gate

6408 Marlette Ct, North Richland Hills, TX 76182, United States

91-817-456-2958

How Much To Install An Automatic Garage Door – Tarrant County Door & Gate

Garage Door Repair North Richland Hills TX can provide convenience, security, and peace of mind for homeowners. However, you may be curious about the costs involved in such an upgrade.

In this comprehensive guide, we’ll explore various factors that influence the cost of installing an automatic garage door and provide valuable insights to help you budget effectively.

Understanding Automatic Garage Doors

Before delving into costs, let’s briefly review what automatic garage doors entail:

An automatic garage door is equipped with an electric motor that allows for remote-controlled opening and closing. These doors come in various styles, materials, and configurations to suit different preferences and garage setups.

Factors Affecting Installation Costs

Several factors influence the cost of installing an automatic garage door:

  • Door Material: Automatic garage doors are available in materials such as steel, aluminum, wood, and fiberglass, each with its price range.
  • Door Style and Design: Different door styles, such as traditional, carriage-house, or contemporary, may come at different price points.
  • Size: The size of your garage opening will affect the cost of the door and installation. Larger doors require more materials and labor.
  • Automation Features: Advanced automation features such as Wi-Fi connectivity, battery backup, and smart home integration can add to the overall cost.
  • Insulation: Insulated garage doors offer better energy efficiency and noise reduction but may cost more upfront.
  • Labor Rates: Installation costs vary depending on the contractor’s rates, location, and level of expertise.

Average Cost of Automatic Garage Door Installation

The cost of installing an automatic garage door can vary widely depending on the factors mentioned above. On average, homeowners can expect to pay:

  • Basic Installation: For a standard single automatic garage door with basic features and no additional customization, the cost typically ranges from $1,000 to $2,500.
  • Custom Installation: For a custom or high-end automatic garage door with premium materials, advanced automation features, and additional customization, the cost can range from $2,500 to $5,000 or more.

DIY vs. Professional Installation

While some homeowners may consider a DIY installation to save money, it’s essential to weigh the pros and cons:

  • DIY Installation: DIY installation can save on labor costs, but it requires technical skills, specialized tools, and knowledge of electrical wiring and safety regulations. Improper installation can compromise security and functionality.
  • Professional Installation: Hiring a professional ensures proper installation, warranty coverage, and peace of mind. While it adds to the overall cost, professional installation reduces the risk of issues down the line.

Tips for Cost-Saving

To minimize the cost of automatic garage door installation, consider the following tips:

  • Choose a Standard Model: Opt for a standard automatic garage door style and material without unnecessary features to keep costs down.
  • Reuse Existing Hardware: If your existing garage door hardware is in good condition, you may be able to save on installation costs by reusing it with the new automatic door.
  • Shop Around: Obtain quotes from multiple contractors to compare prices and services offered, ensuring you get the best value for your money.

Conclusion:

Garage Door Repair North Richland Hills TX can enhance convenience, security, and curb appeal while adding value to your home. By understanding the factors influencing installation costs and following the tips outlined in this guide, you can ensure a smooth and cost-effective installation process.

Tarrant County Door & Gate

6408 Marlette Ct, Fort Worth, TX 76182, United States

1-817-456-2958

Garage Door Chain Tension Adjustment: Professional Techniques – NRH’s Gates & Garage Doors

As a homeowner, I’ve always been eager to tackle various DIY projects around the house. From minor repairs to more extensive renovations, I’ve found joy and satisfaction in maintaining my home. However, when it came to my garage door, I discovered that not all tasks are suitable for the do-it-yourself approach. Specifically, adjusting the chain tension of my garage door opener was a challenging and potentially hazardous task.

By following Garage Door Repair North Richland Hills TX, I’ll share my personal journey into the world of professional techniques for garage door chain tension adjustment.

The Mysterious World of Garage Door Chain Tension

My adventure into the realm of garage door chain tension began with a simple observation. Over time, I noticed that my garage door was becoming noisy and sluggish in its operation. It seemed to struggle as it moved along its tracks, and a loud clanking noise echoed through the garage every time it opened or closed.

I decided to investigate further and discovered that the chain connected to the garage door opener was sagging, a telltale sign of chain tension issues. At this point, I was determined to resolve the problem on my own. After all, how difficult could adjusting a chain tension be, I thought?

The Perils of DIY Garage Door Repairs

Armed with confidence and a basic understanding of the task at hand, I set out to adjust the chain tension myself. I began by consulting the garage door opener’s user manual and found instructions for adjusting the chain tension. However, as I delved deeper into the process, I quickly realized that it was more complicated than I had initially thought.

I soon discovered that there were several critical factors to consider, including:

  1. Proper Balance: Achieving the right balance in chain tension is crucial. If the chain is too loose, the garage door might not open or close properly. If it’s too tight, it can strain the opener’s motor, causing premature wear and potential damage.
  2. Alignment: The chain needed to be precisely aligned with the sprocket on the garage door opener. Even a slight misalignment could lead to issues with the door’s operation.
  3. Safety Concerns: Adjusting the chain tension involved working with a heavy garage door and the opener’s motor. Any mistakes could result in accidents or damage to the door and opener.

As I attempted to adjust the chain tension, it became evident that this was not a task for the faint of heart or the inexperienced. Despite my best efforts, the door’s operation only worsened, and the noise it produced became unbearable.

Seeking Professional Help

Frustrated and with a malfunctioning garage door, I realized it was time to seek the help of professionals. I contacted a local garage door repair service and scheduled an appointment for a technician to assess and fix the issue. What I learned from this experience was invaluable.

The Expert’s Approach

The garage door technician arrived with a toolbox full of specialized tools and a wealth of experience. He carefully assessed the state of my garage door opener, paying close attention to the chain tension and alignment. It was clear that this was a task that required both knowledge and precision.

Here are the professional techniques and insights that I gained:

1. Chain Inspection: The technician began by inspecting the chain to identify any signs of wear, damage, or misalignment. He explained that a loose or damaged chain could affect the door’s operation and needed to be addressed.

2. Chain Adjustment: Adjusting the chain tension involved meticulous adjustments to the chain’s length and alignment. The technician knew precisely how much tension was required for optimal performance and made these adjustments with precision.

3. Lubrication: Proper lubrication of the chain was another critical step. The technician used a specialized garage door lubricant to ensure smooth movement and minimize wear and tear.

4. Safety Measures: Throughout the process, the technician adhered to strict safety protocols. He explained that working with a garage door and its opener’s motor required caution to prevent accidents or damage.

Testing and Fine-Tuning

After making the necessary adjustments, the technician conducted a series of tests to ensure the garage door was operating correctly. He examined the balance, speed, and overall functionality of the door. It was an intricate process that required careful observation and listening for any signs of strain or abnormal noises.

I watched in amazement as the technician expertly fine-tuned the garage door opener. The difference in the door’s operation was remarkable. It moved smoothly, without the previous clanking noise, and its operation was noticeably quieter.

Professional Techniques Matter

Through this experience, I learned that adjusting garage door chain tension is far more intricate than it appears. The professional techniques employed by the technician were critical in ensuring the garage door’s optimal performance. The combination of precise adjustments, proper alignment, and meticulous testing made a significant difference in the door’s operation.

The technician also shared some valuable maintenance tips to keep the garage door functioning correctly:

Regular Lubrication: Applying a specialized garage door lubricant to the chain and other moving parts should be part of routine maintenance.

Periodic Inspection: Regularly inspect the chain, sprockets, and other components for wear and damage. Timely identification of issues can prevent more extensive problems.

Professional Tune-Ups: Scheduling annual or bi-annual professional tune-ups can prolong the life of your garage door opener and ensure it operates efficiently.

In Conclusion

In summary, according to Garage Door Repair North Richland Hills TX, my journey into the world of garage door chain tension adjustment was a humbling experience. I learned that some tasks are best left to the professionals who possess the knowledge, experience, and specialized tools required for the job. Adjusting the chain tension of a garage door opener is one such task. The precision, safety measures, and attention to detail exhibited by the garage door technician highlighted the importance of professional techniques in ensuring the optimal performance of a garage door. It was a lesson that I’ll carry with me for all future home maintenance endeavors.

NRH’s Gates & Garage Doors

7048 Ridge Crest Dr, North Richland Hills, TX 76182, United States

817-533-4913

How To Install Garage Door Support Strut – NRH’s Gates & Garage Doors

Installing a North Richland Hills Garage Door Repair is a relatively simple DIY project that can help strengthen your garage door and improve its stability.

Support struts are particularly useful for reinforcing single-panel garage doors or helping prevent sagging in larger doors. Here’s a step-by-step guide on how to install a garage door support strut:

Tools and Materials You’ll Need:

  1. Garage Door Support Strut: Make sure you have the correct size and length support strut for your garage door. Measure the width of your door to determine the appropriate length.
  2. Ladder: A sturdy ladder will help you reach the necessary height to install the strut.
  3. Socket Wrench or Adjustable Wrench: You’ll need this tool to tighten nuts and bolts.
  4. Wrench or Pliers: These will be used to hold nuts in place while tightening.
  5. Safety Glasses and Gloves: Protect your eyes and hands while working.
  6. Marker or Pencil: For marking hole locations.

Step-by-Step Installation Guide:

  1. Safety First: Always start by disconnecting the power to your garage door opener to prevent any accidental activation. Also, make sure to wear safety glasses and gloves throughout the installation.
  2. Position the Ladder: Place the ladder in a safe and stable position, allowing you to access the garage door’s top section easily. Ensure that the ladder is on a level surface.
  3. Locate the Center: Measure and mark the center of your garage door’s top section using a marker or pencil. This is where you’ll install the support strut.
  4. Attach the Strut: Position the support strut vertically on the marked centerline, with one end at the bottom of the top section and the other end at the top. The curved or bent part of the strut should face outward, creating an “S” shape.
  5. Mark Holes: Use the pre-drilled holes in the strut as a template to mark hole locations on the garage door’s top section. Typically, there are two or three holes on each end of the strut. Mark these hole locations.
  6. Drill Holes: Carefully drill holes through the marked spots on the garage door. Ensure that the holes are large enough to accommodate the bolts that came with the support strut.
  7. Secure with Bolts: Insert the bolts through the holes you drilled in the garage door and through the holes in the support strut. Place a washer on each bolt, and then thread a nut onto each bolt. Use a socket wrench or adjustable wrench to tighten the nuts until they are snug.
  8. Tighten Securely: Make sure the nuts are tightened securely but do not over-tighten, as this could warp the garage door’s top section.
  9. Repeat for Other End: If your support strut has more than one set of holes on each end, you may want to install additional bolts for added stability. Follow the same process for the other end of the support strut.
  10. Test the Door: Reconnect the power to your garage door opener and test the door to ensure it operates smoothly. Look for any signs of improvement in the door’s stability and balance.
  11. Final Inspection: Inspect the installation to make sure the support strut is securely attached, and there are no loose or missing bolts. Ensure that the garage door is operating correctly.
  12. Cleanup: Remove your tools and equipment, and clean up the work area.

By following these steps, you should be able to successfully install a North Richland Hills Garage Door Repair to improve the stability and longevity of your garage door. If you have any doubts or concerns about the installation, consider consulting a professional garage door technician for assistance.

NRH’s Gates & Garage Doors

7048 Ridge Crest Dr, North Richland Hills, TX 76182, United States

1-817-533-4913

How Do I Get A Second Garage Door Opener – Tarrant County Door & Gate

Acquiring a second Garage Door Repair North Richland Hills TX involves a systematic process, from identifying the compatible opener model to programming it for seamless operation.

Whether you’re adding a second opener for convenience or replacing a lost or malfunctioning one, here’s a comprehensive guide to guide you through the steps:

1. Identify Your Garage Door Opener Model: Before purchasing a second garage door opener, determine the model and brand of your existing opener. This information is crucial for ensuring compatibility with the new opener.

2. Check Manufacturer’s Information: Visit the official website of your garage door opener’s manufacturer or refer to the manual that came with your existing opener. Manufacturers often provide details about compatible accessories, including additional remotes or openers.

3. Visit a Local Retailer: Head to a local home improvement store or garage door retailer. Bring information about your existing garage door opener model, and the store staff can assist you in finding a compatible second opener. Ensure that the new opener matches the specifications of your current one.

4. Online Retailers and Marketplaces: Explore online retailers and marketplaces specializing in garage door opener accessories. Many websites offer a variety of openers compatible with different models. Be sure to read product descriptions, reviews, and check compatibility information before making a purchase.

5. Universal Openers: Consider universal garage door openers designed to work with various garage door opener brands. Universal openers often come with instructions and a list of compatible models. Verify that your garage door opener is on the compatibility list before purchasing.

6. Gather Opener Information: Once you have the new opener, take note of important information provided in the packaging, such as programming instructions, model numbers, and any additional features.

7. Remove Old Opener Codes (if necessary): If you are adding a second opener due to a lost or malfunctioning one, it’s advisable to erase the old opener codes from your garage door opener. Consult your garage door opener manual for instructions on clearing existing codes.

8. Read the Manual: Carefully read the manual that comes with your new opener. The manual will provide step-by-step instructions on programming the opener to work with your garage door. Follow the guidelines precisely.

9. Power Up the Opener: Install the batteries or power source in the new opener according to the instructions provided. Ensure that the batteries are in good condition to guarantee optimal performance.

10. Locate the Learn Button on the Opener: On your existing garage door opener unit, find the “Learn” button. This button is typically located on the back or side of the opener motor unit. Pressing this button puts the opener into programming mode.

11. Program the Second Opener: Follow the programming instructions in the manual. This often involves pressing the “Learn” button on the existing opener and then activating a button on the new opener to transmit the code. The garage door opener should confirm successful programming.

12. Test the Second Opener: After programming, test the new opener by pressing the designated button to open or close the garage door. Ensure that the door responds as expected. If not, recheck the programming steps.

13. Additional Features (if applicable): Some openers may come with additional features, such as the ability to control multiple garage doors or integrate with smart home systems. Refer to the manual for information on utilizing these features.

14. Keep the Manual for Future Reference: Store the opener manual in a safe place for future reference. It contains valuable information about troubleshooting, maintenance, and programming instructions.

15. Seek Professional Assistance (if needed): If you encounter difficulties or are unsure about the programming process, consider seeking assistance from a professional garage door technician. They can help ensure that the second opener is correctly programmed and functioning.

In conclusion, adding a second Garage Door Repair North Richland Hills TX involves a series of steps ranging from identifying the right opener to programming it for your specific garage door. Take the time to read manuals thoroughly and follow instructions carefully to ensure a successful setup. With a properly programmed second opener, you’ll enhance the convenience of accessing your garage.

Tarrant County Door & Gate

1-817-456-2958

How To Cover Up A Garage Door – Tarrant County Door & Gate

Covering up a Garage Door Repair North Richland Hills TX can be a valuable and transformative project that elevates both the appearance and functionality of your property. Whether you want to create a seamless facade, add insulation, enhance security, or convert the garage space into an additional room, there are several effective methods to achieve your desired outcomes.

This comprehensive guide will walk you through various techniques to cover up a garage door and provide you with the necessary information to make informed decisions for your project.

  1. Garage Door Material Options

Before considering the covering options, it’s essential to evaluate the current garage door material. Common materials include steel, wood, aluminum, and fiberglass. Understanding the existing material will help you determine the best approach for the cover-up project, considering factors like weight, insulation, and durability.

  1. Insulation

Covering up a garage door presents an excellent opportunity to add insulation, enhancing energy efficiency and comfort inside the garage. Insulation can also improve noise reduction, making the garage space more suitable for various purposes.

  1. Exterior Cladding

One popular method for covering a garage door involves installing an exterior cladding system. Various materials like wood, vinyl, fiber cement, or composite panels can be used to create a cohesive look with the rest of the building’s facade.

  1. Paint or Stain

A cost-effective approach to cover up a garage door is to paint or stain it to match the exterior of the house. Choose high-quality paint or stain that complements the overall design and adds a fresh, updated look.

  1. Wall Framing and Drywall

For those who wish to convert the garage into a new living space, framing the opening and adding drywall is a viable option. This method offers a seamless transition from the exterior and allows you to create an entirely new room within your home.

  1. Sliding or Folding Doors

Installing sliding or folding doors in place of the traditional garage door can be an innovative way to cover it up. These types of doors offer easy access and provide a modern, functional appearance.

  1. Retractable Screens

Retractable screens are an excellent choice for homeowners who want to maintain ventilation and light while concealing the garage door. These screens come in various materials and designs and can be easily rolled up or down as needed.

  1. Murals or Decals

For a unique and artistic approach, consider painting a mural or using decals to cover up the garage door. This method allows for personal expression and creativity while beautifying the exterior.

  1. Living Walls

Creating a living wall with plants and greenery can be a visually stunning way to conceal the garage door. Not only does it add a touch of nature to your property, but it also contributes to a sustainable and eco-friendly environment.

  1. Exterior Cladding with Windows

Combining exterior cladding with windows can create an attractive visual effect and improve the natural light inside the garage. This option also adds an architectural dimension to the overall design.

Conclusion

Covering up a Garage Door Repair North Richland Hills TX offers an array of benefits, from enhancing curb appeal and increasing property value to providing additional functional living space. Depending on your goals and budget, there are various methods to achieve the desired result. Careful consideration of materials, insulation, and design will ensure a successful cover-up project that not only improves aesthetics but also boosts the overall usability and comfort of your property. Whether you opt for a simple paint job or a more complex conversion, the end result will be a space that aligns with your vision and complements your home’s architecture.

Tarrant County Door & Gate

6408 Marlette Ct, North Richland Hills, TX 76182, Estados Unidos

817-456-2958

Powered by WordPress & Theme by Anders Norén