Your One Stop Local Business News

Tag: Window Cleaning Page 1 of 3

How Can I Remove Stubborn Stains From Glass Windows? – Squeaky Clean Windows

Window Cleaning Service Southlake TX add aesthetic appeal and natural light to any space, but stubborn stains can detract from their beauty.

Whether it’s hard water stains, mineral deposits, or grease marks, removing these stains requires the right techniques and tools. In this comprehensive guide, we’ll explore effective methods for removing stubborn stains from glass windows, restoring clarity and shine to your windows.

Understanding the Nature of Stubborn Stains

Before diving into the removal process, it’s essential to understand the nature of stubborn stains on glass windows. Hard water stains, for example, are caused by mineral deposits from evaporated water, while grease marks result from oils and residue. Identifying the type of stain will help determine the most appropriate cleaning method for optimal results.

Tools and Materials Needed

To tackle stubborn stains on glass windows, gather the following tools and materials:

  • White vinegar
  • Baking soda
  • Lemon juice
  • Microfiber cloth
  • Squeegee
  • Razor blade scraper (for tough stains)
  • Distilled water
  • Spray bottle

Step-by-Step Removal Process

1. Prepare the Cleaning Solution

Mix equal parts white vinegar and distilled water in a spray bottle. Alternatively, create a paste by combining baking soda with a few drops of lemon juice to form a thick paste.

2. Apply the Cleaning Solution

Spray the vinegar solution directly onto the stained areas of the glass window or apply the baking soda paste using a damp microfiber cloth. Ensure that the entire stained area is covered evenly.

3. Let it Sit

Allow the cleaning solution to sit on the stained areas for 5-10 minutes. This will give the solution time to penetrate and loosen the stubborn stains.

4. Scrub Gently

Using a soft-bristled brush or microfiber cloth, gently scrub the stained areas in circular motions. Avoid using abrasive materials that could scratch the glass surface.

5. Rinse with Distilled Water

Once the stains have been loosened, rinse the glass window thoroughly with distilled water to remove any residue or cleaning solution.

6. Use a Squeegee

After rinsing, use a squeegee to remove excess water from the glass surface. Start from the top and work your way down in overlapping strokes for a streak-free finish.

7. Spot Treat Tough Stains

For particularly stubborn stains that resist traditional cleaning methods, use a razor blade scraper to carefully scrape away the residue. Exercise caution to avoid scratching the glass surface.

8. Repeat if Necessary

If the stains persist after the initial cleaning, repeat the process until the desired results are achieved. Some stains may require multiple treatments for complete removal.

Preventing Future Stains

To prevent future stains from forming on your glass windows, consider the following preventive measures:

  • Regularly clean your windows to remove dirt and grime buildup.
  • Use a water softener to reduce mineral deposits in your water supply.
  • Avoid using harsh chemicals or abrasive materials that can damage the glass surface.

Conclusion:

Stubborn stains on glass windows can be unsightly and challenging to remove, but with the right techniques and tools, you can restore clarity and shine to your windows. By understanding the nature of the stains, using the appropriate cleaning solutions, and taking preventive measures, you can maintain sparkling clean windows for years to come.

Squeaky Clean Windows

2140 E Southlake Blvd L629, Southlake, TX 76092, United States

1-817-938-7654

How To Remove Streaks From Windows – Squeaky Clean Windows

Window Cleaning Service Southlake TX  Streaks can detract from the appearance of windows and make them look dirty, even after they’ve been cleaned. Fortunately, with the right techniques and tools, it’s possible to achieve streak-free windows and restore their clarity and shine.

In this comprehensive guide, we’ll explore step-by-step instructions and tips for removing streaks from windows effectively:

1. Assess the Cause of Streaks:

Before attempting to remove streaks from windows, it’s important to identify the underlying cause. Streaks can be caused by various factors, including:

  • Residue from cleaning solutions
  • Hard water deposits
  • Mineral buildup
  • Excess moisture
  • Improper cleaning techniques

By understanding the cause of the streaks, you can choose the most appropriate method for removing them and prevent future streaking.

2. Gather the Necessary Tools and Materials:

To remove streaks from windows, you’ll need the following tools and materials:

  • Distilled water or vinegar
  • Microfiber cloths or lint-free towels
  • Squeegee
  • Window cleaning solution (commercial or homemade)
  • Rubbing alcohol or ammonia (optional)
  • Scrubbing pad or sponge
  • Bucket
  • Spray bottle
  • Old newspapers or coffee filters (for drying)

3. Clean the Windows Thoroughly:

Start by cleaning the windows thoroughly to remove any dirt, grime, or residue that may be contributing to the streaks. Use a window cleaning solution and a squeegee or microfiber cloth to clean both the interior and exterior surfaces of the windows. Pay extra attention to areas where streaks are most visible, such as around the edges and corners.

4. Use Distilled Water or Vinegar:

If streaks persist after cleaning, try using distilled water or vinegar to remove them. Fill a spray bottle with equal parts distilled water and white vinegar and spray the solution onto the streaky areas of the windows. Allow the solution to sit for a few minutes to loosen the streaks.

5. Wipe with Microfiber Cloth or Towel:

After allowing the solution to sit, use a clean microfiber cloth or lint-free towel to wipe away the streaks from the windows. Use a circular motion and apply gentle pressure to lift the streaks from the glass. Avoid using excessive force, as this can spread the streaks further.

6. Use Rubbing Alcohol or Ammonia (Optional):

For stubborn streaks that won’t budge with water or vinegar alone, try using rubbing alcohol or ammonia to remove them. Dampen a clean microfiber cloth or sponge with rubbing alcohol or ammonia and gently rub the streaky areas of the windows. Be sure to wear gloves and work in a well-ventilated area when using these chemicals.

7. Rinse with Clean Water:

After removing the streaks, rinse the windows thoroughly with clean water to remove any remaining residue or cleaning solution. Use a spray bottle filled with distilled water to spray the windows and wipe away any excess moisture with a dry microfiber cloth or towel.

8. Dry with Newspapers or Coffee Filters:

For a streak-free finish, use crumpled newspapers or coffee filters to dry the windows after cleaning. Both materials are absorbent and leave behind a lint-free shine, making them ideal for achieving streak-free results.

9. Inspect and Touch Up as Needed:

After cleaning and drying the windows, inspect them from both inside and outside to ensure they are streak-free and sparkling. If you notice any remaining streaks or spots, repeat the cleaning process as needed until you achieve the desired results.

10. Prevent Future Streaking:

To prevent future streaking, consider the following tips:

  • Use a high-quality window cleaning solution and avoid using products that leave behind residue.
  • Clean windows on cloudy days or in the early morning or late afternoon to prevent cleaning solution from drying too quickly and causing streaks.
  • Use distilled water or vinegar in your cleaning solution to minimize mineral buildup and streaking.
  • Use a squeegee or microfiber cloth to remove excess moisture from the windows and prevent streaks from forming.

Window Cleaning Service Southlake TX  Remember to work systematically, use the right tools and materials for the job, and take your time to ensure thorough cleaning and drying. With proper technique and regular maintenance, your windows will remain clean, clear, and streak-free for years to come.

Squeaky Clean Windows

2140 E Southlake Blvd L629, Southlake, TX 76092, United States

1-817-938-7654

Essential Cleaning Tools? – Squeaky Clean Windows

Maintaining a clean and hygienic living environment requires the right tools for the job. From basic essentials to specialized equipment for different surfaces and hard-to-reach areas, having the right Window Cleaning Service Southlake TX can make the task more efficient and effective.

In this article, we’ll explore essential cleaning tools that every home should have, as well as eco-friendly alternatives and safety gear to ensure a thorough and safe cleaning process.

Basic Cleaning Tools for Every Home

  1. Broom and Dustpan: A sturdy broom and dustpan are essential for sweeping up dirt, dust, and debris from floors and other surfaces. Choose a broom with soft bristles for indoor use and a dustpan with a rubber lip to ensure efficient debris collection.
  2. Vacuum Cleaner: A quality vacuum cleaner is indispensable for removing dirt, pet hair, and allergens from carpets, rugs, and upholstery. Look for a vacuum with adjustable settings and attachments for versatile cleaning options.
  3. Microfiber Cloths: Microfiber cloths are highly effective for dusting, wiping, and polishing surfaces without the need for harsh chemicals. They trap dust and dirt particles, leaving surfaces clean and streak-free.

Specialty Cleaning Tools for Different Surfaces

  1. Window Squeegee: A window squeegee with a rubber blade is ideal for achieving streak-free windows and glass surfaces. Choose a squeegee with an adjustable handle and interchangeable blades for versatile use.
  2. Tile Scrubber: For cleaning tile floors and grout lines, a tile scrubber with stiff bristles or an abrasive pad attachment can help remove stubborn dirt and grime effectively.
  3. Grout Brush: A grout brush with narrow bristles or a pointed tip is essential for cleaning grout lines in bathrooms and kitchens. Look for a brush with a comfortable grip and durable bristles for long-lasting use.

Cleaning Tools for Hard-to-Reach Areas

  1. Extension Duster: An extension duster with a telescopic handle is ideal for reaching high ceilings, ceiling fans, and light fixtures. Choose a duster with a flexible head and washable microfiber cover for easy maintenance.
  2. Flexible Vacuum Attachments: Attachments such as crevice tools and brush heads with flexible hoses are invaluable for cleaning tight spaces, corners, and upholstery where standard vacuum heads may not reach.
  3. Reaching Tool: A reaching tool or grabber can help retrieve items from high shelves, under furniture, or behind appliances without straining or bending. Look for a lightweight and durable design with a comfortable grip handle.

Eco-Friendly Cleaning Tools and Alternatives

  1. Bamboo Cleaning Brushes: Bamboo cleaning brushes are eco-friendly alternatives to plastic scrub brushes, offering durability and sustainability. Look for brushes with natural bristles and bamboo handles for a greener cleaning solution.
  2. Natural Bristle Brooms: Brooms made from natural materials such as corn husks or plant fibers are biodegradable and environmentally friendly. They effectively sweep up dirt and debris without harming the environment.
  3. Reusable Cleaning Cloths: Instead of disposable paper towels, opt for reusable cleaning cloths made from materials such as cotton or microfiber. These cloths can be washed and reused multiple times, reducing waste and saving money.

Safety Gear and Protective Equipment

  1. Gloves: Rubber or latex gloves provide protection against chemicals, hot water, and sharp objects while cleaning. Choose gloves that fit comfortably and offer good grip for handling cleaning solutions and tools.
  2. Masks: Disposable or reusable masks are essential for preventing inhalation of dust, allergens, and fumes during cleaning tasks, especially when using harsh chemicals or working in confined spaces.
  3. Eye Protection: Safety goggles or glasses protect your eyes from splashes, debris, and airborne particles while cleaning. Choose goggles with anti-fog and scratch-resistant lenses for clear vision and long-lasting durability.

Conclusion:

Having the right Window Cleaning Service Southlake TX for maintaining a clean, hygienic, and organized living environment. From basic essentials like brooms and vacuum cleaners to specialty tools for different surfaces and hard-to-reach areas, investing in quality cleaning tools can make the task easier, more efficient, and more enjoyable. Additionally, choosing eco-friendly alternatives and using safety gear and protective equipment ensures a thorough and safe cleaning process for you and your home.

Squeaky Clean Windows

2140 E Southlake Blvd L629, Southlake, TX 76092, United States

1-817-938-7654

How Do I Clean Windows With Multiple Panes – DFW Window Cleaning Colleyville

Window Cleaning Service Colleyville TX can be a bit challenging due to the additional surfaces and edges. However, with the right tools, techniques, and a systematic approach, you can achieve streak-free and sparkling clean windows.

In this comprehensive guide, we’ll explore the best ways to clean windows with multiple panes, ensuring that every surface is thoroughly cleaned and enhancing the overall appearance of your home.

1. Gather Your Cleaning Supplies: Before you start, gather the necessary cleaning supplies. You’ll need a bucket, a mild cleaning solution, a squeegee, a soft sponge or microfiber cloth, a soft brush or toothbrush, and a dry lint-free cloth. Ensure that your squeegee is clean and in good condition.

2. Remove Loose Debris: Begin by removing any loose debris from the window frames and sills. Use a soft brush or a vacuum cleaner with a brush attachment to gently sweep away dust, cobwebs, and other particles. Pay attention to corners and edges where debris may accumulate.

3. Test the Cleaning Solution: If you’re using a new cleaning solution, test it on a small, inconspicuous area to ensure compatibility with the window material. This step is particularly important for windows with special coatings or finishes.

4. Apply the Cleaning Solution: Dip a soft sponge or microfiber cloth into the cleaning solution and generously apply it to the windows. Ensure that the entire surface, including each pane, is covered. Allow the cleaning solution to sit for a few minutes to break down dirt and grime.

5. Use a Soft Brush for Detailing: For detailed cleaning, especially in corners and along the edges of each pane, use a soft brush or a toothbrush. Gently scrub these areas to dislodge any stubborn dirt or buildup. Be cautious not to use brushes with stiff bristles that could scratch the glass.

6. Squeegee for a Streak-Free Finish: Use a squeegee to remove the cleaning solution and achieve a streak-free finish. Starting from the top corner, pull the squeegee down in a straight, overlapping motion. Wipe the squeegee blade with a dry cloth after each pass to prevent streaks.

7. Wipe Edges and Corners: After squeegeeing, use a dry, lint-free cloth to wipe away any remaining water from the edges and corners of each pane. This step helps prevent water spots and ensures a polished finish.

8. Repeat for Each Pane: Repeat the cleaning process for each pane on the window. Pay attention to the top and bottom edges of each pane, as these areas may collect more dirt and cleaning solution.

9. Check for Residue: Thoroughly inspect each pane for any leftover cleaning residue. If you notice any, wipe the windows again with a clean, dry cloth to remove any remaining traces of the cleaning solution.

10. Interior Window Cleaning: If your windows have multiple panes on both the interior and exterior, repeat the cleaning process for the interior side. Place towels or cloths on window sills and adjacent areas to catch any drips.

11. Use a Step Stool or Ladder if Needed: For windows that are higher or harder to reach, use a step stool or a safe ladder to access them. Ensure that the ladder is stable and placed on a flat surface, and follow proper safety measures.

12. Rotate and Tilt Windows if Possible: Some windows with multiple panes are designed to rotate or tilt, making it easier to clean both the interior and exterior surfaces. Check the manufacturer’s instructions for your specific window type and utilize these features if available.

13. Consider Using a Window Cleaning Pole: For windows that are out of reach even with a ladder, consider using a window cleaning pole with an adjustable handle. These poles often come with attachments for sponges and squeegees, allowing you to clean high windows from the ground.

14. Time Your Cleaning for Overcast Days: To minimize the risk of streaks, consider cleaning windows on overcast days. Direct sunlight can cause the cleaning solution to dry too quickly, leading to streaks and water spots.

15. Use a Magnetic Window Cleaner for Exterior Windows: If you have windows with multiple panes that are challenging to reach from the outside, consider using a magnetic window cleaner. These devices have magnets on both sides, allowing you to clean the exterior surfaces from the inside.

16. Hire Professional Window Cleaning Services: If cleaning windows with multiple panes seems overwhelming or if you have high or hard-to-reach windows, consider hiring professional window cleaning services. They have the expertise and equipment to tackle complex cleaning scenarios.

17. Regular Maintenance: Establish a regular window cleaning schedule to prevent the buildup of dirt and grime. Regular maintenance will make future cleanings quicker and more manageable.

18. Protect Surrounding Surfaces: When cleaning windows, especially with a cleaning solution, protect surrounding surfaces from drips and splashes. Use towels or cloths to catch any runoff and avoid potential damage to window sills or flooring.

19. Avoid Abrasive Cleaners: Avoid using abrasive cleaners or tools that may scratch or damage the glass. Stick to gentle cleaning solutions and soft brushes to preserve the integrity of the windows.

20. Enjoy the Clear View: Once you’ve completed the cleaning process, take a moment to appreciate the clear and sparkling view through your windows. Enjoy the improved aesthetics and the positive impact on your living space.

In conclusion, Window Cleaning Service Colleyville TX requires a systematic and thorough approach. By following these detailed steps and using the right tools, you can achieve pristine and streak-free windows that enhance the overall appearance of your home.

DFW Window Cleaning Colleyville

1808 Maplewood Trail, Colleyville, TX 76034, United States

1-817-813-8010

Can I Use dish soap for Window Cleaning – Plano Window Cleaning & Glass Repair

Window Cleaning Service Plano TX is a chore that often requires the right balance of cleaning agents to achieve that perfect streak-free shine.

One common household item that people consider using is dish soap. In this article, we’ll delve into the intriguing question:

Understanding Dish Soap Composition

Dish soap typically consists of water, surfactants, and various additives. Surfactants help break down grease and grime, making it an effective cleaner for dishes. However, when it comes to windows, the composition of dish soap may have both positive and negative implications.

Pros and Cons of Using Dish Soap

Advantages

Using dish soap for window cleaning has its perks. It’s readily available, cost-effective, and can cut through stubborn stains. The sudsing action also helps in lifting dirt, leaving your windows sparkling clean.

Disadvantages

On the flip side, dish soap may contain ingredients that leave residues or streaks on windows. Additionally, some formulations may not be suitable for certain window materials, leading to potential damage over time.

Safe Surfaces for Dish Soap Cleaning

While dish soap is generally safe for glass surfaces, caution should be exercised on sensitive materials. Tinted windows, for instance, may be prone to discoloration or damage when exposed to certain dish soap formulations.

DIY Window Cleaning Solution with Dish Soap

For the avid DIY enthusiast, creating a homemade window cleaning solution with dish soap is a viable option. Mix water, dish soap, and vinegar for an effective and budget-friendly solution. Apply with a soft cloth or squeegee for best results.

Addressing Common Myths About Dish Soap

There are numerous myths surrounding the use of dish soap for window cleaning. Some claim it leaves a residue, while others argue it’s the perfect all-in-one solution. Let’s debunk these myths and get to the facts.

Alternatives to Dish Soap for Window Cleaning

While dish soap is an option, there are alternative cleaning agents specifically designed for windows. These options often provide a streak-free finish without the potential drawbacks of using dish soap.

Best Practices for Window Cleaning

Achieving spotless windows involves more than just the choice of cleaning agent. Proper tools, techniques, and timing play crucial roles. Learn the best practices for window cleaning to ensure professional-grade results.

Environmental Impact of Dish Soap

Considering the environmental impact of cleaning agents is essential. Explore eco-friendly alternatives and adopt sustainable practices for window cleaning that benefit both your home and the planet.

Real-life Experiences

Hearing from others who have tried using dish soap for window cleaning can provide valuable insights. Personal stories and tips from experienced users offer practical advice and lessons learned.

Precautions and Warnings

Before you grab that bottle of dish soap, be aware of the precautions and warnings associated with using it for window cleaning. Taking proper safety measures can prevent potential damage and ensure a positive cleaning experience.

Professional Window Cleaning vs. DIY with Dish Soap

Is it worth hiring professionals, or can you achieve the same results with dish soap? We’ll weigh the pros and cons of each approach, helping you make an informed decision for your window cleaning needs.

Maintaining the Longevity of Windows

Windows are a significant investment in any home. Learn tips and tricks for maintaining their longevity, including the impact of cleaning agents on overall window durability.

Expert Opinions on Dish Soap for Window Cleaning

What do the experts say? Gain insights from cleaning professionals who share their opinions on using dish soap for window cleaning. Are there endorsements or cautions you should be aware of?

Conclusion:

In conclusion, using dish soap for Window Cleaning Service Plano TX is a viable option, but it comes with its own set of considerations. By understanding the composition, pros, and cons, you can make an informed decision that suits your cleaning needs. Whether you opt for DIY solutions or professional services, the key is to prioritize the longevity and appearance of your windows.

Plano Window Cleaning & Glass Repair

1201 Legacy Dr #2114, Plano, TX 75023, United States

1-972-544-1373

Can I Clean Tinted Windows With Regular Cleaner – NRH Window Cleaning & Glass Repair

However, the question that often arises is whether it’s safe to clean tinted windows with a regular Window Cleaning Service North Richland Hills TX.

The short answer is yes, but it comes with some crucial considerations. In this comprehensive guide, we’ll explore the dos and don’ts of cleaning tinted windows, ensuring your windows remain in top-notch condition without compromising the tint.

Understanding Tinted Windows

Before delving into the cleaning process, it’s essential to understand the composition of tinted windows. Tinted windows are typically coated with a thin film containing dyes and metallic particles. This film is what provides the tint’s shading effect. While the film is designed to be durable, it requires careful handling to prevent potential damage during cleaning.

Choosing the Right Cleaner

The choice of cleaner plays a pivotal role in maintaining tinted windows. Regular window cleaners often contain ammonia, a powerful cleaning agent that can be detrimental to the tinted film over time. Ammonia can lead to discoloration, peeling, or bubbling, compromising both the aesthetic appeal and functionality of tinted windows. Therefore, the key is to use a regular cleaner that is explicitly labeled as ammonia-free.

Tools for Tinted Window Cleaning

To clean tinted windows effectively, gather the following tools:

  1. Ammonia-Free Window Cleaner: Choose a reputable brand that clearly states its ammonia-free formula.
  2. Microfiber Cloth: Opt for a soft, lint-free cloth to ensure gentle cleaning without scratching the tint.
  3. Soft Sponge or Applicator: Use a non-abrasive sponge or applicator for the even distribution of the cleaner.
  4. Gentle Brush: For hard-to-reach areas or stubborn spots, a soft brush can be used with care.

Step-by-Step Guide for Tinted Window Cleaning

  1. Inspect the Tint: Before diving into the cleaning process, carefully inspect the tinted windows for any signs of damage, peeling, or bubbles. If you notice any issues, it’s advisable to consult a professional before attempting to clean the windows.
  2. Dust Removal: Gently remove any loose dust or dirt from the window surface using a soft brush or a microfiber cloth. This initial step prevents scratching during the cleaning process.
  3. Prepare the Cleaner: Mix or dilute the ammonia-free window cleaner according to the product instructions. Ensure that the cleaner is compatible with tinted windows.
  4. Application: Apply the cleaner to the tinted window using a soft sponge or applicator. Ensure even coverage, paying extra attention to areas with visible dirt or smudges.
  5. Wiping Technique: Use a microfiber cloth to wipe away the cleaner. Adopt gentle, circular motions to avoid applying excessive pressure, which can lead to scratches or damage to the tinted film.
  6. Check for Residue: Inspect the window for any residue or streaks. If you notice any, repeat the cleaning process using a clean cloth until the window is spotless.
  7. Dry the Window: Once satisfied with the cleanliness, use a dry microfiber cloth to ensure the window is completely dry. This step helps prevent water spots and ensures a crystal-clear finish.

Common Mistakes to Avoid

To ensure the longevity and effectiveness of tinted windows, steer clear of the following common mistakes during the cleaning process:

  1. Using Ammonia-Based Cleaners: Always opt for an ammonia-free window cleaner to prevent potential damage to the tinted film.
  2. Abrasive Materials: Avoid using rough sponges or brushes that may scratch the tinted surface. Stick to soft, non-abrasive tools.
  3. Excessive Pressure: Applying too much pressure during cleaning may result in scratches or damage to the tinted film. Gentle and consistent pressure is key.
  4. Neglecting Inspection: Before cleaning, neglecting to inspect the tinted windows may lead to exacerbating existing issues. Address any damage or concerns before proceeding with cleaning.

Benefits of Proper Tinted Window Maintenance

Maintaining tinted windows goes beyond aesthetics. Proper care ensures that tinted windows continue to provide their intended benefits, including:

  1. UV Protection: Tinted windows block harmful UV rays, safeguarding occupants and interior surfaces.
  2. Glare Reduction: The shading effect of tinted windows reduces glare, enhancing comfort, especially during bright and sunny days.
  3. Enhanced Privacy: Tinted windows offer an added layer of privacy by limiting the visibility from the outside.
  4. Improved Aesthetics: Regular cleaning maintains the clarity and appearance of tinted windows, contributing to the overall aesthetic appeal of your vehicle or home.

Conclusion:

In conclusion, the question of whether you can Window Cleaning Service North Richland Hills TX with a regular cleaner has a straightforward answer: yes, as long as the cleaner is ammonia-free. With the right tools, a gentle approach, and a commitment to proper maintenance, you can enjoy the benefits of tinted windows without compromising their longevity or visual appeal.

NRH Window Cleaning & Glass Repair

7510 Davis Blvd # B, North Richland Hills, TX 76182, United States

1-817-601-6082

How Do I Remove Hard Water Stains From Windows – Southlake Window Cleaning & Glass Repair

Window Cleaning Service Southlake TX can be stubborn and unsightly, affecting the clarity and appearance of your glass. These stains are caused by mineral deposits, primarily calcium and magnesium, in the water that evaporate and leave behind residue on the glass.

Removing hard water stains requires a targeted approach using effective cleaning agents and techniques. Let’s explore a comprehensive guide on how to remove hard water stains from windows and restore their crystal-clear shine.

1. Identify the Stains: Before tackling hard water stains, confirm that what you’re dealing with is indeed mineral deposits. Hard water stains typically appear as cloudy or white spots on the glass. If the stains are smooth to the touch and don’t come off with regular cleaning, they are likely hard water stains.

2. Gather Your Supplies: To effectively remove hard water stains, gather the following supplies:

  • Distilled white vinegar
  • Lemon juice
  • Baking soda
  • Razor blade or scraper
  • Soft-bristle brush or scrubber
  • Microfiber cloths
  • Bucket
  • Water

3. Vinegar Solution: White distilled vinegar is a powerful natural acid that can dissolve mineral deposits. Mix equal parts white vinegar and water in a spray bottle. If the stains are severe, you can use undiluted vinegar for stronger cleaning power.

4. Lemon Juice Method: Lemon juice, with its natural acidity, is an effective alternative to vinegar. Squeeze fresh lemon juice onto the stained areas or mix lemon juice with water in a spray bottle. The acid in the lemon helps break down the mineral deposits.

5. Baking Soda Paste: Create a baking soda paste by mixing baking soda with water. Apply the paste to the hard water stains and let it sit for 15-20 minutes. The abrasive nature of baking soda helps lift the deposits. Scrub gently with a soft-bristle brush or scrubber.

6. Scraper or Razor Blade: For more stubborn stains, use a razor blade or scraper. Hold the blade at a 45-degree angle and carefully scrape off the deposits. Ensure the glass is wet to prevent scratching. Use this method cautiously, especially on tempered or tinted glass.

7. Soft-Bristle Brush: Use a soft-bristle brush or scrubber to agitate the vinegar or lemon juice solution on the window surface. This helps loosen the mineral deposits, making them easier to remove.

8. Soak and Dampen: Soak a cloth or sponge in the vinegar solution or lemon juice, and place it directly on the stains. Let it sit for 15-30 minutes to allow the acid to break down the deposits. Keep the cloth damp to prevent it from drying out.

9. Vinegar and Baking Soda Combo: For a powerful one-two punch, create a paste using equal parts baking soda and vinegar. Apply the paste to the stains, let it fizz, and then scrub gently with a soft brush. The combination of vinegar and baking soda enhances the cleaning action.

10. Water Rinse: After treating the stains, rinse the window thoroughly with water to remove any remaining cleaning solution and loosened deposits. Use a bucket of clean water or a hose for an external window.

11. Dry and Buff: Once the stains are removed and the window is rinsed, dry the glass with a lint-free microfiber cloth. Buff the glass in a circular motion to ensure a streak-free finish.

12. Repeat if Necessary: For severe or persistent hard water stains, you may need to repeat the cleaning process. Be patient and thorough, ensuring that all mineral deposits are effectively removed.

13. Prevent Future Stains: To prevent future hard water stains, consider these preventive measures:

  • Wipe down windows regularly with a soft cloth or squeegee to remove water before it evaporates and leaves deposits.
  • Install a water softener to reduce mineral content in your water supply.
  • Use distilled water or a water filter when cleaning windows to minimize mineral deposits.

14. Professional Help: If the hard water stains are extensive or if you’re unable to remove them successfully, consider seeking professional window cleaning services. Professionals have the expertise and equipment to handle challenging stains and restore the clarity of your windows.

15. Caution with DIY Methods: Exercise caution when using DIY methods, especially with abrasive materials like baking soda or razor blades. Test any cleaning solution on a small, inconspicuous area first, and avoid aggressive scrubbing on delicate glass surfaces.

16. Consider Commercial Cleaners: If DIY methods prove challenging, there are commercial hard water stain removers available. Follow the product instructions carefully, and choose a cleaner specifically designed for glass surfaces.

17. Window Restoration Services: For severe cases or if hard water stains have etched into the glass, consider professional window restoration services. These services can polish and resurface the glass to remove deep-seated stains.

18. Consult Window Manufacturer Guidelines: If your windows have specific coatings or treatments, consult the manufacturer’s guidelines before using any cleaning solutions or methods. Some products may be sensitive to certain chemicals.

In conclusion, removing Window Cleaning Service Southlake TX requires a strategic approach using natural acids, abrasives, and proper cleaning techniques. Regular maintenance and preventive measures can help minimize the recurrence of hard water stains, keeping your windows crystal clear and enhancing the overall appearance of your home.

Southlake Window Cleaning & Glass Repair

1052 Summerplace Ln, Southlake, TX 76092, United States

1-817-839-4773

A Guide to Cleaning Windows with Grids or Mullions – DFW Window Cleaning of Irving

As a homeowner with a love for classic architectural details, I’ve always appreciated the charm that windows with grids or mullions bring to a house. These decorative dividers not only add character to a home but also present a unique challenge when it comes to cleaning. Over the years, I’ve learned valuable techniques and developed a systematic approach to ensure that my windows with grids or mullions remain crystal clear and beautiful.

In this article, I’ll share my experiences and insights in this guide to cleaning windows with grids or mullions based from Window Cleaning Irving TX.

The Challenge of Cleaning Windows with Grids or Mullions

Windows with grids or mullions, commonly found in colonial and traditional-style homes, have multiple small panes divided by wooden or metal frames. While these windows enhance the architectural beauty of a house, they pose a unique cleaning challenge due to their intricate design.

Here are some of the challenges posed by windows with grids or mullions:

1. Time-Consuming: Cleaning windows with grids or mullions takes more time and effort compared to standard single-pane windows.

2. Trapped Dirt: Dust, dirt, and grime tend to accumulate in the crevices between the grids, making it challenging to clean effectively.

3. Streaks and Residue: The multiple panes and frames can result in streaks and residue, which may be more visible due to the division.

4. Fragile Grids: The grids or mullions can be delicate, and excessive pressure during cleaning may damage them.

Tools and Supplies You’ll Need

Before you start cleaning windows with grids or mullions, gather the following tools and supplies:

1. A bucket of warm, soapy water: Mix a mild dish soap or a specialized window cleaning solution with warm water.

2. A squeegee: Choose a squeegee with a rubber blade that fits the size of the individual panes.

3. A soft brush or sponge: Use a non-abrasive brush or sponge to clean the glass and grids.

4. Lint-free cloths or microfiber towels: These are ideal for drying the glass and preventing streaks.

5. A step stool or ladder: Ensure you can comfortably reach all the panes, taking safety precautions if working at a height.

6. A small brush or toothbrush: Useful for cleaning between the grid crevices.

7. A scraper tool: This is optional but can help remove stubborn residue from the glass.

8. A bucket of clean water: For rinsing the sponge or brush and for wetting the squeegee.

Step-by-Step Guide to Cleaning Windows with Grids or Mullions

Now that you have your tools and supplies ready, follow these steps to clean your windows with grids or mullions effectively:

1. Prepare the Area:

  • Start by protecting the area below the windows with drop cloths or towels to catch any drips or splashes.

2. Remove Dust and Loose Debris:

  • Use a soft brush or a dusting tool to remove dust, cobwebs, and loose debris from the grids and window frame.

3. Apply Soapy Water:

  • Dip a soft brush or sponge into the bucket of warm, soapy water.
  • Gently scrub the glass and grids, starting from the top and working your way down.

4. Use a Small Brush or Toothbrush:

  • For particularly stubborn dirt or to clean between the grid crevices, use a small brush or toothbrush. Dip it in the soapy water and scrub the hard-to-reach areas.

5. Rinse the Glass:

  • Rinse the sponge or brush in a bucket of clean water and then wring it out.
  • Wet the glass by gently wiping it down with the clean, damp sponge or brush.

6. Squeegee the Glass:

  • Starting at the top of the window, use the squeegee to remove the soapy water, pulling it down in a straight, vertical line.
  • Wipe the squeegee blade with a lint-free cloth or microfiber towel after each pass to prevent streaks.

7. Dry the Glass:

  • Use a dry, lint-free cloth or microfiber towel to wipe down the glass and remove any remaining moisture or streaks.

8. Address Stubborn Residue:

  • If there are stubborn spots or residue on the glass, use a scraper tool to gently remove them. Ensure the glass is wet while using the scraper to prevent scratching.

9. Inspect and Touch-Up:

  • Carefully inspect the window for any areas you may have missed or that require a touch-up. Re-clean as needed.

10. Clean the Window Frame:

  • After cleaning the glass, use a damp cloth to wipe down the window frame and mullions. Dry it with a clean cloth to prevent water damage.

11. Repeat for Other Panes:

  • Continue the same process for all the panes on the window.

12. Final Inspection:

  • Step back and take a final look to ensure all the grids and panes are clean and free from streaks.

Tips and Techniques for Cleaning Grids or Mullions

Cleaning windows with grids or mullions can be time-consuming, but with the following tips and techniques, you can make the process more efficient:

1. Plan Your Approach:

  • Work from top to bottom and left to right to ensure you don’t miss any panes.

2. Be Gentle:

  • Avoid using excessive pressure, especially on the grids or mullions, to prevent damage.

3. Regular Maintenance:

  • Implement a regular cleaning schedule to prevent the accumulation of stubborn dirt and make the process easier.

4. Drying Techniques:

  • Ensure you dry the glass and frames thoroughly to prevent streaks and water damage.

5. Use the Right Tools:

  • Choose the right-sized squeegee for the individual panes and grids. A smaller squeegee is easier to maneuver.

6. Safety First:

  • If you’re working at a height, use a stable ladder or step stool and follow all safety precautions.

7. Prevent Scratches:

  • Avoid using abrasive tools or materials that could scratch the glass or grids.

8. Consider Professional Help:

  • For hard-to-reach or particularly challenging windows, consider hiring professional window cleaners with experience in dealing with grids or mullions.

Conclusion

In reference to Window Cleaning Irving TX, cleaning windows with grids or mullions may be a more intricate task, but the end result is well worth the effort. These unique windows enhance the character of your home, and with the right techniques and regular maintenance, you can keep them looking pristine and beautiful. Remember that a systematic approach, gentle cleaning, and the proper tools are the keys to success when it comes to maintaining the charm and clarity of windows with grids or mullions.

DFW Window Cleaning of Irving

600 Burnwood Dr, Irving, TX 75062, United States

972-476-2947

Quality Glass Cleaning – Plano Window Cleaning & Glass Repair

Window Cleaning Plano TX can transform the ambiance of any space, whether it’s a home, office, or commercial establishment. Glass surfaces, when impeccably maintained, not only enhance the aesthetics but also contribute to a healthier and more pleasant environment.

In this exploration of quality glass cleaning, we will delve into the importance of pristine windows, the challenges faced in maintaining them, and the strategies employed by professionals to achieve crystal clear results.

The Significance of Clean Glass: Windows serve as portals connecting us to the external world. However, over time, they accumulate dust, grime, fingerprints, and other pollutants that mar their transparency. This not only obstructs the view but also diminishes the overall appeal of the surrounding space. Clean windows, on the other hand, allow natural light to penetrate, creating an open and inviting atmosphere. Moreover, they contribute to energy efficiency by maximizing the penetration of sunlight, reducing the need for artificial lighting.

Challenges in Glass Cleaning: Cleaning glass may seem straightforward, but it comes with its own set of challenges. Environmental factors such as pollution, hard water stains, and weather conditions can impact the cleanliness of windows. Interior factors like the type of glass, the presence of tinting or coatings, and the accessibility of the windows also play a role. Additionally, improper cleaning methods or the use of harsh chemicals can damage the glass surface, leaving it scratched or etched.

Professional Strategies for Quality Glass Cleaning:

  1. Assessment and Planning: Before initiating the cleaning process, professionals assess the condition of the glass. They take note of any specific issues such as stains, scratches, or hard water deposits. Based on this assessment, a tailored cleaning plan is developed to address the unique needs of each window.
  2. Proper Tools and Equipment: Quality glass cleaning requires the use of appropriate tools and equipment. Microfiber cloths, squeegees, and non-abrasive cleaners are commonly employed. Professionals are equipped with the latest tools to ensure efficient and effective cleaning without causing damage to the glass.
  3. Environmentally Friendly Cleaning Solutions: Harsh chemicals not only pose a risk to the environment but can also damage the glass surface. Professionals opt for eco-friendly cleaning solutions that are effective in removing dirt and grime without compromising the integrity of the glass. Vinegar, baking soda, and specialized glass cleaners are popular choices.
  4. Techniques for Stubborn Stains: Stubborn stains, such as hard water deposits or mineral buildup, require special attention. Professionals employ techniques like gentle scrubbing with soft brushes or the use of mild acids to dissolve and remove these deposits without harming the glass.
  5. Regular Maintenance Programs: To ensure long-term clarity and cleanliness, professionals often recommend regular maintenance programs. Scheduled cleanings prevent the buildup of dirt and stains, preserving the pristine condition of the glass over time.
  6. Safety Measures: Cleaning windows, especially in high-rise buildings, poses safety risks. Professionals adhere to strict safety measures, utilizing proper safety equipment and techniques to ensure the well-being of both the cleaners and the occupants of the building.

Conclusion:

Window Cleaning Plano TX is a meticulous process that goes beyond mere aesthetics. Pristine windows contribute to a healthier, more inviting living or working environment. By understanding the challenges involved and implementing professional strategies, one can achieve crystal clear views that not only enhance the beauty of the space but also promote overall well-being. Whether in homes, offices, or commercial spaces, investing in quality glass cleaning is an investment in clarity, beauty, and lasting impressions.

Plano Window Cleaning & Glass Repair

1201 Legacy Dr #2114, Plano, TX 75023, United States

1-972-544-1373

The Role of Pressure Washing in Commercial Window Cleaning – DFW Window Cleaning of Irving

As someone who has always appreciated the gleaming façade of commercial buildings, I’ve often marveled at the crystal-clear windows that adorn them. The impressive shine and impeccable appearance of these windows aren’t just the result of routine cleaning; it’s the science of pressure washing at play. Commercial window cleaning is a complex task that demands precision and expertise, and pressure washing is a pivotal component of this process.

In this article, I’ll share my insights into the role of pressure washing in commercial window cleaning and how it transforms dull, dirty windows into a pristine, polished showcase by following Irving Window Cleaning.

The Aesthetic Impact of Clean Windows

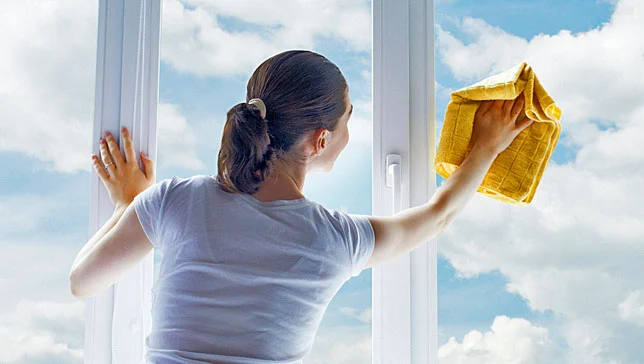
The visual impact of clean windows cannot be overstated. In the realm of commercial real estate, the appearance of a building is often the first impression it makes on clients, customers, and visitors. Clean windows not only enhance the overall aesthetics but also create an inviting and professional atmosphere. Whether it’s an office tower, a retail storefront, or a restaurant with a view, the windows serve as a reflection of the business itself.

Commercial Window Cleaning: A Unique Challenge

Cleaning commercial windows isn’t as simple as wiping them down with a paper towel and glass cleaner. The scale, complexity, and specific requirements of commercial properties pose a unique set of challenges for window cleaning:

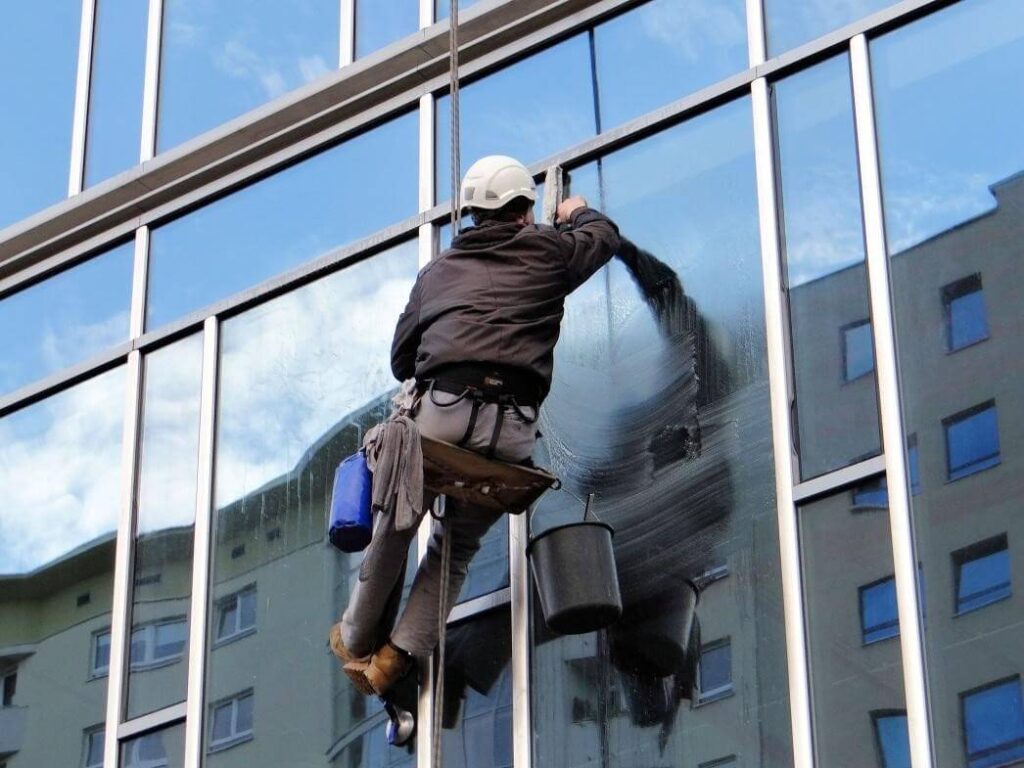
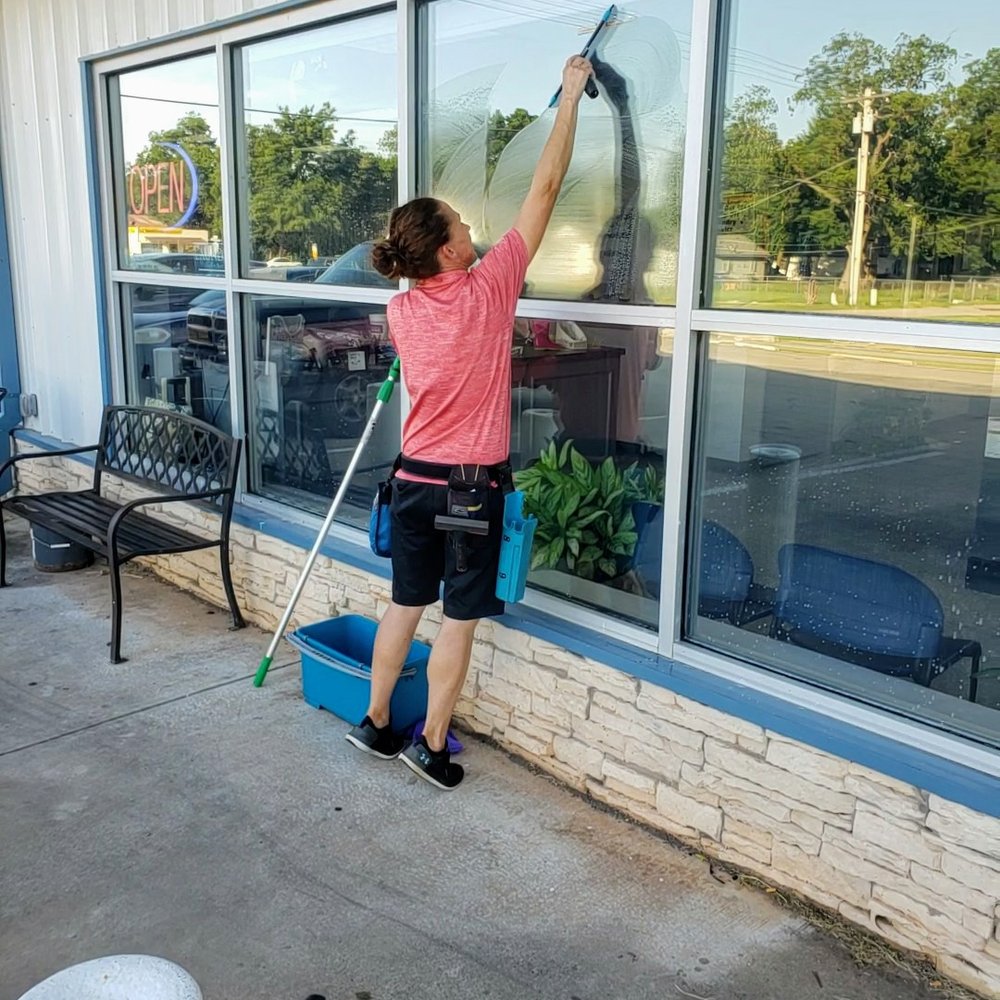
  1. Height: Many commercial buildings have multiple stories, making it necessary to access great heights for thorough cleaning.
  2. Safety: Working at height requires specialized training, equipment, and safety measures to prevent accidents and ensure the well-being of window cleaners.
  3. Large Surface Area: Commercial buildings often have extensive window surface areas, which can make the task time-consuming.
  4. Environmental Factors: Depending on location, windows may be exposed to various environmental elements, such as pollution, bird droppings, and weathering.
  5. Access to Different Types of Glass: Commercial buildings may feature various types of glass, including tinted, coated, or patterned, each requiring specific care during cleaning.
  6. Time Constraints: Businesses can’t afford to have their windows out of commission for extended periods. Quick and efficient cleaning is essential.

Pressure Washing: A Game-Changer in Commercial Window Cleaning

The multifaceted challenges of commercial window cleaning require innovative solutions. Pressure washing stands out as one of the most effective methods for transforming grimy windows into sparkling showcases. Here’s how pressure washing plays a crucial role in commercial window cleaning:

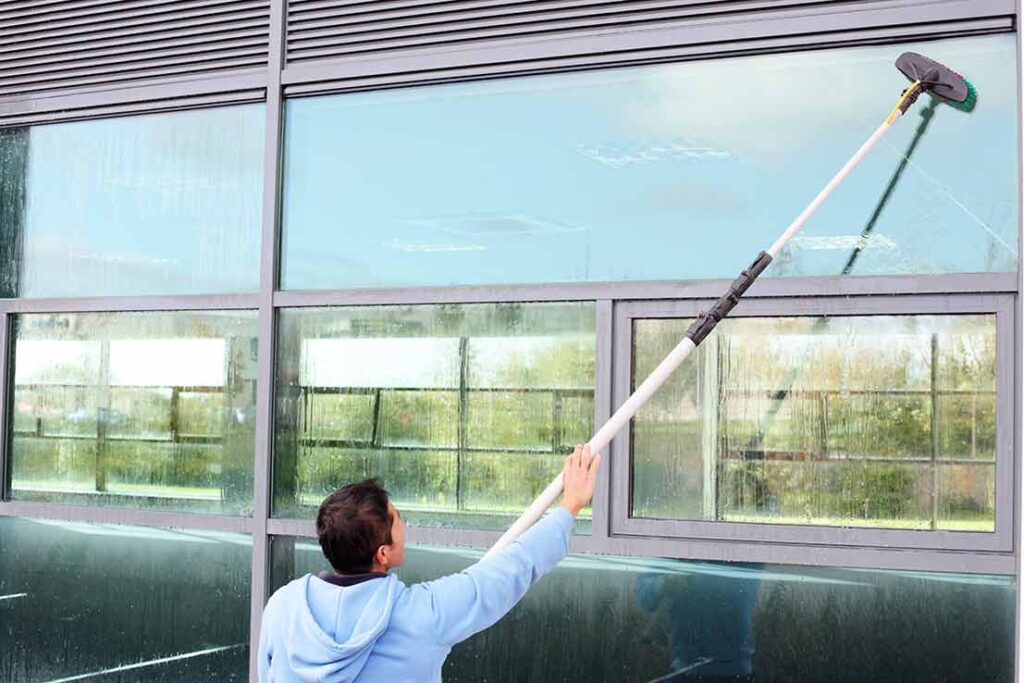
1. Power and Efficiency: Pressure washing uses a high-velocity stream of water to dislodge dirt, grime, and debris from the surface. This power allows for efficient and effective cleaning, especially on large glass surfaces.

2. Versatility: Pressure washing is versatile and can be adapted to different types of glass and window frames. Professionals can adjust the pressure and nozzle types to suit the specific requirements of the building.

3. Safety and Accessibility: Pressure washing is a safe method for accessing elevated windows. It eliminates the need for cleaners to physically reach high places, reducing the risk of accidents.

4. Quick Turnaround: Commercial window cleaning with pressure washing is known for its speed. Businesses can have their windows cleaned efficiently, minimizing downtime.

5. Environmentally Friendly: Pressure washing typically requires less chemical cleaning agents, making it an environmentally friendly option. The powerful water stream does the heavy lifting.

How Pressure Washing Works in Commercial Window Cleaning

The process of pressure washing for commercial window cleaning is precise and systematic. Here’s how it typically works:

1. Assessment: Window cleaning professionals assess the building, including the type of glass and the degree of soiling. They also consider any surrounding areas that need protection from overspray.

2. Equipment Setup: Pressure washing equipment is set up, including a high-pressure hose and an adjustable wand or nozzle. Safety equipment, such as harnesses and fall protection gear, is also prepared.

3. Pre-Cleaning: Before pressure washing, professionals may pre-treat the windows with a cleaning solution that helps break down dirt and grime, making the pressure washing process more effective.

4. Pressure Washing: The technician uses the pressure washer to apply a high-pressure stream of water to the glass surface. The angle and distance of the nozzle are adjusted to ensure thorough cleaning without causing damage.

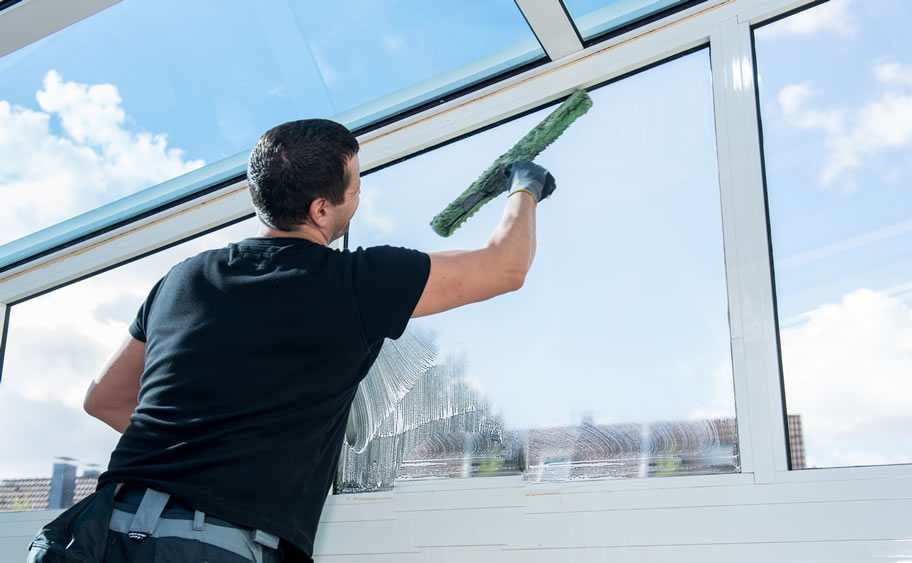
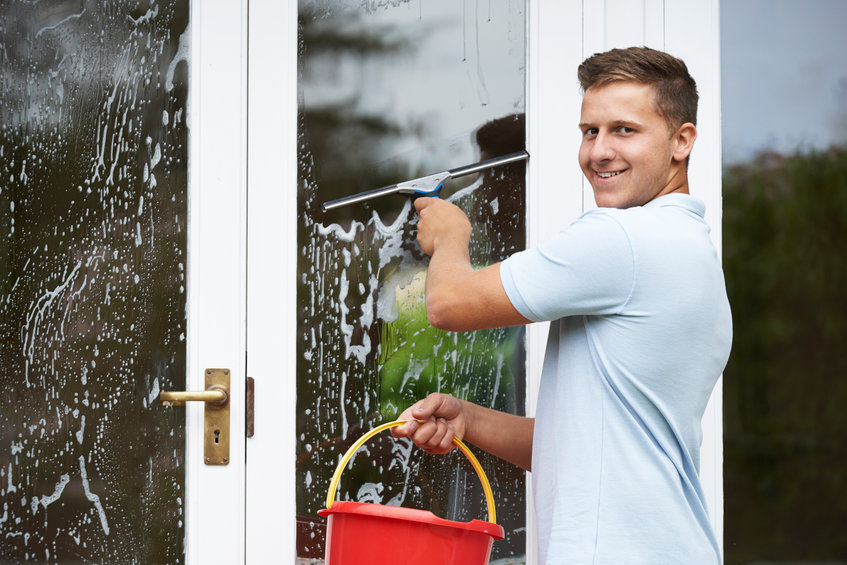
5. Squeegee Finish: After pressure washing, a squeegee is used to remove any remaining water and cleaning solution from the glass. This leaves the windows streak-free and sparkling.

6. Inspection: A final inspection is conducted to ensure that all windows are clean and free of streaks. Any areas requiring touch-ups are addressed.

Environmental Considerations: Responsible Pressure Washing

While pressure washing is highly effective in commercial window cleaning, it’s important to be mindful of environmental considerations. Here are some steps professionals take to ensure responsible pressure washing:

1. Water Reclamation: Many commercial window cleaning professionals use water reclamation systems that capture and filter the water used in the cleaning process. This prevents runoff of potentially contaminated water into storm drains.

2. Eco-Friendly Detergents: Environmentally friendly cleaning solutions are used whenever possible. These are biodegradable and minimize the impact on the environment.

3. Compliance with Regulations: Professionals ensure compliance with local environmental regulations, including obtaining any necessary permits for pressure washing.

Benefits of Professional Pressure Washing

Professional window cleaners are well-versed in the intricacies of pressure washing for commercial window cleaning. Here are some of the key benefits of enlisting their services:

1. Expertise: Professionals have the knowledge to assess the building’s specific needs and tailor their approach accordingly.

2. Safety: Professional window cleaners are trained in safety procedures and have the necessary equipment to work at height securely.

3. Time Efficiency: Businesses benefit from the efficiency of professional services, minimizing disruption to their operations.

4. Superior Results: The expertise and equipment of professionals ensure streak-free and pristine windows.

5. Responsible Cleaning: Professional window cleaners adhere to environmentally friendly practices, ensuring responsible pressure washing.

Conclusion: The Transformative Power of Pressure Washing

Overall, based from Irving Window Cleaning, in the world of commercial window cleaning, pressure washing stands out as a transformative tool. It addresses the unique challenges of cleaning windows in commercial buildings while delivering pristine results. The gleaming windows of commercial properties not only enhance the aesthetic appeal of the building but also leave a lasting impression on clients and visitors. As someone who has long admired the sparkle of commercial windows, I’ve come to appreciate the skill and precision of professional window cleaners and their mastery of the art of pressure washing. Their work is a testament to the power of innovation in preserving the beauty and professionalism of our commercial spaces.

DFW Window Cleaning of Irving

600 Burnwood Dr, Irving, TX 75062, United States

972-476-2947

Page 1 of 3

Powered by WordPress & Theme by Anders Norén