Your One Stop Local Business News

Tag: garage door repair Grapevine TX Page 1 of 2

How To Replace Garage Door Drum – Grapevine Garage Door & Gates


Garage Door Repair Grapevine TX Here’s a comprehensive guide with detailed instructions to help you replace a garage door drum effectively:

Step 1: Gather Necessary Tools and Materials Before beginning, gather all the tools and materials you’ll need for the job. This typically includes:

  • New garage door drum
  • Replacement cables (if needed)
  • Socket wrench set
  • Adjustable wrench
  • Vice grips
  • Hammer
  • Screwdriver
  • Safety glasses
  • Gloves
  • Ladder
  • Lubricant spray
  • Penetrating oil
  • Rag

Step 2: Disconnect Power Ensure that the power to the garage door opener is disconnected for safety. This can be done by unplugging it from the power outlet or turning off the circuit breaker supplying power to the opener.

Step 3: Release Tension from the Springs To release tension from the springs, use a winding bar to unwind the tension from the torsion springs. Insert the winding bar into the winding cone on the side of the drum and slowly unwind the spring tension until the cable becomes slack.

Step 4: Disconnect the Cables Once the tension is released, disconnect the cables from the old drum. Use vice grips to hold the cable in place while you loosen the set screws that secure it to the drum. Once the set screws are loosened, remove the cable from the drum.

Step 5: Remove the Old Drum Use a socket wrench to loosen the bolts that secure the drum to the torsion tube. Once the bolts are loose, slide the drum off the torsion tube and remove it from the garage door assembly.

Step 6: Install the New Drum Slide the new drum onto the torsion tube in the same position as the old drum. Make sure it is aligned properly and secure it in place by tightening the bolts with a socket wrench.

Step 7: Reattach the Cables Reattach the cables to the new drum by threading them through the cable drum grooves. Use vice grips to hold the cable in place while you tighten the set screws to secure it to the drum.

Step 8: Wind the Springs Using a winding bar, wind the tension back into the torsion springs. Insert the winding bar into the winding cone on the side of the drum and slowly wind the spring tension until the cable is taut.

Step 9: Test the Door Manually raise and lower the garage door to test the new drum and ensure it is operating smoothly. Check for any unusual noises or resistance that may indicate a problem.

Step 10: Lubricate Moving Parts Apply lubricant spray to the moving parts of the garage door assembly, including the drum, torsion tube, and cables. This will help ensure smooth operation and extend the life of the components.

Step 11: Reconnect Power Once you’re satisfied with the installation, reconnect the power to the garage door opener by plugging it back in or turning the circuit breaker back on.

Step 12: Clean Up Dispose of any old parts and clean up your work area. Use a rag to wipe away any excess lubricant or debris.

Garage Door Repair Grapevine TX you can successfully replace the garage door drum and ensure smooth and reliable operation of your garage door. Always prioritize safety and don’t hesitate to seek professional assistance if you encounter any difficulties.

Grapevine Garage Door & Gates

Grapevine Doors and Gates
2958 Wentwood Dr.
Grapevine, TX 76051

1-817-809-2507

How Long Does It Take To Install A Garage Door – Grapevine Gates & Garage Doors

Installing a Garage Door Repair Grapevine TX is a task that demands attention to detail, precision, and a methodical approach.

The duration of the installation process can be influenced by several factors, ranging from the type and material of the garage door to the expertise of the installer and even external elements like weather conditions.

Type of Garage Door:

The type of garage door you choose significantly impacts the installation time. A basic, single-panel garage door typically involves a simpler installation process and may take less time compared to a sectional or roller door. Single-panel doors swing up and down in one piece, whereas sectional doors comprise multiple sections that slide into place. The latter tends to be more time-consuming to install due to the additional components and precision required.

Material Matters:

The material of the garage door is another critical factor. Common materials include steel, wood, and aluminum. Wooden doors, for instance, may require additional steps such as staining or painting, elongating the installation time. Meanwhile, steel and aluminum doors are often quicker to install due to their lighter weight and durability.

Professional Expertise:

The experience and expertise of the installer play a pivotal role in determining the duration of the installation. A seasoned professional who has installed numerous garage doors can navigate the process more efficiently than someone attempting it for the first time. Additionally, having a team of installers can expedite the process, as tasks can be divided among them, leading to parallel progress.

Installation Steps:

Garage door installation involves a series of steps, each demanding careful attention. These steps typically include assembling the door sections, attaching hardware, installing tracks and rollers, and connecting any necessary opener mechanisms. The complexity of these tasks can influence the overall installation time. For instance, if the installation involves a sophisticated garage door opener with smart features, additional time may be required for programming and testing.

Weather Conditions:

The external environment, especially weather conditions, can be a variable in the installation equation. Rain, extreme heat, or cold temperatures can impact the installation process. Inclement weather may necessitate additional precautions or even halt the installation temporarily, leading to potential delays.

Average Duration:

On average, a straightforward garage door installation can span anywhere from a few hours to a full day. This estimate considers a standard, uncomplicated installation scenario. However, it’s essential to note that more intricate installations, such as those involving custom features or advanced security systems, may extend beyond this timeframe.

Conclusion:

In summary, the duration of a Garage Door Repair Grapevine TX is contingent on various factors. While a basic installation may be completed in a day, it’s crucial to account for the specificities of the chosen door, the installer’s proficiency, and potential external factors. Seeking professional guidance and expertise ensures not only a timely installation but also a seamlessly functioning garage door that enhances both convenience and security.

Grapevine Gates & Garage Doors

601 W Wall St, Grapevine, TX 76051

817-790-9634

How To Remove Cover On Chamberlain Garage Door Opener – Grapevine Gates & Garage Doors


Removing the cover of your Chamberlain Garage Door Repair Grapevine TX is a task that requires precision and attention to detail.

Follow these comprehensive steps to safely and effectively remove the cover, ensuring that you can access internal components for maintenance or repairs.

Preparatory Steps:

Begin by prioritizing safety. Disconnect the power supply to the garage door opener to prevent any electrical accidents. Identify the specific model of your Chamberlain opener and consult the user manual for any manufacturer-specific instructions on cover removal.

Assessment of Cover Fasteners:

Carefully inspect the garage door opener unit to identify the type of fasteners securing the cover. Common fasteners include screws, bolts, or clips. Take note of their locations and gather the necessary tools, such as a screwdriver or nut driver, for the removal process.

Tool Preparation and Organization:

Ensure that your tools are in good condition and appropriate for the fasteners on your Chamberlain opener. Organize them in a way that facilitates easy access during the removal process. Having the right tools at hand streamlines the task and minimizes the risk of damage.

Step-by-Step Removal Process:

Start by removing visible screws or bolts securing the cover. Turn them counterclockwise with the appropriate tool, keeping track of each fastener. If your opener uses clips, delicately release them with a flat-head screwdriver. Be cautious not to force or damage the clips during this step.

Additionally, inspect the entire perimeter of the cover for hidden fasteners. Manufacturers sometimes conceal them under labels or rubber plugs. Remove these additional fasteners with care to avoid any unnecessary complications.

Dealing with Wires:

Once all fasteners are removed, check for any wires attached to the cover. If present, disconnect them carefully, taking note of their positions. This step is crucial for reassembly, ensuring that you reconnect the wires correctly. Handle the wires gently to avoid damaging them.

Lifting the Cover:

With all fasteners removed and wires disconnected, lift the cover straight up. Take care not to snag on any internal components or pull on connected wires. Place the cover in a secure and clean location, protecting it from potential damage during the subsequent steps.

Accessing Internal Components:

With the cover successfully removed, you now have access to the internal components of the Chamberlain garage door opener. This accessibility is beneficial for various tasks, including routine maintenance, repairs, or adjustments.

Reassembly Process:

To reassemble the garage door opener, follow the removal steps in reverse. Begin by carefully aligning the cover, reconnecting any disconnected wires according to your notes. Secure the cover with the previously removed fasteners, ensuring they are tightened appropriately.

Powering On:

After reassembly, reconnect the power supply to the garage door opener. Test its functionality to ensure that the cover removal and reassembly did not disrupt its operation. Address any issues promptly to maintain the optimal performance of your Chamberlain opener.

Conclusion:

In conclusion, the process of removing the cover from your Chamberlain Garage Door Repair Grapevine TX involves meticulous steps to ensure both safety and effectiveness. Always prioritize safety by disconnecting the power before starting, and if you encounter any challenges, consult the user manual or seek professional assistance.

Grapevine Gates & Garage Doors

817-631-6355

How Much Are Garage Doors – Grapevine’s Maid Pros

The cost of a Garage Door Repair Grapevine TX can vary significantly depending on various factors, including the type of door, materials used, design, size, and additional features.

In this comprehensive guide, we’ll explore the factors that influence the price of garage doors and provide insights into the different options available in the market.

1. Types of Garage Doors:

There are several types of garage doors, each with its own set of characteristics and price range:

  • Sectional Garage Doors: These are the most common type of garage doors. They consist of panels that are connected with hinges and move along a track. Sectional doors can be made of various materials, including steel, aluminum, and wood.
  • Roll-Up Garage Doors: Roll-up doors, also known as coiling doors, roll vertically and are stored in a coil above the opening. They are often used in commercial and industrial settings but are also available for residential use.
  • Swing-Out or Swing-Up Garage Doors: These doors swing outward or upward to open. They are less common in residential settings but can add a unique aesthetic to a home.
  • Slide-to-the-Side Garage Doors: Similar to sectional doors, these doors move to the side instead of upward. They are ideal for situations where a traditional garage door may not be suitable.

2. Materials:

The material of the garage door significantly affects its cost. Common materials include:

  • Steel: Steel doors are durable, low-maintenance, and come in various styles. The thickness of the steel and the design can influence the cost.
  • Aluminum: Lightweight and resistant to rust, aluminum doors are suitable for coastal areas. They may cost more than steel doors but are less prone to corrosion.
  • Wood: Wooden garage doors offer a classic and elegant look. The type of wood, its quality, and the design intricacy can impact the cost.
  • Composite Wood: These doors combine wood fibers with other materials for a more durable and less maintenance-intensive option compared to solid wood.
  • Vinyl: Vinyl garage doors are known for their durability and resistance to dents and rust. They are also low-maintenance.

3. Design and Style:

The design and style of the garage door play a significant role in pricing. Custom designs, windows, decorative hardware, and unique finishes can increase the overall cost.

4. Insulation:

Insulated garage doors provide better temperature control and energy efficiency. The level of insulation, measured in R-value, can impact the cost. Doors with higher R-values are generally more expensive.

5. Size:

The size of the garage door is a crucial factor. Larger doors require more material and more complex mechanisms, resulting in higher costs.

6. Additional Features:

Certain features and accessories can add to the overall cost:

  • Windows: Adding windows to a garage door enhances its aesthetic appeal but can increase the price.
  • Smart Technology: Garage doors equipped with smart technology for remote monitoring and control may have a higher upfront cost.
  • Customization: Customized features, finishes, and hardware can contribute to a higher price.

7. Installation Costs:

Installation costs are a significant part of the overall expense. Professional installation ensures proper functioning and longevity of the garage door. Installation costs can vary based on location, complexity, and the need for any additional modifications.

8. Geographic Location:

Prices for garage doors may vary depending on your geographic location due to factors such as local demand, labor costs, and regional pricing trends.

Conclusion:

In conclusion, the cost of Garage Door Repair Grapevine TX can range from a few hundred to several thousand dollars. It’s crucial to consider factors such as the type of door, materials, size, design, insulation, and additional features when determining the overall cost. Additionally, obtaining quotes from multiple suppliers and considering long-term maintenance and energy efficiency can help make an informed decision when investing in a new garage door for your home.

Grapevine’s Maid Pros

1527 W State Hwy 114, Grapevine, TX 76051, United States

1-817-442-2239

How To Avoid Hitting Garage Door Frame – Grapevine Gates & Garage Doors

Avoiding collisions with the Garage Door Repair Grapevine TX frame is essential for the safety of your vehicle and the proper functioning of the garage door. Accidental hits can cause damage to both the vehicle and the door, leading to costly repairs. Here’s a comprehensive guide on how to avoid hitting the garage door frame:

: Install Parking Guides

One effective way to prevent collisions with the garage door frame is to install parking guides on the floor. These guides can be simple rubber or plastic strips that are attached to the floor in front of the garage door. They provide a visual and tactile indication of the correct stopping point for your vehicle.

: Use Parking Assist Devices

Consider using parking assist devices, such as ultrasonic sensors or laser-guided systems, to help you park your vehicle accurately within the garage. These devices can provide audio or visual cues to indicate your distance from the garage door frame, helping you avoid accidental collisions.

: Mark Parking Spot on the Floor

Marking the ideal parking spot on the garage floor can serve as a visual guide. Use tape, paint, or any other visible marker to create a clear indicator of where your vehicle should be positioned. This visual cue can be particularly helpful for family members who may be using the garage.

: Install Bumper Guards

Consider installing bumper guards on the garage door frame itself. These guards can absorb impact and protect both your vehicle and the door from damage in case of accidental contact. Bumper guards are available in various materials, including rubber and foam, and can be easily attached to the door frame.

: Check Side Mirrors and Use Rearview Camera

Before entering or exiting the garage, use your side mirrors to gauge the distance between your vehicle and the garage door frame. If your vehicle is equipped with a rearview camera, use it to get a clear view of the surroundings, helping you navigate safely within the confined space of the garage.

: Slow and Steady Approach

Adopt a slow and steady approach when entering or leaving the garage. Avoid sudden acceleration or deceleration, as this can lead to misjudgments and collisions. Take your time and maneuver your vehicle with caution to ensure a safe passage.

: Open the Garage Door Completely

Ensure that the garage door is fully open before attempting to drive in or out. Partially opened doors can obstruct your view and increase the risk of hitting the door frame. Wait until the door is completely open, providing a clear passage for your vehicle.

: Regularly Check Garage Door Sensors

Most modern garage doors are equipped with sensors that detect obstacles in the door’s path. Regularly check and maintain these sensors to ensure they are functioning correctly. If the sensors are misaligned or not working, it increases the risk of accidental collisions.

: Educate Family Members

If multiple people use the garage, ensure that everyone is educated about the proper parking procedures and the importance of avoiding collisions with the garage door frame. Communication and awareness among family members can contribute to a safer garage environment.

: Provide Adequate Lighting

Good visibility is crucial for avoiding collisions. Ensure that the garage is well-lit, both inside and outside. Proper lighting helps you see the surroundings clearly and reduces the likelihood of misjudging distances.

: Conduct Regular Maintenance

Regularly inspect and maintain your garage door and its components. Lubricate moving parts to ensure smooth operation, and check for any signs of wear or damage. A well-maintained garage door is less likely to malfunction and cause unexpected obstacles.

: Seek Professional Advice

If you consistently find it challenging to avoid hitting the garage door frame, consider seeking professional advice. A garage door technician can assess the situation, recommend adjustments, or suggest additional safety features to enhance the functionality of your garage door.

In conclusion, avoiding collisions with the Garage Door Repair Grapevine TX frame requires a combination of preventative measures, awareness, and careful maneuvering. By implementing these steps and fostering a safety-conscious approach, you can minimize the risk of accidental hits and ensure a secure and functional garage environment.

Grapevine Gates & Garage Doors

817-631-6355

How To Install Genie Garage Door Keypad – Grapevine’s Best Garage Doors

Installing a Genie Garage Door Repair Grapevine TX can be a straightforward process if you follow the instructions carefully.

Genie provides detailed instructions with their products, but here’s a general guide with approximately to help you install a Genie garage door keypad:

Materials You’ll Need:

  1. Genie garage door keypad (make sure it’s compatible with your Genie garage door opener model).
  2. Phillips screwdriver.
  3. Drill with appropriate bits (if needed).
  4. Mounting hardware (screws and anchors).
  5. Batteries (usually AAA).

: Choose a Location

Select a suitable location for your Genie garage door keypad. It should be easily accessible from outside your garage but not within easy reach of strangers. A common location is near the garage door, typically to the side or close to the door frame.

: Remove the Old Keypad (If Applicable)

If you’re replacing an old keypad, remove it from the wall by unscrewing any mounting screws. Disconnect any wires, if present, and discard the old keypad.

: Prepare the New Keypad

Open the battery compartment on the back of the Genie keypad and insert the provided batteries (usually AAA). Close the battery compartment securely.

: Program Your Keypad

  1. Locate the programming button on your garage door opener motor unit. This button is usually a small, square, or circular button with a label like “Learn” or “Program.”
  2. Press and release the programming button. The indicator light on the garage door opener motor unit will begin to flash, indicating that it’s in programming mode.
  3. Quickly enter a PIN code of your choice on the Genie keypad. The PIN should be between 3 to 8 digits long.
  4. Press the “Enter” or “Send” button on the keypad.
  5. Wait for the garage door opener motor unit’s indicator light to stop flashing. This indicates that the keypad has been successfully programmed.

: Mount the Keypad

  1. Position the Genie keypad on the wall at the chosen location. Make sure it’s level and aligned as you desire.
  2. If you’re mounting the keypad on wood or a similar material, use the provided screws to secure it in place. If you’re mounting it on a concrete or brick surface, you may need to use anchors and screws designed for such surfaces. Use a drill to create holes if necessary.
  3. Once the keypad is securely mounted, ensure that it doesn’t move or wobble when touched.

: Test the Keypad

  1. Stand outside your garage and enter the PIN code you programmed earlier on the Genie keypad.
  2. If the keypad is working correctly, the garage door should begin to open or close. It may take a few moments for the door to respond.
  3. Test the keypad multiple times to ensure consistent operation.

: Final Checks

  1. Double-check the mounting to ensure it’s secure.
  2. Make a note of your PIN code in a safe place for future reference.
  3. Test the keypad from different angles and distances to ensure reliable operation.
  4. If you encounter any issues, consult the Genie keypad’s manual or contact Genie customer support for assistance.

Congratulations! You’ve successfully installed your Genie Garage Door Repair Grapevine TX. It should now provide convenient access to your garage without the need for a physical key or remote control. Remember to periodically change your PIN code for security purposes, and always keep your PIN code confidential.

Grapevine’s Best Garage Doors

820 Kings Canyon Dr, Grapevine, TX 76051, United States

1-817-790-9634

Garage Door Panel Repair vs. Replacement – Grapevine Gates & Garage Doors

As a proud homeowner, I’ve always been mindful of the upkeep and maintenance of my property. It’s a place where I’ve invested not only my money but also countless hours of care and attention. So, when an unexpected issue arose with my garage door panels, I found myself facing a dilemma: Should I opt for garage door panel repair or replacement?

In Garage Door Repair, I’ll share my personal journey of weighing the pros and cons of both options and offer insights into making the right decision for your own home.

The First Sign of Trouble

The trouble began one sunny morning as I hit the button on my garage door opener, expecting the familiar hum and smooth ascent. To my dismay, I was met with a jarring noise, and the door refused to budge. After a few moments of frustration, I inspected the scene and quickly identified the problem: a dented and slightly warped garage door panel. The source of my annoyance was clear, but the solution was not.

Understanding the Significance of Garage Door Panels

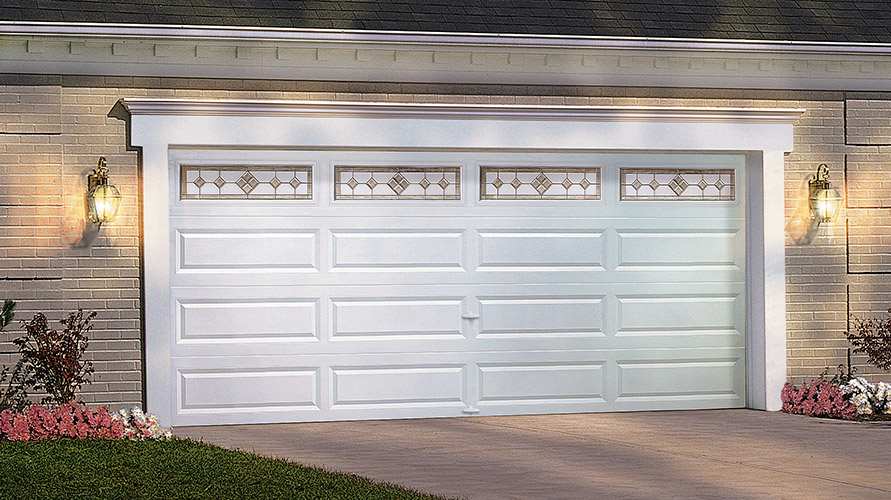
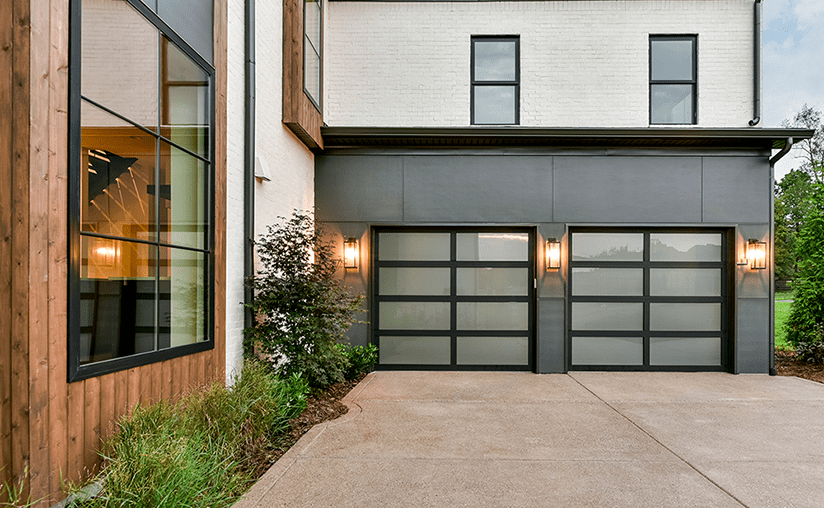
Before delving into the repair vs. replacement debate, it’s essential to understand the importance of garage door panels. These panels are the visible and functional parts of your garage door. They not only contribute to the overall aesthetics of your home but also play a critical role in the door’s functionality and insulation.

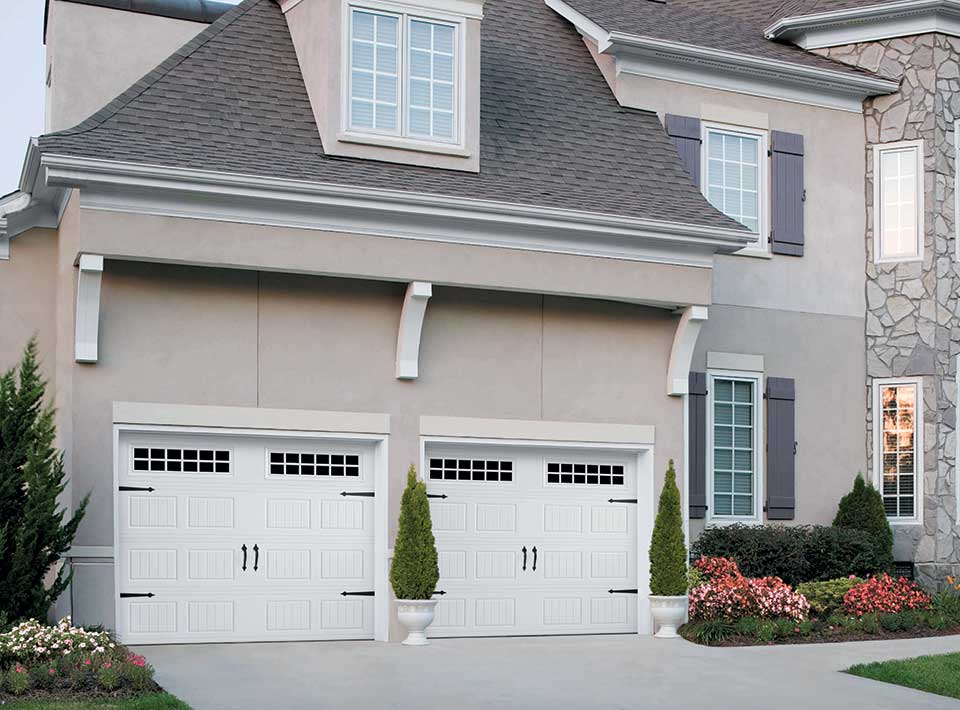
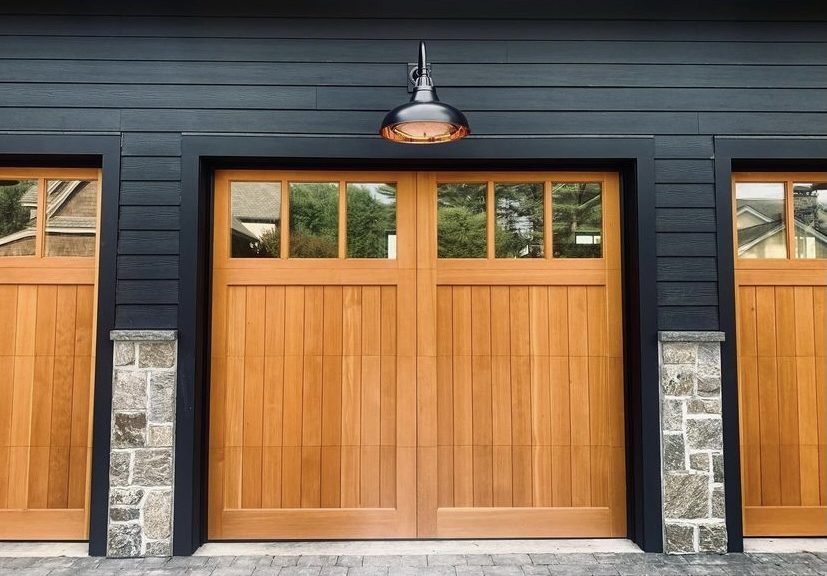
  1. Aesthetic Appeal: Garage door panels are highly visible from the street, and their condition significantly impacts your home’s curb appeal. A damaged or deteriorating panel can detract from the overall beauty of your property.
  2. Functionality: Each panel of your garage door is essential for the door’s smooth operation. Damage to a panel can lead to issues such as misalignment, uneven movement, and difficulty in opening and closing the door.
  3. Insulation: Modern garage doors are designed to provide insulation, helping regulate the temperature inside your garage. Damaged panels can compromise this insulation, leading to energy loss and potential discomfort in extreme weather conditions.

Repairing Damaged Garage Door Panels

Upon discovering the issue with my garage door panel, my initial instinct was to explore the possibility of repair. After all, if I could salvage the panel, it would be a cost-effective solution compared to a full replacement. Here are the steps and considerations for repairing damaged garage door panels:

1. Assessment: The first step is to assess the extent of the damage. Minor dents and scratches may be repairable, while severe warping or extensive damage might warrant replacement.

2. Dent Removal: Small dents and dings can often be repaired using methods like dent removal kits or professional services. These techniques involve smoothing out the damaged area and restoring the panel’s appearance.

3. Panel Reinforcement: For panels with minor structural issues, reinforcement methods can be applied to restore their integrity. This typically involves adding braces or struts to the panel.

4. Painting and Refinishing: After repairs, the panel may require painting and refinishing to match the appearance of the rest of the door. This step is crucial for maintaining the door’s aesthetic appeal.

5. Professional Assistance: It’s advisable to seek the expertise of a professional garage door technician for panel repairs. They have the tools and experience to assess the damage accurately and perform repairs effectively.

Pros of Repairing Garage Door Panels:

  • Cost-Effective: Repairing a damaged panel is often more cost-effective than replacing the entire door.
  • Preservation of Aesthetics: Repairing panels can help maintain the overall appearance of your garage door and home.
  • Sustainability: Repairing rather than replacing is a more environmentally friendly choice as it reduces waste.

Cons of Repairing Garage Door Panels:

  • Limited Repairs: Not all types of damage can be repaired, especially if the panel is severely warped or structurally compromised.
  • Aesthetic Mismatch: Achieving a perfect match in terms of color and texture can be challenging, potentially leaving visible differences between repaired and original panels.
  • Temporary Solution: Repairs may extend the life of the damaged panel, but it’s not a permanent fix. The panel may require replacement in the future.

Replacing Damaged Garage Door Panels

After weighing the pros and cons of repairing my garage door panel, I decided that replacement was the more practical and long-term solution in my case. Here’s what I learned about the process and considerations for replacing damaged garage door panels:

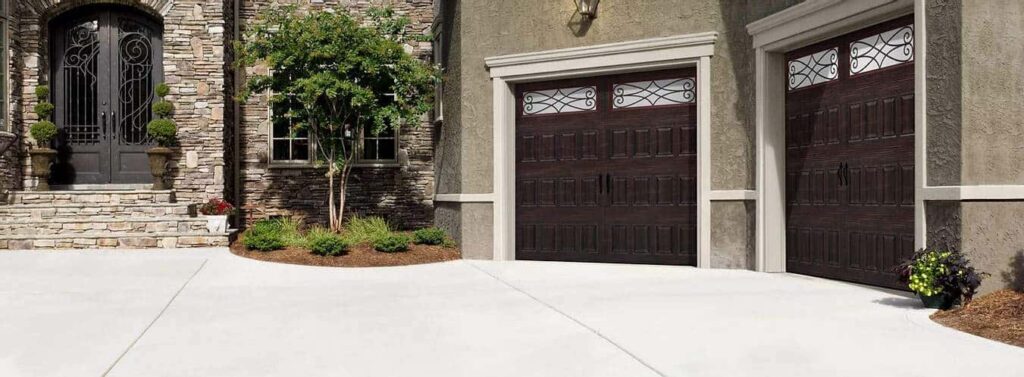
1. Panel Selection: When replacing a panel, it’s essential to choose a replacement panel that matches the style, design, and color of the existing door. This ensures a seamless and uniform appearance.

2. Professional Installation: Replacing garage door panels is a complex task best left to experienced professionals. They can safely remove the damaged panel and install the new one, ensuring proper alignment and functionality.

3. Insulation and Energy Efficiency: Replacing panels offers an opportunity to upgrade to more energy-efficient options, which can improve insulation and reduce heating and cooling costs in your garage.

4. Overall Door Integrity: Replacing a damaged panel restores the door’s structural integrity, ensuring that it operates smoothly and securely.

5. Cost Considerations: While panel replacement may be more expensive than repairs, it is a long-term investment in the functionality and aesthetics of your garage door.

Pros of Replacing Garage Door Panels:

  • Aesthetic Consistency: Replacing panels allows for a perfect match in terms of color, design, and texture, maintaining the door’s uniform appearance.
  • Improved Insulation: Upgrading to energy-efficient panels during replacement can enhance insulation and reduce energy costs.
  • Long-Term Solution: Panel replacement addresses the root of the problem, providing a more durable and long-lasting solution.

Cons of Replacing Garage Door Panels:

  • Higher Cost: Replacing panels is generally more expensive than repairs, primarily due to the cost of the new panel itself and professional installation.
  • Time-Consuming: The process of sourcing a matching panel and scheduling professional installation can take time.
  • Environmental Impact: Panel replacement generates waste, which may not be as eco-friendly as repairing the existing panel.

Making the Right Choice

Ultimately, the decision to repair or replace damaged garage door panels depends on several factors, including the extent of the damage, your budget, and your long-term goals for your garage door. As a homeowner, I realized the importance of evaluating these factors carefully and seeking professional advice when making this crucial decision.

Overall, based from Garage Door Repair, for minor dents and aesthetic issues, repairing garage door panels can be a cost-effective and viable solution. However, for more extensive damage or structural issues, panel replacement is often the better choice for ensuring the door’s longevity, functionality, and overall curb appeal. Regardless of your decision, prioritizing the maintenance and care of your garage door panels is essential to the continued safety and reliability of this vital home feature.

Grapevine Gates & Garage Doors

601 W Wall St, Grapevine, TX 76051, United States

817-631-6355

Where to Buy Garage Door Window Inserts – Grapevine Gates & Garage Doors

Buying Garage Door Repair Grapevine,TX can enhance the aesthetics and functionality of your garage door.

Whether you want to add natural light to your garage or improve its curb appeal, window inserts are a great option. In this 1000-word guide, we will explore where to buy garage door window inserts, considerations for your purchase, and installation tips.

Where to Buy Garage Door Window Inserts

  1. Local Home Improvement Stores:
    • Home Depot: Home Depot is a well-known home improvement retailer with a wide selection of garage door window inserts. You can visit a local store or order online.
    • Lowe’s: Lowe’s is another major home improvement store that offers various garage door window insert options. They have physical stores and an online platform for purchasing.
  2. Garage Door Dealers and Installers:
    • Many garage door dealers and installers offer garage door accessories, including window inserts. Contact local garage door professionals to inquire about their product offerings.
    • They may also provide installation services, which can be convenient if you want a professional to install the inserts for you.
  3. Online Retailers:
    • Amazon: Amazon is a popular online marketplace that offers a wide range of garage door window inserts from different manufacturers. Read product reviews and check ratings to make an informed choice.
    • eBay: eBay is another online marketplace where you can find various garage door window inserts. Be sure to review seller ratings and return policies.
  4. Specialty Garage Door Retailers:
    • Some specialty garage door retailers focus exclusively on garage door products and accessories. They often have a broad selection of window inserts designed specifically for garage doors.
  5. Manufacturer Websites:
    • Consider visiting the websites of manufacturers that specialize in garage door components. Many of them sell window inserts directly to consumers.
  6. Local Building Supply Stores:
    • Check with local building supply stores, as they may carry garage door window inserts in their inventory.
  7. Online Marketplaces:
    • Besides Amazon and eBay, you can explore other online marketplaces like Walmart, Overstock, and Wayfair, which may offer garage door window inserts.

Considerations When Buying Garage Door Window Inserts

Before making a purchase, there are several important considerations to keep in mind:

  1. Material and Durability:
    • Garage door window inserts are available in various materials, including plastic, glass, and acrylic. Consider the material’s durability and resistance to harsh weather conditions.
  2. Design and Style:
    • Choose window inserts that complement the style of your home and garage door. There are many designs and styles available, from traditional to modern.
  3. Size and Shape:
    • Measure the dimensions of your existing window openings on the garage door accurately. Ensure that the inserts you choose fit these dimensions correctly.
  4. Privacy and Security:
    • Consider whether you want clear windows for visibility or frosted/obscured options for added privacy and security.
  5. Insulation and Energy Efficiency:
    • Some window inserts offer insulation properties, which can help regulate the temperature in your garage. If energy efficiency is a concern, look for inserts with insulating features.
  6. Installation Method:
    • Check the installation method required for the window inserts. Some may require drilling, while others use adhesive or snap-in designs. Ensure you have the necessary tools and skills for installation.
  7. Maintenance:
    • Consider the maintenance requirements of the window inserts. Some materials may require more frequent cleaning or upkeep than others.
  8. Warranty:
    • Review the manufacturer’s warranty for the window inserts. A good warranty can provide peace of mind in case of defects or damage.
  9. Local Building Codes:
    • Ensure that the window inserts you choose comply with local building codes and regulations.

Installation Tips for Garage Door Window Inserts

Installing garage door window inserts can be a DIY project if you have the necessary tools and skills. Here are some installation tips:

  1. Gather Supplies:
    • Collect all the tools and materials required for installation, including a measuring tape, screwdriver, adhesive (if needed), and the window inserts themselves.
  2. Measure and Mark:
    • Measure the dimensions of the window openings on your garage door accurately. Use these measurements to mark the placement of the inserts.
  3. Follow Manufacturer Instructions:
    • Read and follow the installation instructions provided by the manufacturer carefully. Different inserts may have specific installation requirements.
  4. Prepare the Surface:
    • Clean the window openings thoroughly before installation to ensure proper adhesion or fitting.
  5. Secure the Inserts:
    • Depending on the type of inserts, use the appropriate method to secure them in place. This may involve screws, adhesive, or snap-in mechanisms.
  6. Check Alignment:
    • Verify that the inserts are level and aligned correctly. Make any necessary adjustments before finalizing the installation.
  7. Seal Edges (if required):
    • Some inserts may require sealing along the edges to prevent moisture infiltration. Follow the manufacturer’s recommendations for sealing.
  8. Test for Functionality:
    • Open and close your garage door to ensure that the inserts do not interfere with its operation.
  9. Regular Maintenance:
    • Periodically clean and inspect the window inserts to keep them in good condition.

In conclusion, Garage Door Repair Grapevine,TX are available from various sources, including local home improvement stores, online retailers, and garage door professionals. When purchasing, consider factors such as material, design, size, and installation method. Follow the manufacturer’s instructions and take the time to install them correctly to enhance the appearance and functionality of your garage door. With the right choice and installation, you can transform your garage and improve your home’s curb appeal.

Grapevine Gates & Garage Doors

601 W Wall St, Grapevine, TX 76051, United States

1-817-631-6355

How To Reattach Liftmaster Garage Door Opener – Grapevine Gates & Garage Doors

Reattaching a LiftMaster Garage Door Repair Grapevine TX opener involves securing the opener to the ceiling and connecting it to the garage door’s trolley system. Whether you’re reinstalling the opener after maintenance, relocation, or for other reasons, the process is relatively straightforward.

Here’s a comprehensive guide on how to reattach a LiftMaster garage door opener:

Step 1: Gather Your Tools and Materials

Before you begin, gather the necessary tools and materials:

Tools:

  • Power drill
  • Screwdriver
  • Wrenches (adjustable or open-end)
  • Stepladder or extension ladder
  • Pencil or marker
  • Level
  • Safety glasses

Materials:

  • LiftMaster garage door opener
  • Opener mounting bracket (usually included with the opener)
  • Lag screws or suitable hardware (usually included with the opener)
  • Garage door trolley assembly
  • Safety cables (if required by local regulations)
  • Hanging straps (if needed)
  • Angle iron or metal framing (if additional support is necessary)

Step 2: Safety Precautions

  1. Safety First: Before reattaching the garage door opener, ensure the garage door is in the fully closed position. This prevents the door from moving unexpectedly during installation.

Step 3: Determine Mounting Location

  1. Choose a Central Location: Select a location on the ceiling that is centered above the garage door. This provides balanced support for the opener and minimizes vibrations.
  2. Check for Obstructions: Ensure there are no obstacles, beams, or pipes that could interfere with the installation process.

Step 4: Install the Opener Mounting Bracket

  1. Assemble Bracket: Assemble the opener mounting bracket according to the manufacturer’s instructions.
  2. Mark Mounting Holes: Hold the bracket against the ceiling at the chosen location and mark the positions of the mounting holes using a pencil or marker.
  3. Check for Studs: If possible, use a stud finder to locate ceiling joists or beams that can provide extra stability for mounting. If not, you may need to use additional hardware, such as hanging straps or angle iron.

Step 5: Drill Holes and Mount Bracket

  1. Drill Pilot Holes: Use a power drill to create pilot holes at the marked positions. Make sure the holes are the appropriate size for the lag screws or hardware provided.
  2. Attach Bracket: Securely attach the opener mounting bracket to the ceiling using the provided lag screws or suitable hardware. If mounting to a stud or beam, ensure the screws go directly into the solid structure.

Step 6: Attach the Opener to the Bracket

  1. Attach Opener to Bracket: Depending on the LiftMaster model you have, follow the manufacturer’s instructions to attach the opener unit to the mounting bracket using the provided hardware.

Step 7: Hang the Trolley Assembly

  1. Attach Trolley to J-Arm: Hang the garage door trolley assembly on the opener’s J-arm. The trolley will connect the opener to the garage door.

Step 8: Check for Proper Alignment

  1. Operate the Opener: Test the garage door opener to ensure the trolley moves smoothly along the rail as you open and close the door. Ensure the door opens and closes evenly.
  2. Level and Alignment: Use a level to ensure the opener unit is properly aligned and level. Make any necessary adjustments to the opener’s position on the mounting bracket.

Step 9: Secure Wiring

  1. Secure Wiring: Use clips or straps to secure the wiring for the opener to the ceiling or walls. This prevents loose wires from interfering with the garage door’s movement.

Step 10: Attach Safety Cables (If Required)

  1. Safety Cables: If local regulations or building codes require it, attach safety cables to the garage door springs and the ceiling. These cables provide an additional layer of protection in case the springs break.

Step 11: Test and Adjust

  1. Test Opener: Operate the garage door opener multiple times to ensure smooth and proper operation.
  2. Make Adjustments: If you notice any misalignment or unusual noises, refer to the manufacturer’s instructions to make the necessary adjustments.

In conclusion, reattaching a LiftMaster Garage Door Repair Grapevine TX opener involves selecting a suitable location, installing the mounting bracket, attaching the opener unit, hanging the trolley assembly, checking for alignment, securing wiring, and testing the opener’s operation. By following the manufacturer’s instructions and ensuring proper alignment, you can successfully reattach your LiftMaster garage door opener and restore its functionality. If you encounter any challenges or uncertainties during the process, it’s recommended to consult the manufacturer’s guidelines or seek professional assistance.

Grapevine Gates & Garage Doors

601 W Wall St, Grapevine, TX 76051, United States

1-817-631-6355

How To Quiet A Loud Garage Door – Grapevine Gates & Garage Doors

A loud Garage Door Repair Grapevine TX can be disruptive and bothersome, especially if it’s affecting your home environment or disturbing neighbors. Fortunately, there are several steps you can take to quiet a loud garage door and enjoy a smoother and quieter operation.

Here’s a comprehensive guide on how to quiet a loud garage door:

Step 1: Identify the Source of Noise

  1. Listen Carefully: Pay attention to where the noise is coming from. Is it the opener, springs, rollers, hinges, tracks, or another part of the system?

Step 2: Lubrication and Maintenance

  1. Use a High-Quality Lubricant: Apply a silicone-based or garage door-specific lubricant to all moving parts of the garage door system, including rollers, hinges, springs, and tracks. Lubrication helps reduce friction and noise.
  2. Lubricate Regularly: Perform regular maintenance by lubricating the moving parts at least twice a year or as needed to keep them operating smoothly.

Step 3: Tighten Loose Hardware

  1. Check for Loose Bolts and Nuts: Inspect the garage door hardware, including hinges, roller brackets, and track bolts. Tighten any loose hardware using a wrench or socket set.

Step 4: Replace Worn or Damaged Parts

  1. Inspect Rollers: If your garage door rollers are worn, cracked, or damaged, consider replacing them with nylon rollers or quieter ball-bearing rollers. Nylon rollers tend to be quieter and smoother than metal rollers.
  2. Replace Hinges: If hinges are making noise, consider replacing them with nylon or quiet hinges designed to reduce friction and noise.

Step 5: Balance the Door

  1. Check Door Balance: An unbalanced garage door can cause excess noise and strain on the system. To check the balance, disconnect the opener and lift the door manually. If it’s difficult to lift or falls quickly, it’s likely unbalanced.
  2. Adjust Tension Springs: Adjust the tension springs to achieve proper balance. If you’re not experienced with this, it’s recommended to hire a professional.

Step 6: Insulate and Dampen Sound

  1. Apply Insulation: Adding insulation to the garage door panels can help dampen sound and create a quieter environment. Insulated doors also offer energy efficiency benefits.
  2. Install Weatherstripping: Install weatherstripping around the edges of the garage door to seal gaps and reduce noise from outside.

Step 7: Upgrade the Opener

  1. Choose a Belt-Drive Opener: If your garage door opener is chain-driven and noisy, consider upgrading to a belt-drive opener. Belt-drive openers are generally quieter due to their smoother operation.
  2. Vibration Isolation: Install vibration isolators or anti-vibration pads under the opener to reduce noise transmission to the ceiling and walls.

Step 8: Soundproof the Garage

  1. Add Acoustic Panels: If noise from the garage door is a persistent issue, you can install acoustic panels on the walls and ceiling of the garage to absorb sound and reduce echoes.

Step 9: Regular Maintenance

  1. Keep Up with Maintenance: Perform regular maintenance tasks, such as lubrication and inspections, to keep the garage door system in optimal condition and prevent excessive noise.

Step 10: Seek Professional Help

  1. Consult a Professional: If you’re unsure about any aspect of garage door maintenance or if the noise persists, it’s advisable to consult a professional garage door technician. They can identify and address the specific causes of noise and recommend appropriate solutions.

In conclusion, quieting a loud Garage Door Repair Grapevine TX involves lubricating moving parts, tightening loose hardware, replacing worn components, balancing the door, insulating, upgrading the opener, and soundproofing the garage if necessary. By following these steps and performing regular maintenance, you can enjoy a quieter and more comfortable garage door experience.

Grapevine Gates & Garage Doors

601 W Wall St, Grapevine, TX 76051, United States

1-817-631-6355

Page 1 of 2

Powered by WordPress & Theme by Anders Norén