Your One Stop Local Business News

Tag: Garage Door Repair Lantana TX

How Do I Fix My Garage Door Sensor – Lantana Gates & Garage Doors

Before diving into the troubleshooting process, it’s crucial to grasp the significance of Lantana Garage Door Repair.

These small devices play a pivotal role in preventing accidents by detecting objects or people in the door’s path. They ensure that the door stops and reverses if an obstruction is detected, keeping your family, pets, and possessions safe.

Common Issues with Garage Door Sensors

1. Sensor Misalignment

One prevalent issue is sensor misalignment. Over time, factors like vibrations or accidental bumps can knock the sensors out of their correct positions, disrupting their ability to communicate effectively.

2. Dirty Sensors

Dust, dirt, and spider webs can accumulate on sensor lenses, impairing their function. Regular cleaning is crucial to maintain optimal performance.

3. Wiring Problems

Faulty wiring is another culprit. Exposed or damaged wires can interrupt the signal between sensors, leading to malfunctions.

Tools You’ll Need

Before you embark on the repair journey, gather some essential tools: a soft cloth, a level, a screwdriver, and electrical tape. Having these on hand will make the troubleshooting process smoother.

Step-by-Step Guide to Fixing Garage Door Sensors

1. Check for Obstructions

Begin by inspecting the sensor area for any obstructions. Remove leaves, debris, or items blocking the sensors’ line of sight.

2. Clean the Sensors

Gently clean the sensor lenses with a soft cloth. Ensure they are free from dirt and dust, allowing for unobstructed communication.

3. Adjust Sensor Alignment

Use a level to check the alignment of the sensors. If they are misaligned, carefully adjust them until they are perfectly level.

4. Inspect Wiring

Examine the wiring connecting the sensors. Look for any visible damage or loose connections. Use electrical tape to secure any exposed wires.

5. Test the Sensors

Once everything is in order, test the sensors by opening and closing the garage door. Ensure it responds promptly without any hesitation.

When to Seek Professional Help

While many sensor issues are DIY-fixable, some complex problems may require professional intervention. If the sensors still malfunction after following the steps above, it’s time to call in the experts.

Tips for Preventing Future Sensor Issues

  • Regularly clean the sensors to prevent dirt buildup.
  • Be mindful of any potential obstructions in the sensor’s line of sight.
  • Periodically check the wiring for signs of wear or damage.

Conclusion:

Fixing your Lantana Garage Door Repair doesn’t have to be a daunting task. By understanding the common issues and following our step-by-step guide, you can ensure your sensors function optimally, providing the safety and convenience you rely on. Remember, preventive maintenance goes a long way in avoiding future complications.

Lantana Gates & Garage Doors

1180 Central Way, Lantana, TX 76226, United States

1-940-400-3038

How To Get A New Garage Door Opener Remote – Lantana Gates & Garage Doors

Getting a new Garage Door Repair Lantana TX is a straightforward process that involves several steps.

Follow this comprehensive guide to ensure you select the right remote and successfully program it for your garage door.

1. Identify Your Garage Door Opener Model:

Before purchasing a new remote, determine the model of your existing garage door opener. This information is usually found on the motor unit, and it helps ensure compatibility with the new remote.

2. Check for Universal Remote Compatibility:

Consider opting for a universal garage door opener remote. These remotes are designed to work with a variety of opener models and brands. Verify that the universal remote explicitly supports your garage door opener.

3. Purchase the Right Remote:

Visit a local home improvement store or shop online for the garage door opener remote that matches your opener model or is labeled as universal. Ensure the remote comes with a manual and batteries.

4. Read the Manual:

Carefully read the manual that comes with your new remote. Different remotes have varying programming instructions, and it’s crucial to understand the specific steps for your model.

5. Install Batteries:

Insert the provided batteries into the new remote. Make sure to follow the polarity markings to ensure proper battery installation.

6. Clear Existing Codes (if necessary):

If you are replacing an old remote or if there are issues with your current remotes, clear the existing codes on your garage door opener. This is typically done by pressing a button on the opener’s motor unit.

7. Locate the Learn Button:

Find the “Learn” or “Program” button on your garage door opener motor unit. This button is used to synchronize the remote with the opener. The location of this button varies by model and brand.

8. Programming Steps:

Follow the specific programming steps outlined in the remote’s manual. Generally, this involves pressing the “Learn” button on the opener, then pressing a button on the remote. The opener’s lights may flash or make a clicking sound to indicate successful programming.

9. Test the Remote:

After programming, test the remote to ensure it operates the garage door correctly. Stand at a reasonable distance from the door and press the remote button. The door should respond by opening or closing.

10. Troubleshooting:

If the remote doesn’t work, consult the troubleshooting section of the manual. Common issues include incorrect programming steps, low battery power, or interference with other devices.

11. Additional Features (if applicable):

Explore any additional features your new remote may offer, such as the ability to control multiple garage doors, integrate with smart home systems, or provide enhanced security options.

12. Keep the Manual:

Store the remote’s manual in a safe place for future reference. It contains valuable information about programming, troubleshooting, and maintenance.

By following these steps, you should be able to successfully get a new Garage Door Repair Lantana TX and have it programmed for use with your garage door. If you encounter difficulties, refer to the manual or seek assistance from the manufacturer’s customer support.

Lantana Gates & Garage Doors

1180 Central Way, Lantana, TX 76226, United States

1-940-400-3038

How To Install Side Door In Garage – Coppell Gates & Garage Doors


Installing a side door in your Garage Door Repair Lantana TX can provide convenient access and enhance the functionality of the space.

While the specific steps may vary depending on the type of door and your garage’s construction, here’s a general guide to help you get started. This guide will be divided into several sections, covering planning, preparation, installation, and finishing.

Planning

  1. Determine the Door Type: Choose the type of door that suits your needs and matches your garage’s aesthetics. Common options include solid doors, hollow core doors, and metal doors.
  2. Measurements: Accurate measurements are crucial. Measure the rough opening (the space where the door will go) to ensure the door fits correctly.
  3. Door Swing Direction: Decide whether the door will swing inwards or outwards, depending on your garage layout and preferences.
  4. Permits and Regulations: Check with your local building department for any necessary permits or regulations regarding garage door installation.

Preparation

  1. Gather Tools and Materials:
    • Tape measure
    • Level
    • Screwdriver
    • Hammer
    • Drill and drill bits
    • Saw (for resizing the door if needed)
    • Shims
    • Screws and anchors
    • Weatherstripping
    • Safety goggles and gloves
  2. Clear the Area: Remove any obstructions in the path of the door installation, such as clutter, tools, or debris.

Installation

  1. Remove Existing Trim or Siding (if applicable): If your garage has siding or trim where the door will go, carefully remove it to expose the framing.
  2. Prepare the Rough Opening:a. Ensure the opening is square and level. b. Add framing if necessary to create a solid structure around the opening.
  3. Position the Door:a. Place the door in the opening and make sure it fits snugly. b. Use shims to ensure the door is plumb and level. c. Check the door’s operation to ensure it swings freely.
  4. Secure the Door:a. Drill pilot holes through the door frame into the surrounding framing. b. Insert screws to secure the door in place. c. Verify that the door is still level and operates correctly.
  5. Weatherproofing:a. Apply weatherstripping around the door frame to seal any gaps. b. Ensure the door has proper insulation if needed for climate control.

Finishing

  1. Trim Installation:a. Install exterior trim around the door frame for a finished look. b. Caulk any gaps between the trim and the siding or wall to prevent drafts and water infiltration.
  2. Paint or Finish:a. Paint or finish the door and trim to match your garage’s overall appearance. b. Ensure you use exterior-grade paint or finish for durability.
  3. Hardware Installation:a. Install the doorknob, lockset, and any other hardware. b. Make sure the door functions correctly and locks securely.
  4. Final Inspection:a. Carefully inspect the entire installation for any issues. b. Test the door’s operation multiple times to ensure it opens and closes smoothly.
  5. Clean Up:a. Dispose of any debris and packaging materials. b. Organize your tools and materials for future use.

In conclusion, installing a side door in your Garage Door Repair Lantana TX can be a rewarding DIY project. However, it’s essential to plan carefully, gather the necessary tools and materials, and follow the installation steps diligently to ensure a secure and functional door. If you have any doubts or lack the necessary skills, consider consulting a professional contractor to assist with the installation.

Coppell Gates & Garage Doors

440 Shadowcrest Ln, Coppell, TX 75019, United States

1-972-449-7776

Budgeting for Your New Garage Door: Cost Considerations – Lantana Gates & Garage Doors

As a homeowner who recently went through the process of replacing my garage door, I understand the importance of budgeting wisely for this significant home improvement project. Your garage door not only plays a vital role in the functionality of your home but also contributes to its curb appeal and security.

In Garage Door Repair, I’ll share my insights into the various cost considerations when budgeting for a new garage door, helping you make informed decisions that align with your financial plan.

The Value of a New Garage Door

Before delving into cost considerations, it’s essential to recognize the value that a new garage door brings to your home:

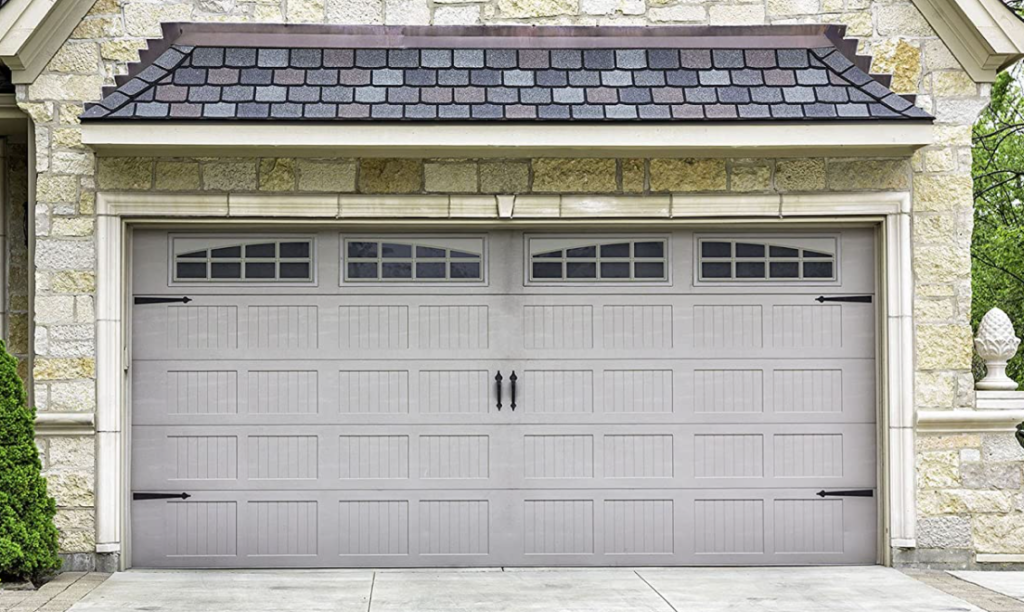
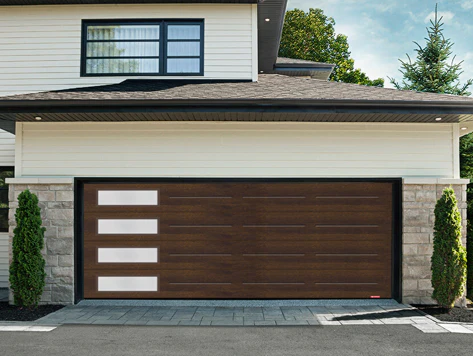
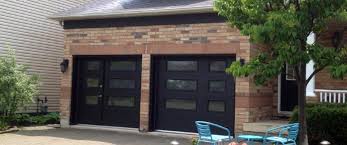
1. Curb Appeal: A new garage door can dramatically enhance the curb appeal of your home. It’s one of the first things visitors and passersby notice.

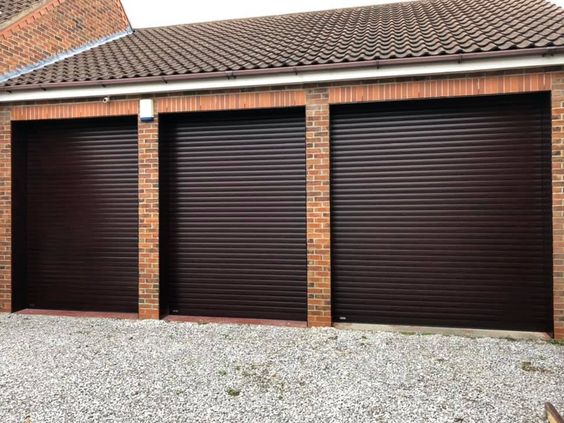
2. Security: A modern garage door often comes with improved security features, such as robust locks and durable materials, providing better protection for your belongings.

3. Energy Efficiency: Insulated garage doors can help regulate the temperature in your garage, which can impact the energy efficiency of your home, especially if your garage is attached.

4. Functionality: A new garage door operates smoothly and reliably, reducing the risk of malfunctions and costly repairs.

Cost Considerations When Budgeting for a New Garage Door

Budgeting for a new garage door involves several key considerations. Here’s a breakdown of the factors that can impact the overall cost:

1. Garage Door Material: The material you choose for your garage door significantly affects the cost. Common materials include:

  • Steel: Steel doors are durable, low-maintenance, and come in various price ranges, depending on the quality and design.
  • Wood: Wooden garage doors offer a classic, rustic look but tend to be more expensive and require more maintenance.
  • Aluminum: Aluminum doors are lightweight, low-maintenance, and can be less expensive than some other materials.
  • Fiberglass: Fiberglass doors are lightweight and resistant to dents and corrosion. They are generally priced between steel and wood doors.
  • Vinyl: Vinyl garage doors are durable and low-maintenance, falling in the mid-range of pricing.

2. Garage Door Style: The style of the garage door can impact its cost. Basic, single-panel doors tend to be more affordable than carriage-style or custom-designed doors.

3. Insulation: Insulated garage doors offer better temperature control and energy efficiency but are typically more expensive than non-insulated options.

4. Size: The size of your garage door plays a crucial role in the cost. Larger doors cost more than standard-sized ones.

5. Hardware and Features: The hardware, features, and accessories you choose, such as windows, decorative hardware, and smart technology, can add to the overall cost.

6. Installation Costs: Professional installation is recommended to ensure proper functioning and safety. Installation costs can vary based on your location and the complexity of the installation.

7. Labor Charges: Labor charges for the installation can vary depending on the installer’s expertise and reputation. It’s essential to get quotes from multiple installers to compare prices.

8. Removal and Disposal: If you’re replacing an old garage door, you’ll need to consider the cost of removing and disposing of the old door and its components.

9. Warranty: Some garage doors come with extended warranties, which may impact the initial cost but provide long-term peace of mind.

10. Customization: If you opt for a custom-designed garage door, expect to pay more for the unique design and features.

11. Opener and Accessories: If you’re also replacing your garage door opener or adding accessories like a keypad or remote control, factor in those costs.

Creating a Realistic Budget

Now that we’ve identified the various cost considerations, let’s discuss how to create a realistic budget for your new garage door:

1. Determine Your Priorities: Start by listing your priorities for the new garage door. Is energy efficiency your top concern, or are you looking for a specific design or material? Knowing your priorities will help you allocate your budget accordingly.

2. Research Options: Research different garage door materials, styles, and features to understand their price ranges. This will give you a better idea of what to expect in terms of costs.

3. Obtain Multiple Quotes: Reach out to multiple garage door dealers and installers to request quotes. Be clear about your preferences and budget constraints when seeking quotes.

4. Consider Long-Term Value: While a lower upfront cost may be appealing, consider the long-term value of your investment. A higher-quality, energy-efficient door may save you money on energy bills and maintenance over time.

5. Factor in Installation Costs: Don’t forget to account for professional installation in your budget. Skimping on installation can lead to problems down the road.

6. Plan for Additional Expenses: Be prepared for potential additional expenses, such as insulation, hardware upgrades, or any unforeseen issues during installation.

7. Explore Financing Options: If your budget is tight, look into financing options offered by garage door dealers or through third-party lenders. Financing can help you spread out the cost over manageable monthly payments.

8. Prioritize Safety and Security: Remember that investing in a secure and reliable garage door is essential for the safety of your home and belongings. Cutting corners on security features may not be advisable.

Tips for Cost Savings

If you’re looking to save on garage door costs without compromising quality, consider these tips:

1. Choose a Mid-Range Material: Opt for a garage door material that offers a balance between durability and cost. Steel or aluminum doors are often good choices.

2. Select Standard Sizes: Stick to standard garage door sizes to avoid customization costs.

3. Compare Quotes: Obtain quotes from different dealers and installers to find the most competitive pricing.

4. Prioritize Energy Efficiency: Investing in an insulated garage door can lead to long-term savings on energy bills.

5. Consider Basic Styles: Choose a basic, functional style if curb appeal is not a top priority.

6. Plan for Maintenance: Regular maintenance can extend the life of your garage door and reduce repair costs in the long run.

Conclusion: An Informed Investment

Overall, in Garage Door Repair, budgeting for a new garage door requires careful consideration of various factors, but it’s a valuable investment in your home’s functionality, security, and aesthetics. By understanding the cost considerations, setting realistic priorities, and exploring financing options when needed, you can make an informed decision that aligns with your budget and provides long-term value. Remember that a well-chosen garage door not only enhances your home but also contributes to its overall comfort and efficiency.

Lantana Gates & Garage Doors

1180 Central Way, Lantana, TX 76226, United States

940-400-3038

How To Paint A Wooden Garage Door – Lantana Gates & Garage Doors

Painting a wooden Garage Door Repair Lantana TX is a rewarding DIY project that can enhance the curb appeal of your home while also protecting the wood from the elements.

Whether you’re giving your garage door a fresh look or simply maintaining its condition, this comprehensive guide will provide step-by-step instructions on how to paint a wooden garage door effectively. By following these instructions and using the right materials, you can achieve a professional finish that will not only beautify your home but also extend the life of your garage door.

Materials Needed: Before you begin, gather the necessary materials and tools:

  1. Wooden Garage Door: Ensure the door is clean and in good condition.
  2. Sandpaper (120 and 220 grit)
  3. Primer
  4. Exterior Paint
  5. Paintbrushes (synthetic or natural bristle)
  6. Paint Roller and Tray
  7. Painter’s Tape
  8. Drop Cloth or Plastic Sheet
  9. Paint Stirrer
  10. Screwdriver (if needed)
  11. Cleaning Supplies (soap, water, and a scrub brush)
  12. Safety Equipment (gloves, safety glasses, mask)

: Prepare the Garage Door: The first step in painting your wooden garage door is proper preparation. This ensures that the paint adheres well and results in a long-lasting finish.

  1. Clean the Surface: Remove dirt, dust, and debris by scrubbing the door with soapy water and a scrub brush. Rinse thoroughly and allow it to dry completely.
  2. Remove Hardware: If your garage door has handles or other hardware, remove them using a screwdriver. This allows for easier and more even painting.
  3. Sanding: Use 120-grit sandpaper to sand the entire surface of the garage door. Sand in the direction of the wood grain to create a smooth surface. Afterward, switch to 220-grit sandpaper to achieve a finer finish. Remove all dust with a clean, damp cloth.

: Apply Primer: Priming is essential for ensuring proper adhesion and providing a stable base for the paint.

  1. Choose the Right Primer: Select an exterior wood primer suitable for your garage door’s wood type. Consult with a paint specialist if necessary.
  2. Stir the Primer: Use a paint stirrer to mix the primer thoroughly.
  3. Apply Primer: Using a paintbrush or roller, apply a thin, even coat of primer to the entire garage door. Be sure to cover all surfaces, including edges and corners. Allow it to dry according to the manufacturer’s instructions.
  4. Sand Again: Once the primer is dry, lightly sand the door with 220-grit sandpaper to smooth any imperfections. Wipe away dust with a clean cloth.

: Paint the Garage Door: Now comes the exciting part – applying the paint to your garage door.

  1. Choose Exterior Paint: Select a high-quality exterior paint in the color of your choice. Ensure it’s suitable for outdoor use and matches your home’s aesthetics.
  2. Stir the Paint: Stir the paint thoroughly to achieve a consistent color and texture.
  3. Apply the First Coat: Begin by painting the recessed panels and trim with a brush, ensuring you get into all the nooks and crannies. Then, use a paint roller to cover the larger flat areas. Apply a thin, even coat of paint and work in the direction of the wood grain.
  4. Allow to Dry: Let the first coat of paint dry completely according to the paint manufacturer’s instructions. This typically takes a few hours.
  5. Apply Additional Coats: Depending on the desired finish and the quality of your paint, you may need to apply one or two more coats. Repeat the process of painting, allowing each coat to dry before adding the next.

: Finishing Touches and Cleanup: After applying the final coat of paint, it’s essential to finish the project properly and clean up the work area.

  1. Reattach Hardware: Once the paint is completely dry, reattach any hardware you removed from the door.
  2. Remove Painter’s Tape: Carefully remove the painter’s tape while the paint is still slightly tacky to prevent peeling.
  3. Clean Tools: Clean your paintbrushes, roller, and any other tools you used with the appropriate cleaning agents. Properly dispose of any leftover paint and empty paint cans according to local regulations.
  4. Dispose of Waste: Collect and dispose of any drop cloths, plastic sheets, or debris responsibly.

Conclusion:

Painting a wooden Garage Door Repair Lantana TX is a project that requires attention to detail and patience. By following these steps and using quality materials, you can transform your garage door into a beautiful and protective asset for your home. Regular maintenance and periodic repainting will ensure that your garage door retains its appeal and continues to safeguard your property from the elements for years to come. With the right approach and a little effort, you can achieve a professional-looking finish that enhances your home’s overall appearance.

Lantana Gates & Garage Doors

1180 Central Way, Lantana, TX 76226, United States

1-940-400-3038

How To Remember To Close The Garage Door – Lantana Gates & Garage Doors

Remembering to close the Garage Door Repair Lantana TX is an important aspect of home security and safety. A forgotten open garage door can leave your belongings exposed and create a potential security risk.

Here are some strategies and tips to help you remember to close the garage door:

1. Establish a Routine:
Creating a consistent routine can help reinforce the habit of closing the garage door. Make it a part of your daily or evening routine to check and close the garage door before you go to bed or leave the house.

2. Set Alarms or Reminders:
Utilize alarms, reminders, or notifications on your smartphone or smart home devices to alert you to close the garage door. You can set a daily reminder at a specific time or whenever you’re leaving home.

3. Install a Garage Door Timer:
Some garage door openers come with built-in timers that automatically close the door after a specified period of time. If your opener supports this feature, consider using it to ensure the door closes even if you forget.

4. Use a Smart Garage Door Opener:
Upgrade to a smart garage door opener that can be controlled remotely through a smartphone app. These openers often include features like real-time alerts and the ability to close the door remotely, giving you peace of mind if you forget to close it.

5. Attach a Visible Reminder:
Place a visual reminder near the exit of your home, such as a note or a sign that says “Close the Garage Door!” This simple reminder can catch your attention and prompt you to take action.

6. Create a Chant or Mantra:
Create a short and memorable chant or mantra related to closing the garage door. Repeat it to yourself as you leave the house to reinforce the habit.

7. Use Home Automation:
Integrate your garage door opener with a home automation system. This can allow you to set up triggers that automatically close the garage door when certain conditions are met, such as when you leave your home perimeter.

8. Pair it with Another Habit:
Associate closing the garage door with another daily habit. For example, make it a rule to close the garage door every time you lock the front door.

9. Visual Checks:
Make it a habit to glance at the garage door as you leave your home. This quick visual check can help you confirm that the door is closed.

10. Involve Family Members:
Involve your family members in the effort to remember to close the garage door. Remind each other and hold each other accountable.

11. Post-It Notes:
Place a brightly colored Post-It note on the front door or another prominent location as a visual cue to check and close the garage door.

12. Gamify the Process:
Turn the task of closing the garage door into a game or challenge. For example, challenge yourself to see how quickly you can close the door after leaving the house.

13. Check from Anywhere:
If you have a smart security camera or smart home system, use it to check the status of your garage door remotely. This way, even if you forget, you can verify and close the door from your phone.

14. Reflect on Consequences:
Remind yourself of the potential consequences of leaving the garage door open, such as security risks or exposure to the elements. This can serve as a motivation to develop the habit.

15. Practice Mindfulness:
Practice being present in the moment as you leave your home. Pay attention to the actions you take, including closing the garage door, to increase your awareness and prevent forgetfulness.

Remembering to close the Garage Door Repair Lantana TX requires consistent effort and reminders. By implementing these strategies and making it a part of your daily routine, you can reduce the likelihood of forgetting and ensure the security of your home.

Lantana Gates & Garage Doors

1180 Central Way, Lantana, TX 76226, United States

1-940-400-3038

Negotiating Pricing with Garage Door Experts: Expert Tips for Homeowners – Lantana Gates & Garage Doors

Being a homeowner who values both quality and responsible spending, I’ve learned that negotiation is a powerful tool when it comes to essential home services. Dealing with garage door experts has taught me that negotiating pricing isn’t just about getting a lower cost—it’s about striking a balance between affordability and top-notch service.

In this article, I’m excited to share the wisdom I’ve gained through negotiating with garage door experts.

These expert tips from Garage Door Repair, have helped me navigate negotiations with confidence, ensuring that I get the best value for my money without compromising on quality.

  1. Building a Strong Foundation with Research and Knowledge

Before stepping into any negotiation, I believe in arming myself with knowledge. I start by researching various garage door services in my area to understand the average costs for the specific service I need. This knowledge becomes my foundation for informed negotiations.

  1. Transparent Communication: Sharing My Budget

Honesty is paramount during negotiations. I find that being upfront about my budget constraints creates an atmosphere of trust. Reputable garage door experts appreciate transparency and are often willing to work within my budget.

  1. Power of Multiple Quotes: Making Comparisons

I’ve found that gathering quotes from multiple garage door experts empowers me with a range of pricing to work with. This gives me the upper hand in negotiation by allowing me to make informed comparisons and encouraging competitive offers.

  1. Leveraging Package Deals: Bundling Services

When I require multiple services, I explore the possibility of bundling them together and negotiating for a package deal. Garage door experts often consider offering discounts when they see the potential for a larger project.

  1. Timing Your Negotiations: Capitalizing on Off-Peak Seasons

Timing plays a crucial role in negotiation success. I inquire about off-peak seasons or times when the garage door industry experiences lower demand. Negotiating during these periods increases my chances of securing a favorable deal.

  1. Requesting Value-Added Services: Maximizing My Investment

I’ve learned that negotiation isn’t limited to the base price. I ask for value-added services that enhance the overall package. This could include extended warranties, complimentary maintenance visits, or discounted future services.

  1. Politeness and Respect: Building Positive Relationships

A respectful and polite demeanor during negotiations builds positive rapport with garage door experts. A positive interaction often leads to a more successful negotiation.

  1. Flexible Payment Terms: Discussing Options

Discussing payment terms is completely acceptable. Some garage door experts offer flexible payment options like installment plans, making the service more accessible and manageable.

  1. Understanding the Cost Breakdown: Questioning Line Items

I make it a point to understand the breakdown of costs during negotiations. This allows me to question specific line items and ensure that each cost is justified. Being well-informed safeguards against overcharging.

  1. Loyalty Benefits: Discounts for Repeat Business

For repeat business, I inquire about loyalty discounts. Many professionals value long-term relationships and may offer reduced rates for returning customers.

  1. Requesting References: Validating Expertise

Asking for references from past clients not only validates the expertise of the garage door expert but also provides insights into their service quality. This information can serve as a negotiation point for better pricing.

  1. Negotiating for Value, Not Just Price: Prioritizing Quality

Negotiation is more than just haggling over price. I emphasize the importance of quality service and materials. A successful negotiation ensures that I receive value for my investment.

  1. Documenting the Agreement: Finalizing in Writing

Once a successful negotiation is reached, I ensure to document the agreement in writing. This prevents any misunderstandings or disputes down the line.

  1. Knowing When to Step Back: Valuing My Time and Money

Lastly, I’ve come to realize that not all negotiations will lead to an agreement that aligns with my needs. If the terms aren’t favorable, I don’t hesitate to explore other options and walk away.

In conclusion, by following Garage Door Repair and my journey in negotiating pricing with garage door experts has taught me that it’s an art of balance. Through diligent research, transparent communication, multiple quotes, and consideration of value-added services, I navigate negotiations confidently. I’ve discovered that negotiation is a collaborative process, and fostering positive relationships with garage door experts leads to mutually beneficial outcomes. Ultimately, effective price negotiation allows me to maximize my home improvement investments while ensuring the longevity and security of my garage door.

Lantana Gates & Garage Doors

1180 Central Way, Lantana, TX 76226, United States

940-400-3038

How to Adjust the Tension on a Garage Door-Lantana Garage & Overhead Doors

Adjusting the tension on a Garage Door Repair Lantana TX is an important maintenance task that ensures the door operates smoothly and safely. The tension, also known as the spring tension, affects the balance and ease of movement of the door. If the tension is too loose, the door may not stay open or close properly, and if it’s too tight, it can strain the opener and cause other issues.

In this guide, we will walk you through the step-by-step process of adjusting the tension on a garage door.

Before we begin, it’s essential to emphasize that adjusting garage door tension can be dangerous, as the springs are under high tension and can cause injury if mishandled. If you are uncomfortable or unsure about performing these tasks, it’s recommended to contact a professional garage door technician.

Tools and materials you will need:

  • C-clamps or locking pliers
  • Adjustable wrench or socket set
  • Ladder
  • Safety goggles
  • Lubricating spray (optional)

Step 1: Safety First Before starting any work, make sure to disconnect the power to the garage door opener to prevent any accidental activation. Put on your safety goggles to protect your eyes during the process.

Step 2: Identify the Springs Most garage doors have either extension springs or torsion springs. Extension springs are located on both sides of the door track, while torsion springs are positioned above the door. Torsion springs are typically enclosed in a metal shaft or tube.

Step 3: Determine the Current Tension To determine the current tension of your garage door, close the door and disconnect it from the opener by pulling the release cord. Slowly raise the door about halfway and let go. If the door stays in place, the tension is most likely correct. If it falls or rises, it indicates that the tension needs adjustment.

Step 4: Loosening the Springs If the tension needs to be increased, start by loosening the existing tension. For extension springs, place a C-clamp or locking pliers on the track just below the bottom roller to prevent the door from moving. Using an adjustable wrench or a socket set, loosen the set screws on the spring cones by turning them counterclockwise. Loosen them gradually and evenly.

For torsion springs, you need to secure the door in place. Use locking pliers or a C-clamp to grip the track just below the bottom roller. Then insert a winding bar into one of the winding cone holes on the spring. Slowly unwind the spring by turning the winding cone counterclockwise. Repeat this process on the other spring if necessary.

Step 5: Adjusting the Tension To increase the tension, tighten the set screws on the spring cones for extension springs. Turn the screws clockwise, but be careful not to overtighten them. For torsion springs, wind the spring by turning the winding cone clockwise using the winding bar. Again, make sure not to overtighten the spring.

Step 6: Testing the Tension Once you have adjusted the tension, remove the clamps or pliers securing the door. Reconnect the door to the opener and slowly raise it fully. Observe its movement and listen for any unusual sounds. The door should open and close smoothly and remain in the desired position without any sudden movements or imbalance. If the door still exhibits issues, you may need to readjust the tension further.

Step 7: Lubrication As an optional step, you can apply lubricating spray to the springs, hinges, rollers, and other moving parts of the garage door to ensure smooth operation. This can help reduce friction and prolong the lifespan of the components.

In conclusion, adjusting the tension on a Garage Door Repair Lantana TX is a task that requires caution and attention to detail. Following the steps outlined above, you should be able to safely adjust the tension to ensure your garage door operates smoothly and efficiently. However, if you are uncertain or uncomfortable with this process, it is always recommended to consult a professional garage door technician for assistance.

Lantana Garage & Overhead Doors

3501 FM 407 #15, Lantana, TX 76226

940-400-3038

Powered by WordPress & Theme by Anders Norén