Your One Stop Local Business News

Tag: garage door repair carlsbad ca

How To Fix My Garage Door – Denzel Garage Door Repair

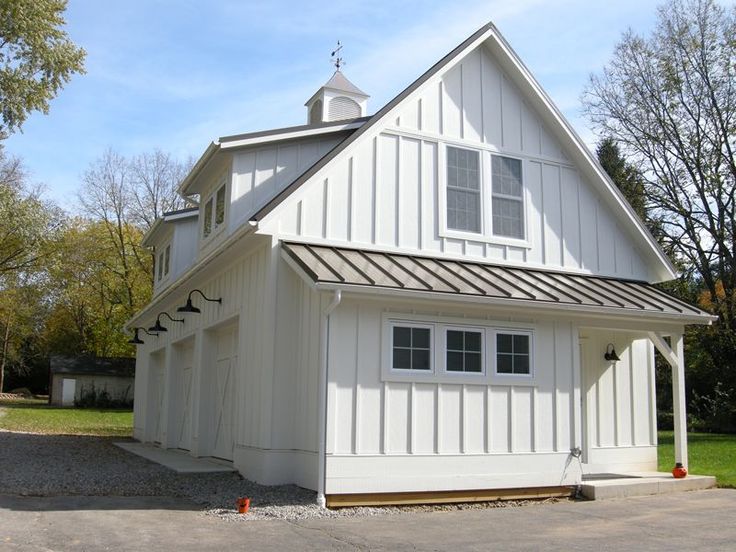
Repairing a Garage Door Repair Carlsbad CA can be a manageable task with the right guidance.

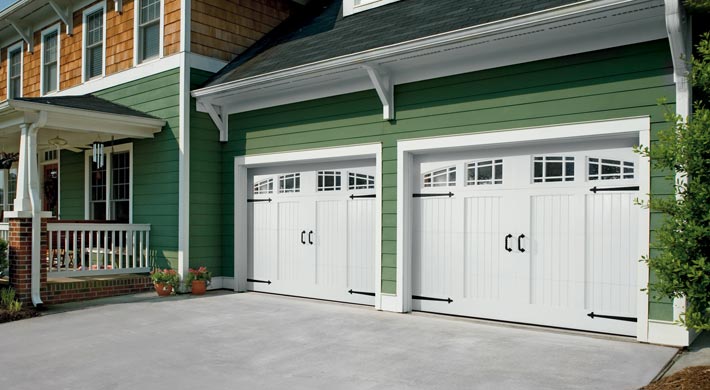
Whether your garage door is making unusual noises, not closing properly, or showing signs of wear, this comprehensive guide will walk you through the steps to diagnose and fix common issues.

: Safety First

Before you start any repair work, prioritize safety. Disconnect the power to the garage door opener to prevent accidental activation. If your garage door is spring-operated, exercise extreme caution, as garage door springs are under high tension and can be dangerous.

: Identify the Issue

Understanding the specific problem with your garage door is crucial for effective repairs. Common issues include:

  • Noisy Operation: If your garage door is making excessive noise, it may be due to worn rollers, loose hardware, or lack of lubrication.
  • Door Won’t Close: Check for obstructions in the door’s path and ensure that the safety sensors are aligned and functioning correctly.
  • Uneven Closing or Opening: Misaligned tracks or worn rollers can cause the door to operate unevenly.
  • Door Reverses Before Closing: This may be due to an issue with the garage door opener’s settings or safety sensors.
  • Weather Stripping and Seal Issues: Damaged weather stripping can allow drafts and pests into your garage.

: Lubricate Moving Parts

Proper lubrication is essential for the smooth operation of your garage door. Apply a silicone-based lubricant to moving parts such as hinges, rollers, springs, and the opener’s chain or screw. Lubrication helps reduce friction and minimizes wear and tear.

: Inspect and Tighten Hardware

Over time, nuts and bolts on your garage door can loosen due to vibrations. Inspect all hardware, including roller brackets, track bolts, and hinges. Tighten any loose hardware using a wrench.

: Check and Align the Tracks

Misaligned tracks can cause operational issues. Inspect the tracks for gaps between the rollers and the track, ensuring that they are properly aligned. Use a level to check the vertical alignment. If needed, loosen the bolts and gently tap the tracks into place with a rubber mallet.

: Examine and Replace Worn Rollers

Worn or damaged rollers can contribute to noise and uneven operation. Inspect the rollers for signs of wear, such as chipping or cracking. If they are worn, consider replacing them with high-quality nylon rollers for smoother operation.

: Test Safety Sensors

If your garage door won’t close, the issue may lie with the safety sensors. Check for obstructions in the sensor’s line of sight and ensure that they are properly aligned. Clean the sensors with a soft cloth and test the door’s operation.

: Adjust Spring Tension

Garage door springs counterbalance the weight of the door, and improper tension can lead to operational issues. If your door is difficult to open or close, consider adjusting the spring tension. Consult your garage door opener manual for specific instructions or seek professional assistance.

: Replace Damaged Weather Stripping

Damaged or worn weather stripping can compromise the insulation and security of your garage. Replace any damaged weather stripping along the sides and bottom of the door.

: Check and Adjust Opener Settings

If your garage door reverses before closing, check the opener settings. Some openers have sensitivity adjustments that control how much force is required to reverse the door. Consult your opener’s manual for instructions on adjusting these settings.

: Seek Professional Help if Needed

If you encounter difficulties or if the issue seems beyond your expertise, don’t hesitate to seek professional assistance. Garage door technicians have the experience and tools to diagnose and address more complex problems, ensuring the safety and optimal performance of your garage door.

: Regular Maintenance

To prevent future issues, incorporate regular maintenance into your routine. Schedule periodic inspections, lubricate moving parts, and address any emerging issues promptly. Regular maintenance contributes to the longevity and efficient operation of your garage door system.

Conclusion:

Fixing your Garage Door Repair Carlsbad CA involves a combination of inspections, adjustments, and maintenance tasks. By identifying the specific issue, addressing wear and tear, lubricating moving parts, and ensuring proper alignment, you can keep your garage door operating smoothly. Regular upkeep and timely repairs contribute to the longevity and reliability of your garage door system, providing convenience and security for your home.

Denzel Garage Door Repair

2380 Camino Vida Roble, Carlsbad, CA 92011, United States

1-760-970-8179

How to Adjust Garage Door Tension? – Denzel Garage Door Repair

As a homeowner who takes pride in maintaining the seamless functionality of my garage door, I’ve often found that the key to its smooth operation lies in achieving the perfect balance of tension. Adjusting garage door tension might seem like a daunting task, but with the right knowledge and a cautious approach, it can become a routine part of home maintenance.

By following Garage Door Repair, I’ll share my personal insights and experiences on how to navigate the intricacies of garage door tension adjustment.

Understanding the Dynamics: The Role of Garage Door Tension

Before delving into the adjustment process, it’s crucial to comprehend the role of tension in a garage door system. Tension is what allows the door to move smoothly along its tracks, both during the opening and closing phases. The two primary types of garage door systems—torsion and extension—have different mechanisms for managing tension:

1. Torsion Spring System:

In a torsion spring system, tension is maintained by the torque generated through the winding and unwinding of tightly wound springs mounted above the garage door.

2. Extension Spring System:

An extension spring system relies on the stretching and contracting of springs on either side of the door to provide the necessary tension.

Signs That Adjustment Is Needed:

Identifying when your garage door tension needs adjustment is the first step in the maintenance process. Look out for these signs:

1. Difficulty in Opening or Closing:

If your garage door is suddenly harder to open or close, it could be a sign of tension imbalance.

2. Uneven Movement:

An imbalanced door, where one side appears to sag or rise faster than the other, indicates a potential tension issue.

3. Unusual Noises:

Creaking, popping, or snapping sounds during operation may suggest that the tension needs adjustment.

4. Door Stops or Reverses:

If your garage door stops or reverses unexpectedly during operation, it may be struggling with tension-related issues.

Preparation: Safety First

Adjusting garage door tension involves working with powerful springs, and safety should always be the top priority. Here’s how I prepare for the task:

1. Gather the Necessary Tools:

Ensure you have the required tools, including winding bars, pliers, a socket set, and safety glasses.

2. Disconnect the Garage Door Opener:

For safety reasons, disconnect the garage door opener from the power source to prevent accidental activation during adjustment.

3. Use Caution Labels:

Place caution labels on the spring system to remind yourself and others of the potential dangers involved.

Adjusting Torsion Spring System: A Step-by-Step Guide

1. Locate the Torsion Springs:

Identify the torsion springs mounted above the garage door. There is usually one or two depending on the size and weight of the door.

2. Release Existing Tension:

Use winding bars to release tension from the existing springs. Insert the winding bars into the winding cone and carefully unwind the springs. This step is crucial for safe adjustment.

3. Adjust the Tension:

To increase tension, wind the springs in the direction specified by the manufacturer. To decrease tension, unwind the springs. Make adjustments in small increments, testing the door’s movement after each adjustment.

4. Balance the Springs:

Ensure that both torsion springs are adjusted evenly to maintain balance. A balanced system contributes to the smooth operation of the garage door.

5. Test the Door:

Reconnect the garage door opener and manually test the door’s movement. It should open and close smoothly without any jerking or imbalance.

Adjusting Extension Spring System: A Step-by-Step Guide

1. Identify the Extension Springs:

Locate the extension springs on both sides of the garage door. They run parallel to the tracks.

2. Release Tension:

Open the garage door completely to release tension from the extension springs. Use locking pliers or a C-clamp to secure the door in the open position.

3. Adjust the Cable:

On the side with the least tension, move the S-hook to a higher or lower hole on the track hanger. This adjusts the tension in the cable.

4. Test the Door:

Manually close the garage door and observe its movement. If further adjustment is needed, repeat the process until the door moves smoothly.

Common Mistakes to Avoid:

In my journey of adjusting garage door tension, I’ve learned to steer clear of common pitfalls. Here are some mistakes to avoid:

1. Over-tightening Springs:

Adjusting springs too tightly can lead to excessive tension, causing unnecessary strain on the door and opener.

2. Ignoring Safety Precautions:

Neglecting safety precautions can result in serious injuries. Always follow safety guidelines and use the appropriate tools.

3. Skipping Balance Checks:

Failure to balance the tension on both sides can lead to an imbalanced door, causing further issues down the line.

4. Lack of Regular Maintenance:

Ignoring regular maintenance can contribute to tension-related problems. Periodically inspect and adjust the tension as part of your home maintenance routine.

Conclusion: A Balancing Act for a Smooth Operation

Adjusting garage door tension may seem like a technical task, but with the right knowledge and precautions, it becomes a manageable part of home maintenance. Regularly checking and adjusting the tension ensures that your garage door operates smoothly, prolonging its lifespan and preventing potential issues.

As a homeowner and based from Garage Door Repair, mastering the art of adjusting garage door tension has empowered me to take control of the functionality of this essential entry point. From recognizing signs of tension imbalance to carefully executing the adjustment process, the journey has been a valuable lesson in maintaining the delicate balance required for a garage door’s smooth operation. As I continue to refine my skills, I find satisfaction in knowing that a well-adjusted garage door not only enhances the safety and efficiency of my home but also reflects the commitment to responsible homeownership.

Denzel Garage Door Repair

2380 Camino Vida Roble, Carlsbad, CA 92011, United States

760-970-8179

v

how to program overhead garage door opener to car – Carlsbad Garage Door & Gate Repairs

Programming your Garage Door Repair Carlsbad CA involves synchronizing the car’s built-in HomeLink system with the garage door opener.

The process may vary depending on the make and model of your car, as well as the type of garage door opener you have. Here’s a comprehensive guide to help you through the programming process:

: Gather Information Before you start, gather essential information about your garage door opener, including the brand and model. Locate the “learn” button on the garage door opener unit.

: Read the Car and Opener Manuals Refer to the manuals provided with both your car and the garage door opener. These manuals contain specific instructions and information that will be crucial during the programming process.

: Locate the HomeLink Buttons in Your Car Most cars come equipped with a HomeLink system, which is often integrated into the rearview mirror or the overhead console. Identify the HomeLink buttons in your car.

: Clear Existing HomeLink Memory (if needed) If the HomeLink buttons have been programmed previously, it’s recommended to clear the existing memory. This is usually done by pressing and holding the first and third HomeLink buttons simultaneously until the indicator light flashes rapidly.

: Identify the “Learn” Button on the Opener Unit Locate the “learn” button on the garage door opener unit. This button is typically on the back or side of the motor unit. Pressing this button puts the opener into programming mode.

: Program the HomeLink Buttons in Your Car Enter your car and turn the ignition key to the “On” position without starting the engine. Press and hold the desired HomeLink button (the one you want to program) and the garage door opener remote simultaneously. Continue holding both buttons until the HomeLink indicator light in your car flashes slowly, then rapidly. This process may take up to 20 seconds.

: Press the “Learn” Button on the Opener Unit Within 30 seconds of programming the HomeLink buttons in your car, go to the garage door opener unit and press the “learn” button. The indicator light on the opener should flash, indicating that it is ready to receive the new HomeLink code.

: Test the HomeLink System To confirm successful programming, press the programmed HomeLink button in your car. The garage door should respond by moving up or down. If it doesn’t, repeat steps 5-7.

: Repeat for Additional Doors or Gates If you have more than one garage door or gate, repeat the entire process for each additional HomeLink button in your car.

: Final Testing and Troubleshooting Perform a final test of all programmed HomeLink buttons to ensure they operate the garage door or gate correctly. If any issues arise, consult the troubleshooting section of your car’s manual or the garage door opener manual.

Conclusion:

By following these detailed steps, you should be able to successfully program your Garage Door Repair Carlsbad CA HomeLink system. Remember to consult the specific manuals for your car and garage door opener, as instructions may vary. This comprehensive guide aims to assist you in seamlessly integrating your car with your garage door opener, providing convenient and efficient access to your garage.

Carlsbad Garage Door & Gate Repairs

760-350-3536

How To Clear Memory On Chamberlain Garage Door Opener – Denzel Garage Door of Carlsbad

Clearing the memory on a Chamberlain Garage Door Repair Carlsbad CA is a relatively straightforward process, but it’s important to follow the steps carefully to ensure you don’t accidentally erase important settings or remotes from the system.

In this guide, I will provide you with detailed instructions on how to clear the memory on a Chamberlain garage door opener.

: Clearing the memory on your Chamberlain garage door opener is necessary in several situations:

  • If you have lost a remote control and want to remove it from the system.
  • When you move into a new home and want to erase the previous owner’s settings.
  • To troubleshoot issues with your garage door opener.

Before You Begin: Before you start the process of clearing the memory, gather the following items:

  1. A ladder (if necessary to reach the garage door opener).
  2. A flathead screwdriver or a small tool for pressing buttons (if required).
  3. A piece of paper and a pen to note down important information.

Step-by-Step Instructions:

1. Safety First:

  • Ensure that the garage door is closed before you begin.
  • Disconnect the power to the garage door opener. You can usually do this by unplugging it from the electrical outlet or turning off the circuit breaker that powers it. Safety precautions are essential to avoid accidents during this process.

2. Locate the “Learn” Button:

  • Look for the “Learn” button on your Chamberlain garage door opener. This button is typically located near the antenna wire hanging from the motor unit. The antenna wire is often a thin, coiled wire.

3. Press and Hold the “Learn” Button:

  • Press and hold the “Learn” button for approximately 10-15 seconds. You may need to use a small tool or a flathead screwdriver to press and hold the button effectively.

4. Observe the LED Light:

  • While holding the “Learn” button, observe the LED light on the garage door opener.
  • After about 10-15 seconds, the LED light will either flash or turn off. This indicates that the memory has been cleared.

5. Release the “Learn” Button:

  • Once the LED light has flashed or turned off, release the “Learn” button.

6. Resetting Remote Controls:

  • If you were clearing the memory to erase a lost or stolen remote control, you will need to reprogram your remaining remotes.
  • To do this, press and release the “Learn” button again. The LED light will come on.
  • Within 30 seconds, press and release the button on the remote control that you want to program. The garage door opener should respond by flashing its lights or making a clicking sound.
  • Repeat this process for each remote control you want to program.

7. Resetting Keypads:

  • If you have a wireless keypad, you will also need to reprogram it.
  • Enter the PIN code you want to use on the keypad and press the “Enter” or “Send” button.
  • Next, press and hold the “Learn” button on the garage door opener.
  • While holding the “Learn” button, enter your chosen PIN code on the keypad and release the “Learn” button.
  • Test the keypad to ensure it is working correctly.

8. Reconnecting Power:

  • Once you have cleared the memory and reprogrammed your remotes and keypad, reconnect power to the garage door opener by plugging it back in or turning on the circuit breaker.

9. Test the System:

  • Open and close the garage door using the remotes and keypad to ensure that they are working correctly.

10. Resetting Wi-Fi or Smart Features (Optional):

  • If your Chamberlain garage door opener has Wi-Fi or smart home capabilities, you may need to reset and reconfigure those features separately according to the manufacturer’s instructions.

Final Tips:

  • Keep a record of your garage door opener’s model number and any other relevant information in case you need to reference it in the future.
  • Always follow the manufacturer’s instructions, as specific models may have slight variations in the process.
  • If you encounter any difficulties or are unsure about any step, consider consulting the Chamberlain user manual or contacting Chamberlain’s customer support for assistance.

By following these step-by-step instructions, you should be able to successfully clear the memory on your Chamberlain Garage Door Repair Carlsbad CA and reprogram any remotes or keypads as needed.

Denzel Garage Door of Carlsbad

300 Carlsbad Village Dr 108a 205, Carlsbad, CA 92008, United States

1-760-378-7470

How Much Is A Garage Door Opener Installed – Carlsbad Garage Door & Gate Repairs

Garage Door Repair Carlsbad CA have become an essential part of modern living, providing convenience, security, and ease of access to our homes.

If you’re considering installing a garage door opener, you may be wondering about the cost and various factors that influence it. In this comprehensive guide, we will explore the average cost of garage door opener installation, the factors affecting the price, and tips for getting the best value for your investment.

The Average Cost of Garage Door Opener Installation

The cost of garage door opener installation can vary significantly based on several factors, including the type of opener, labor charges, and any additional features or accessories. On average, you can expect to pay between $300 and $600 for a standard garage door opener installation. However, this price range can increase depending on various factors.

Factors That Influence the Cost

  1. Type of Garage Door OpenerThere are three primary types of garage door openers: chain-drive, belt-drive, and screw-drive. Chain-drive openers are the most affordable, while belt-drive and screw-drive openers tend to be more expensive due to their quieter operation and durability. The type you choose will have a significant impact on the overall cost.
  2. Labor ChargesLabor costs for garage door opener installation can vary depending on your location and the complexity of the job. In general, expect to pay between $100 and $200 for labor. If additional work is required, such as electrical wiring or repairing an existing garage door system, labor charges may increase.
  3. Additional Features and AccessoriesGarage door openers come with various features and accessories that can enhance functionality and security. These may include remote controls, keyless entry systems, Wi-Fi connectivity, battery backups, and security cameras. Adding these features can increase the total cost of installation.
  4. Garage Door Size and WeightThe size and weight of your garage door can affect the cost of installation. Larger and heavier doors may require more powerful openers, which can be more expensive. Additionally, if your garage door is not in good condition and needs repairs or reinforcement, this will add to the overall cost.
  5. Location and Installation DifficultyWhere you live can impact the cost of installation. In areas with a higher cost of living, labor charges may be more expensive. The complexity of the installation can also affect the price. For example, installing a garage door opener on a sloped ceiling or a non-standard door may require additional work and increase the cost.
  6. DIY vs. Professional InstallationWhile some homeowners opt for DIY installation to save money, it’s essential to consider your skills and the potential risks involved. Professional installation ensures that the opener is correctly installed and complies with safety standards. DIY installation may save you money upfront but could lead to costly repairs or accidents in the long run.

Tips for Getting the Best Value

  1. Get Multiple Quotes: Obtain quotes from several garage door installation companies to compare prices and services. This will help you find the best deal in your area.
  2. Consider Long-Term Costs: While upfront costs are important, also consider the long-term costs associated with energy efficiency, maintenance, and durability when choosing a garage door opener.
  3. Research Opener Brands: Invest in a reputable garage door opener brand known for reliability and longevity. High-quality openers may cost more initially but can save you money in the long term.
  4. Ask About Warranties: Inquire about warranties offered by the manufacturer and installer. A good warranty can provide peace of mind and potentially save you money on future repairs.
  5. Evaluate Security Features: If security is a concern, consider garage door openers with advanced security features such as rolling codes and smartphone integration.
  6. Plan for Maintenance: Regular maintenance can extend the life of your garage door opener. Factor in maintenance costs when budgeting for your installation.

Conclusion:

Installing a Garage Door Repair Carlsbad CA is a valuable investment that can enhance your daily life and home security. The cost of installation can vary based on factors such as opener type, labor charges, additional features, and location. By understanding these factors and following the tips mentioned, you can make an informed decision that provides the best value for your needs and budget. Remember that safety and long-term reliability should be your top priorities when choosing a garage door opener and installation service.

Denzel Garage Door of Carlsbad

300 Carlsbad Village Dr 108a 205, Carlsbad, CA 92008, United States

1-760-378-7470

Realigning Off-Track Garage Doors: Steps to Take – Carlsbad Garage & Overhead Doors

As a homeowner who values both functionality and aesthetics, discovering that my garage door had gone off-track was a jolt of frustration. The uneven movement, the ominous noises, and the potential safety risks were enough to prompt immediate action. Determined to rectify the situation and restore my garage door to its smooth operation, I embarked on a journey to realign the door myself. Through careful observation, research, and hands-on work, I successfully navigated the process of identifying the off-track issue, understanding its root causes, and implementing effective solutions.

Now, I’m eager to share my experience and guide you through the step-by-step process of realigning an off-track garage door, ensuring your door functions as smoothly as it should as stated from Garage Door Repair Carlsbad CA.

Step 1: Recognizing the Problem

My journey began with a keen observation of my garage door’s behavior. Was it uneven in its tracks? Did it make unusual noises during operation? These initial signs were vital in pinpointing the off-track issue.

Step 2: Safety First

Before embarking on any repairs, I prioritized safety. I disconnected the automatic opener and engaged the manual release. This ensured that the door remained secure and prevented any unexpected movements.

Step 3: Clearing the Way

Clearing the area around the off-track door was crucial. Providing ample space to work not only made the process smoother but also minimized the risk of accidents.

Step 4: Roller and Track Examination

With a keen eye, I examined the rollers and tracks for any signs of damage or wear. Worn-out rollers were a common culprit for off-track garage doors, and identifying them was a step toward resolving the issue.

Step 5: Patient Realignment

With patience in mind, I gradually attempted to realign the door manually. It was important not to rush this step to avoid causing further damage.

Step 6: Tackling Bent Tracks

Bent tracks were another consideration. If I identified any bending or misalignment, I carefully used a rubber mallet to gently tap the tracks back into their correct positions. It was crucial to apply just the right amount of force.

Step 7: The Precision of a Level

Using a level was a game-changer in ensuring proper alignment. Placing it on the top edge of the door allowed me to identify any imbalances and make necessary adjustments to the tracks.

Step 8: Reattaching the Rollers

If any rollers had become dislodged during the off-track incident, I meticulously reattached them to the tracks. Ensuring their secure placement was essential for smooth movement.

Step 9: Testing the Success

With the door back on track, I manually opened and closed it to test its movement. Listening for any unusual sounds and checking for smooth operation confirmed the success of my efforts.

Step 10: A Lasting Solution through Maintenance

Realignment wasn’t the end of the journey. I applied lubricant to the rollers, hinges, and tracks to ensure ongoing smooth operation. Regular maintenance would help prevent future off-track incidents.

When to Seek Professional Help:

While I successfully realigned my garage door through DIY efforts, certain situations call for professional expertise:

  • Severe Damage: Extensive damage to the door, tracks, or components warrants professional attention to ensure proper repairs.
  • Complex Issues: If you encounter challenges beyond realignment, like structural damage or intricate track misalignment, professional assistance is recommended.

Overall, by following Garage Door Repair Carlsbad CA and as well as my journey of realigning an off-track garage door taught me the power of observation, patience, and proactive maintenance. By following the steps outlined above and prioritizing safety, I managed to diagnose and address the issue effectively. Regular upkeep, addressing worn-out components, and swift action can prevent future off-track incidents. With a garage door that glides smoothly once more, I’ve regained the functionality, security, and peace of mind that my home deserves.

Carlsbad Garage & Overhead Doors

300 Carlsbad Village Dr 108a 205, Carlsbad, CA 92008, United States

760-350-3536

How To Get Alexa To Open Garage Door – Carlsbad Garage & Overhead Doors

In this comprehensive guide, we will walk you through the process of integrating your Amazon Alexa device with your Garage Door Repair Carlsbad CA opener to enable voice commands for opening and closing the garage door. This integration adds convenience and enhances the smart home experience, allowing you to control your garage door effortlessly using just your voice.

Before we proceed, it is essential to emphasize the importance of safety and security when automating any aspect of your home, especially the garage door. Ensure that your garage door opener is compatible with smart home technology and meets the necessary safety standards. Additionally, always use strong, unique passwords for your devices to prevent unauthorized access.

Part 1: Check Garage Door Opener Compatibility

Before you begin, verify that your garage door opener is compatible with smart home systems, specifically Amazon Alexa. Many modern garage door openers are compatible, but older models may not be. Look for the following indicators of compatibility:

  1. Internet Connectivity: Ensure your garage door opener can connect to the internet either through built-in Wi-Fi or an add-on device.
  2. Smart Home Integration: Check the manufacturer’s documentation or website to see if they mention compatibility with Amazon Alexa or other smart home platforms.
  3. Third-Party Compatibility: If your garage door opener is not natively compatible, some third-party devices can bridge the gap between your opener and Alexa.

Part 2: Set Up Amazon Alexa

If you already have an Amazon Alexa device set up, skip this step. Otherwise, follow these steps to set up your Alexa device:

  1. Unbox the Alexa Device: Unbox your Amazon Echo or Alexa-enabled device and plug it into a power source.
  2. Connect to Wi-Fi: Follow the on-screen instructions to connect your Alexa device to your home Wi-Fi network using the Alexa app.
  3. Enable Skills: Open the Alexa app, navigate to Skills & Games, and search for the manufacturer’s skill for your garage door opener. Enable the skill and follow any additional setup instructions.

Part 3: Connect Garage Door Opener to Alexa

There are different methods to connect your garage door opener to Alexa, depending on the manufacturer and the smart home platform used. Here’s a general outline of the steps:

  1. Install the Smart Home Hub (if applicable): Some garage door openers require a smart home hub, like the Wink Hub or Samsung SmartThings, for integration with Alexa. Install and set up the hub following the manufacturer’s instructions.
  2. Link the Garage Door Opener: In the Alexa app, navigate to Smart Home and select “Add Device.” Search for your garage door opener manufacturer, and if available, select it from the list. Log in to your garage door opener account and authorize Alexa to access it.
  3. Discover Devices: Alexa will scan for compatible devices on your network. Once it discovers your garage door opener, it will be listed in the Alexa app.
  4. Test the Connection: Use the Alexa app or voice command to test the connection and ensure that Alexa can control your garage door opener.

Part 4: Security and Safety Considerations

Garage door openers are vital for home security, so it’s crucial to take precautions to ensure they are not easily exploited:

  1. Set a PIN: Enable a secure PIN for garage door control through Alexa. This adds an extra layer of protection, preventing unauthorized access to your garage.
  2. Multi-Factor Authentication: If supported, enable multi-factor authentication for your garage door opener account to enhance security.
  3. Disable Voice Purchasing: To prevent accidental purchases, disable voice purchasing in the Alexa app or set up a voice code for purchases.
  4. Regular Updates: Keep your garage door opener’s firmware up to date to ensure it benefits from the latest security patches.

Part 5: Voice Commands for Garage Door Control

With your garage door opener successfully integrated with Alexa, you can now use voice commands to control it. Some examples of commands include:

  1. “Alexa, open the garage door.”
  2. “Alexa, close the garage door.”
  3. “Alexa, ask [garage door opener skill name] to open the garage.”

Conclusion

Setting up Alexa to control your Garage Door Repair Carlsbad CA can significantly improve your smart home experience. With just a few simple steps, you can enjoy the convenience and hands-free control that voice commands offer. Always prioritize safety and security by following best practices and keeping your devices and passwords secure. Enjoy the ease and comfort of managing your garage door with your voice, making your smart home even smarter.

Carlsbad Garage & Overhead Doors

300 Carlsbad Village Dr 108a 205, Carlsbad, CA 92008, United States

760-350-3536

How to Mount Garage Door Sensors? – Carlsbad Garage & Overhead Doors

Mounting garage door sensors is an essential part of the installation process as they play a crucial role in ensuring the safety and proper operation of your garage door.

When I mounted my garage door sensors, I followed these steps from Carlsbad Garage Door to ensure the safety and proper functioning of my garage door:

  1. I gathered all the necessary tools and materials for the job, including the garage door sensors (consisting of a transmitter and receiver), mounting brackets, screws or adhesive tape (depending on the type of sensors), power drill (if using screws), screwdriver (if using screws), level, measuring tape, and safety goggles.
  2. I identified the appropriate location for mounting the sensors. I positioned them on the vertical tracks near the bottom, slightly above the ground. The receiver sensor was typically mounted on the left track, while the transmitter sensor was mounted on the right track.
  3. Using a measuring tape, I determined the proper height for mounting the sensors. I ensured they were aligned with each other and positioned to face each other across the garage door. I marked the locations where I would mount the sensors on the vertical tracks.
  4. If required, I prepared the mounting brackets for the sensors. Following the manufacturer’s instructions, I securely attached the brackets to the sensors.
  5. Starting with the receiver sensor, which is usually mounted on the left track, I positioned it at the marked location on the track. If I was using screws, I used a power drill and screwdriver to attach the sensor to the track using the provided screws. I made sure the sensor was level and firmly mounted.
  6. Moving on to the transmitter sensor, I positioned it at the marked location on the right track. I ensured it was aligned with the receiver sensor across the garage door. If screws were necessary, I attached the sensor to the track using the provided screws and a power drill and screwdriver. I checked that the sensor was level and securely mounted.
  7. Once both sensors were securely mounted, I connected them according to the manufacturer’s instructions. This typically involved connecting the transmitter sensor to the garage door opener unit using wires or cables. I followed the provided wiring instructions carefully to ensure proper connectivity.
  8. To test the alignment of the sensors, I closed the garage door slowly and observed the LED lights on the sensors. The lights should have been solid or changed color, indicating that the sensors were properly aligned and detecting each other. If the lights blinked or did not illuminate, it meant that the alignment was off. In such cases, I adjusted the sensor positions until the lights indicated proper alignment.
  9. I secured any loose wires or cables from the sensor connections using zip ties or clips. This prevented interference with the operation of the garage door or the sensors. I organized the wires neatly and kept them away from moving parts.
  10. Performing a final test was crucial. I opened and closed the garage door multiple times, carefully observing the sensor lights and ensuring that the door stopped and reversed if an object obstructed its path. I made any necessary adjustments to the sensor positions or alignment until the safety features functioned correctly.

In conclusion, according to Carlsbad Garage Door, I successfully mounted my garage door sensors, prioritizing the safety and proper operation of my garage door. It’s important to always refer to the manufacturer’s instructions for specific guidelines and consult a professional if any difficulties or specific questions arise.

Carlsbad Garage & Overhead Doors

300 Carlsbad Village Dr 108a 205, Carlsbad, CA 92008, United States

760-350-3536

Does Home Warranty Covers Garage Door? – Carlsbad Garage & Overhead Doors

When I first purchased my home, I was offered a home warranty through the real estate agent. At the time, I wasn’t sure if I needed it, but after hearing about the coverage it provided, I decided to sign up for it. One of the things I was curious about was whether the warranty would cover my garage door if it ever needed repairs.

A few months after moving in, I noticed that my garage door wasn’t opening and closing as smoothly as it used to. I tried a few troubleshooting steps, but I couldn’t figure out what was causing the problem. I remembered my home warranty and decided to look into whether it covered garage doors.

I reviewed my policy and saw that garage doors were covered, but only for mechanical failures caused by normal wear and tear. According to Garage Door Repair Carlsbad CA, I also learned that I needed to call the warranty company before hiring a repair technician, so I called the customer service number and explained the issue with my garage door.

The representative on the phone was very helpful and scheduled an appointment for a technician to come out and assess the problem. The technician arrived on time and quickly diagnosed the issue – one of the springs had broken and needed to be replaced. He provided an estimate for the repair cost, and the warranty company approved it.

The repair was completed within a few days, and my garage door was working like new again. I was relieved that the warranty covered the cost of the repair, which saved me hundreds of dollars. Since then, I’ve had a few other minor issues with my garage door, and each time, the warranty company has been responsive and helpful in getting them resolved.

Overall, as per Garage Door Repair Carlsbad CA, my experience with home warranties and garage door coverage has been positive. I feel more secure knowing that I have coverage for unexpected repairs, and I appreciate the convenience of being able to call one company to handle everything. I would definitely recommend home warranties to other homeowners, especially those with older homes or appliances that may be more prone to issues.

Carlsbad Garage & Overhead Doors

300 Carlsbad Village Dr 108a 205, Carlsbad, CA 92008, United States

760-350-3536

Powered by WordPress & Theme by Anders Norén