Your One Stop Local Business News

Tag: garage door repair Mesa AZ

How Much Is Garage Door Installation – JT’s Overhead Doors

The cost of Garage Door Repair Mesa AZ can vary depending on several factors, including the type of door, its size, material, additional features, and labor fees. In this comprehensive guide, I’ll provide an overview of the factors that influence garage door installation costs and discuss the typical price ranges for different types of installations.

Factors Influencing Garage Door Installation Costs:

  1. Type of Door:
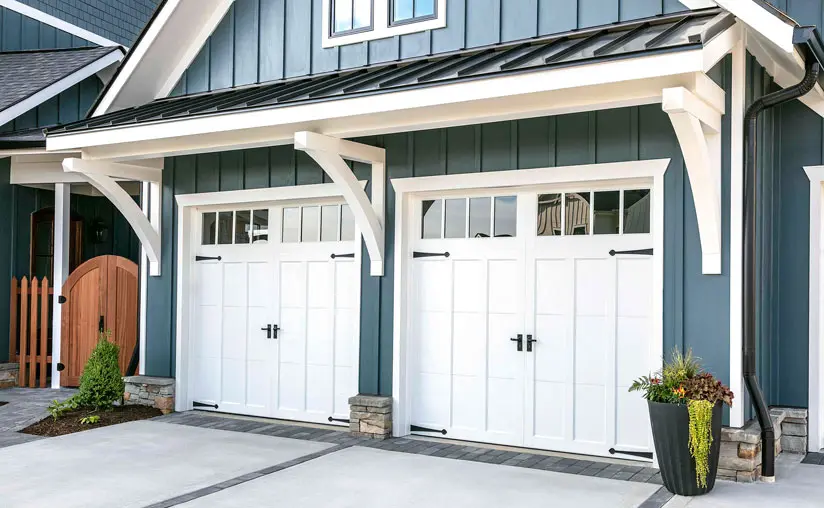
    • The type of garage door you choose significantly impacts the installation cost. Common types include sectional, roll-up, sliding, and side-hinged doors.
    • Sectional garage doors are the most popular choice and typically offer a wide range of styles, materials, and price points.
  2. Material:
    • Garage doors are available in various materials, including steel, wood, aluminum, vinyl, and fiberglass. The material you choose can affect both the initial cost and long-term maintenance requirements.
    • Steel doors are typically the most affordable option, while custom wood doors are often the most expensive due to their craftsmanship and customization.
  3. Size:
    • The size of the garage door, including width and height, directly influences the installation cost. Larger doors generally require more materials and labor, resulting in higher installation costs.
    • Standard single-car garage doors typically range from 8 to 10 feet wide, while double-car garage doors are typically 16 to 18 feet wide.
  4. Insulation:
    • Insulated garage doors offer improved energy efficiency and temperature control but tend to cost more than non-insulated doors. The level of insulation (single-layer, double-layer, or triple-layer) and the type of insulation material (e.g., polystyrene or polyurethane foam) can affect the installation cost.
  5. Additional Features:
    • Additional features such as windows, decorative hardware, insulation, and smart technology (e.g., Wi-Fi connectivity, remote access) can add to the overall cost of garage door installation.
    • Custom or specialty features may require additional customization or special ordering, resulting in higher installation costs.
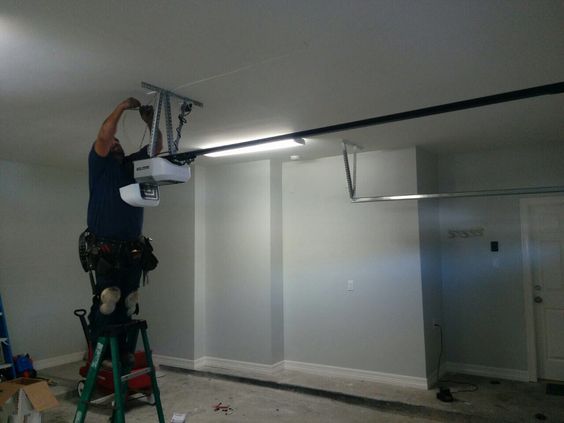
  6. Labor Fees:
    • Labor fees for garage door installation vary depending on factors such as the complexity of the installation, location, and contractor rates. Professional installation ensures proper fitting, alignment, and functionality of the garage door but adds to the total project cost.

Typical Price Ranges for Garage Door Installation:

  1. Standard Single-Car Garage Door:
    • The cost to install a standard single-car garage door typically ranges from $500 to $1,500, depending on the material, size, and additional features. This price includes the door, hardware, labor, and disposal of the old door.
    • Installation of a standard steel or aluminum door without insulation or custom features falls within the lower end of the price range, while installation of a custom wood or insulated door with decorative features falls within the higher end.
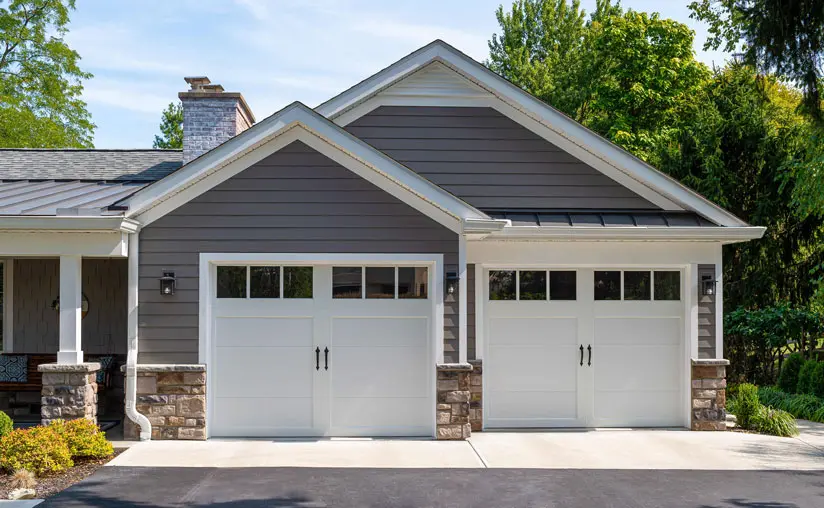
  2. Standard Double-Car Garage Door:
    • The cost to install a standard double-car garage door typically ranges from $800 to $2,500 or more, depending on the material, size, and additional features. This price includes the door, hardware, labor, and disposal of the old door.
    • Installation of a double-car garage door follows a similar pricing structure to single-car doors, with prices increasing proportionally based on size, material, and customization.
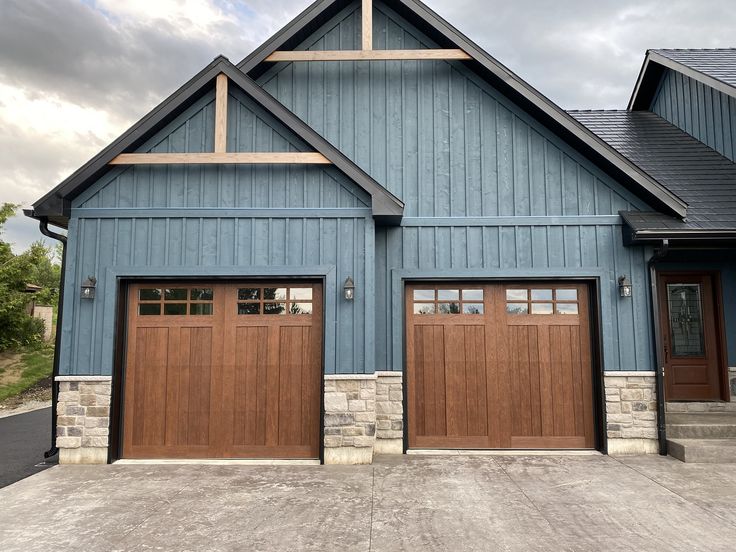
  3. Custom or Specialty Garage Door:
    • The cost to install a custom or specialty garage door can vary widely depending on the material, design, size, and features. Prices for custom garage doors start at around $2,000 and can exceed $10,000 or more for high-end or specialized designs.
    • Custom wood doors with intricate designs or specialty finishes typically command the highest installation costs due to the craftsmanship and customization involved.

Conclusion:

The cost of Garage Door Repair Mesa AZ varies based on factors such as the type of door, material, size, insulation, additional features, and labor fees. It’s essential to consider your budget, aesthetic preferences, and functional requirements when selecting a garage door and obtaining installation quotes. By understanding the factors that influence installation costs and obtaining estimates from reputable garage door installers, homeowners can make informed decisions and budget accordingly for their installation project. Professional installation ensures proper fitting, alignment, and functionality of the garage door, providing peace of mind and long-term value. If you’re unsure about the cost of garage door installation or need assistance with selecting a door, consider consulting with a qualified garage door installer or contractor for expert advice and service.

JT’s Overhead Doors

307 N Sandal, Mesa, AZ 85205, United States

1-480-662-3315

How To Program A Linear Garage Door Keypad – JT’s Overhead Doors


Garage Door Repair Mesa AZ  Here’s a detailed guide on how to program a Linear garage door keypad:

1. Locate the Learn Button on the Garage Door Opener:

  • Before programming the keypad, locate the “Learn” or “Program” button on your Linear garage door opener. This button is typically found on the motor unit or control panel of the opener.

2. Clear Previous Programming (if necessary):

  • If the keypad has been previously programmed or if you’re setting it up for the first time, it’s essential to clear any existing programming. To do this, press and hold the “Learn” or “Program” button on the garage door opener until the indicator light turns off or changes its behavior.

3. Choose a PIN Code:

  • Decide on a four-digit PIN code that you’ll use to operate the garage door. Choose a code that is easy for you to remember but difficult for others to guess. Avoid using sequential or repetitive numbers for security reasons.

4. Put the Keypad in Programming Mode:

  • Press and release the “Learn” or “Program” button on the garage door opener to put it in programming mode. The indicator light on the opener should begin flashing, indicating that it’s ready to receive programming signals.

5. Enter the PIN Code on the Keypad:

  • On the Linear garage door keypad, enter your chosen four-digit PIN code using the numeric keypad. Ensure that you press each button firmly and accurately. The keypad will typically beep or flash with each button press to confirm your input.

6. Send the Programming Signal:

  • Once you’ve entered the PIN code, press the “Enter” or “Send” button on the keypad to send the programming signal to the garage door opener. The indicator light on the opener should flash or change behavior, indicating that it has received the programming signal.

7. Test the Keypad:

  • Test the programmed PIN code by entering it on the Linear garage door keypad and pressing the “Enter” or “Open/Close” button. The garage door should begin to move, indicating that the keypad is functioning correctly. If the door doesn’t respond, double-check the programming steps and ensure that the PIN code was entered correctly.

8. Finalize Programming:

  • Once the keypad is programmed and tested, finalize the programming process by closing the keypad cover securely and ensuring that it’s protected from the elements.

9. Additional Programming Options (if available):

  • Some Linear garage door keypads may offer additional programming options, such as setting temporary PIN codes for guests or adjusting the backlight settings. Refer to the keypad’s instruction manual for details on these advanced features.

10. Regular Maintenance:

  • Periodically check and maintain the programmed keypad to ensure proper operation. Clean the keypad surface, replace the batteries as needed, and avoid exposing it to extreme temperatures or moisture.

Conclusion:

Garage Door Repair Mesa AZ  By following the steps outlined above and taking proper precautions, you can successfully program the keypad and enjoy hassle-free operation of your garage door.

JT’s Overhead Doors

307 N Sandal, Mesa, AZ 85205, United States

1-480-662-3315

How To Change Code On Chamberlain Garage Door Remote – JT’s Overhead Doors

Chamberlain Garage Door Repair Mesa AZ are convenient devices that allow you to open and close your garage door with the press of a button.

However, if you suspect that someone has gained unauthorized access to your garage or if you simply want to update your security code for peace of mind, you may need to change the code on your Chamberlain garage door remote. In this comprehensive guide, we’ll walk you through the step-by-step process of changing the code on your Chamberlain garage door remote.

: Identify Your Garage Door Opener Model

The first step in changing the code on your Chamberlain garage door remote is to identify the model of your garage door opener. Different models may have slightly different procedures for changing the code, so it’s essential to consult the owner’s manual or manufacturer’s website for specific instructions tailored to your model.

: Access the Learn Button on Your Garage Door Opener

Next, locate the “Learn” button on your garage door opener. This button is typically located on the back or side of the motor unit and may be labeled as “Learn” or “Program.” Press and release the “Learn” button to put your garage door opener into programming mode.

: Press and Hold the Learn Button

Once you’ve accessed the Learn button, press and hold it down until the indicator light on your garage door opener flashes. This indicates that the opener is ready to receive a new code from your remote.

: Select a New Code

With the garage door opener in programming mode, it’s time to select a new code for your Chamberlain garage door remote. Choose a code that is easy for you to remember but difficult for others to guess. Avoid using common combinations such as “1234” or your birthdate, as these are easily compromised. Instead, opt for a unique combination of numbers that you can easily recall.

: Program the New Code into Your Remote

Now that you’ve selected a new code, it’s time to program it into your Chamberlain garage door remote. The programming process may vary slightly depending on the model of your remote, so refer to the owner’s manual or manufacturer’s website for specific instructions. In general, you’ll need to press a combination of buttons on the remote in a specific sequence to enter the new code.

: Test the Remote

Once you’ve programmed the new code into your Chamberlain garage door remote, it’s essential to test it to ensure that it’s working correctly. Stand within range of your garage door opener and press the button on your remote to open and close the door. If the door responds as expected, congratulations! You’ve successfully changed the code on your Chamberlain garage door remote.

: Update Other Remotes and Keypads

If you have multiple Chamberlain garage door remotes or keypads, you’ll need to repeat the programming process for each device to ensure that they all have the same updated code. This helps maintain consistency and security across all access points to your garage.

: Securely Store Your Remote

Finally, once you’ve changed the code on your Chamberlain garage door remote, be sure to store it in a safe and secure location. Avoid leaving it in your car where it could be stolen or accessed by unauthorized individuals. Instead, keep it in a secure place inside your home where only you can access it when needed.

Conclusion:

In conclusion, changing the code on your Chamberlain Garage Door Repair Mesa AZ is a simple yet effective way to enhance the security of your garage and protect your belongings. By following the step-by-step process outlined in this guide, you can update your remote’s code quickly and easily, giving you peace of mind knowing that your garage is secure. Remember to choose a unique code, program it into your remote, and test it to ensure proper functionality. With a few simple steps, you can enjoy added security and convenience with your Chamberlain garage door opener.

JT’s Overhead Doors

307 N Sandal, Mesa, AZ 85205, United States

1-480-662-3315

How To Reprogram Overhead Garage Door Remote – JT’s Overhead Doors

Reprogramming an overhead Garage Door Repair Mesa AZ is a task that involves a series of steps to ensure a successful connection between the remote and the garage door opener.

Below is a comprehensive guide to help you reprogram your overhead garage door remote, but keep in mind that specific steps may vary based on the brand and model of your garage door opener.

1. Identify Your Garage Door Opener Model: Before starting the reprogramming process, identify the model of your overhead garage door opener. This information is often located on the motor unit or in the owner’s manual.

2. Locate the “Learn” Button: Most overhead garage door openers have a “Learn” button on the motor unit. Find the “Learn” button, as it is crucial for programming new remotes. This button is often located on the back or side of the motor unit.

3. Clear Existing Codes (if needed): If you are reprogramming the remote due to issues or changing the code, it’s recommended to clear out any existing codes from the opener’s memory. Press and hold the “Learn” button until the indicator light on the motor unit turns off. This ensures a clean slate for the new remote code.

4. Obtain a New Battery (if needed): If your remote is not working correctly, it might be due to a weak or dead battery. Open the remote and replace the battery with a new one, ensuring it is the correct type and properly installed.

5. Access Programming Mode: Press and release the “Learn” button on the garage door opener. The indicator light on the motor unit should start blinking, indicating that the opener is now in programming mode and ready to accept a new remote code.

6. Press the Button on the Remote: Within 30 seconds of activating programming mode, press the desired button on your overhead garage door opener remote. Hold the remote close to the motor unit to ensure a strong signal. The indicator light on the motor unit should respond by either blinking, staying solid, or flashing multiple times.

7. Test the Remote: After programming, test the remote to ensure it’s working correctly. Stand within the range of the opener and press the button on the remote. The garage door should respond by either opening or closing.

8. Programming Multiple Remotes (if applicable): If you have multiple remotes, repeat the process for each one. Overhead garage door openers usually allow you to program several remotes to operate the same door.

9. Troubleshooting: If the reprogramming process is unsuccessful, consult your overhead garage door opener’s manual for troubleshooting tips. Ensure you are following the correct procedure and that the remote is compatible with your opener.

10. Secure the Remote: Once successfully reprogrammed, keep your overhead garage door opener remote secure. Avoid sharing the code or leaving the remote in an easily accessible location.

11. Regular Maintenance: To ensure continued functionality, periodically check and replace the remote’s battery. Keep the remote clean and free from debris that may interfere with its signal.

In conclusion, reprogramming your overhead Garage Door Repair Mesa AZ involves identifying the opener model, locating the “Learn” button, clearing existing codes, obtaining a new battery, accessing programming mode, pressing the button on the remote, testing its functionality, programming multiple remotes if applicable, troubleshooting if necessary, securing the remote, and performing regular maintenance. Following these steps will help you successfully reprogram your overhead garage door opener remote for smooth and secure operation.

JT’s Overhead Doors

307 N Sandal, Mesa, AZ 85205, United States

1-480-662-3315

How Do Automatic Garage Door Openers Work – JT’s Overhead Doors

Automatic Garage Door Repair Mesa AZ have become a standard feature in many homes, providing convenience, security, and ease of use.

Understanding how these systems work can help demystify their operation. Here’s a comprehensive guide explaining the functionality of automatic garage door openers:

Overview of Components: A typical automatic garage door opener system consists of several key components, including a motorized unit, a drive mechanism, a remote control or keypad, safety sensors, and a control panel.

Motorized Unit: The motorized unit, often referred to as the opener, is the central component responsible for lifting and lowering the garage door. It contains an electric motor, gears, and other mechanisms necessary for the door’s movement.

Drive Mechanism: The drive mechanism is the system that transfers power from the motorized unit to the garage door itself. Common types include chain drives, belt drives, and screw drives. Each has its advantages in terms of cost, noise level, and durability.

Remote Control and Keypad: Remote controls and keypads provide a means for users to operate the garage door opener from a distance. The remote sends signals to the opener, triggering the desired action—either opening or closing the door.

Safety Sensors: Safety sensors are a critical safety feature of garage door openers. Placed near the bottom of the door tracks, these sensors use infrared beams to detect obstacles or obstructions in the door’s path. If an obstruction is detected while the door is closing, the sensors instruct the opener to reverse the door’s movement.

Control Panel: The control panel, typically installed inside the garage, allows users to operate the garage door manually, adjust settings, and program features. It often includes buttons for opening and closing the door, a light switch, and programming options.

Power Source: Garage door openers are powered by electricity, typically supplied through a standard household outlet. Some models also come with backup power options, such as battery backups, to ensure functionality during power outages.

Activation Mechanism: When a user initiates the opening or closing of the garage door, the activation mechanism comes into play. This mechanism interprets the signal from the remote control, keypad, or control panel, directing the motorized unit to perform the requested action.

Limit Switches: Limit switches are crucial for controlling the travel distance of the garage door. These switches, often adjustable, signal the opener to stop when the door reaches the fully open or fully closed position, preventing overtravel.

Rolling Code Technology: Many modern garage door openers use rolling code technology to enhance security. With rolling codes, the access code changes each time the remote control is used, making it difficult for potential intruders to intercept and mimic the code.

Force Sensors: Force sensors are designed to detect resistance when the door is closing. If excessive resistance is encountered, such as when the door comes into contact with an object, the force sensors prompt the opener to stop and reverse the door’s direction.

Manual Release Mechanism: In case of a power outage or malfunction, garage door openers are equipped with a manual release mechanism. This allows users to disengage the opener from the door and operate the door manually.

Lighting Features: Many garage door openers come with built-in lighting features. These lights, often located on the motorized unit, illuminate the garage space when the door is in operation or when activated manually.

Wi-Fi Connectivity: Some advanced garage door openers offer Wi-Fi connectivity, allowing users to control and monitor the door remotely through smartphone apps. This feature adds an extra layer of convenience and security.

Operation Process: The operation of an automatic garage door opener involves a sequence of steps. When a user presses the remote control or keypad button, the signal is transmitted to the opener, activating the motor. The motor, through the drive mechanism, lifts or lowers the garage door. Safety sensors continuously monitor for obstacles, and limit switches control the door’s travel distance.

Closing Mechanism: When closing the garage door, the opener engages the drive mechanism to lower the door gently until it reaches the fully closed position. The limit switches play a crucial role in ensuring the door stops at the correct point.

Safety and Reversal Features: Safety is a top priority in garage door opener design. In the event of an obstruction, the safety sensors detect the obstacle and trigger an immediate reversal of the door’s movement. This prevents accidents and damage to property.

Maintenance Requirements: Regular maintenance is essential for the smooth and reliable operation of garage door openers. Tasks may include lubricating moving parts, checking and adjusting the tension of the drive mechanism, and ensuring the proper alignment of safety sensors.

Troubleshooting and Diagnostics: In case of malfunctions or issues, garage door openers often feature diagnostic capabilities. LED lights on the motorized unit or audible signals can indicate problems, assisting users and technicians in troubleshooting.

Security Measures: Manufacturers implement various security measures to protect against unauthorized access. Rolling code technology, encryption, and secure communication protocols contribute to the overall security of automatic garage door openers.

In conclusion, automatic Garage Door Repair Mesa AZ combine mechanical and electronic components to provide a convenient and secure solution for accessing and securing your garage space. Understanding the various features and components of these systems empowers users to operate and maintain their garage doors effectively. Regular maintenance and adherence to safety guidelines ensure the longevity and reliability of automatic garage door openers.

JT’s Overhead Doors

307 N Sandal, Mesa, AZ 85205, United States

1-480-662-3315

Powered by WordPress & Theme by Anders Norén