Your One Stop Local Business News

Tag: Garage Door Repair Richmond TX

How To Reconnect Garage Door To Opener – 20527 Farm to Market 1093 a2


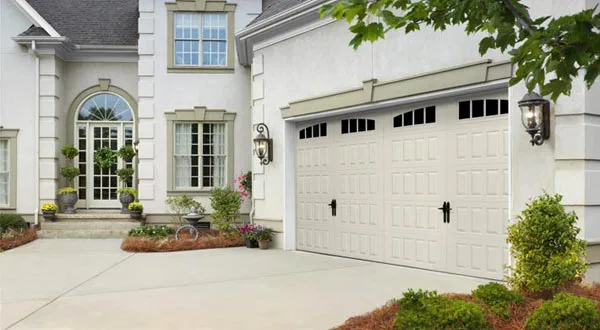
Reconnecting a Garage Door Repair Richmond TX to its opener involves several steps to ensure proper alignment, functionality, and safety. Whether you’re troubleshooting an existing connection or installing a new garage door opener, it’s essential to follow manufacturer instructions and safety precautions.

Here’s a detailed guide on how to reconnect a garage door to its opener:

  1. Inspect the Garage Door: Before reconnecting the garage door to the opener, visually inspect the door for any signs of damage, misalignment, or wear. Check the tracks, rollers, springs, cables, and hinges for rust, corrosion, or loose hardware. Ensure that the door moves smoothly and operates correctly manually.
  2. Check the Opener: Inspect the garage door opener to ensure it’s in good working condition. Check for power supply, test the remote control and wall switch, and verify that the safety sensors are aligned and functioning correctly. If the opener shows signs of malfunction or damage, troubleshoot or repair it before attempting to reconnect the door.
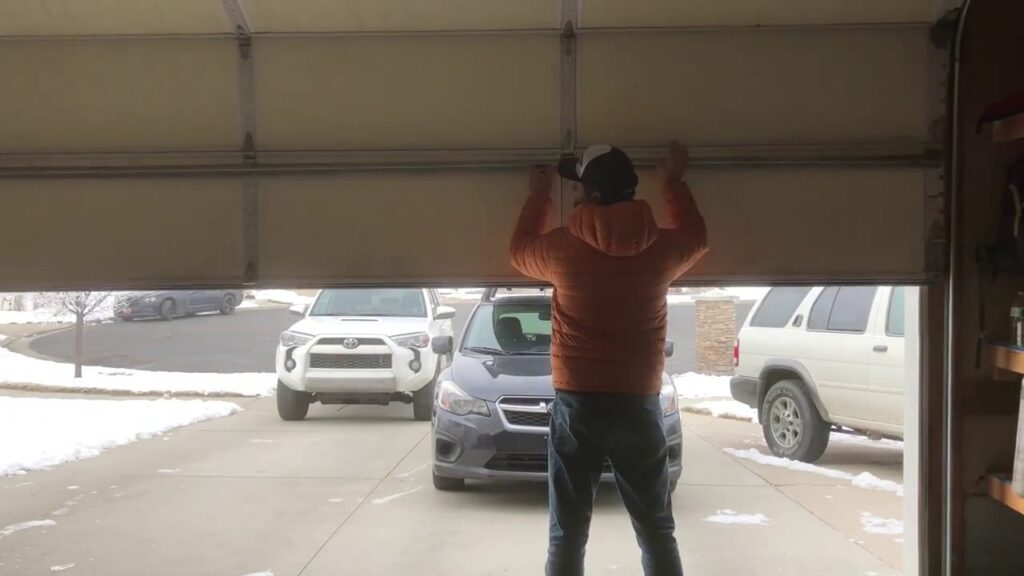
  3. Release the Emergency Release Cord: If the garage door is currently disconnected from the opener, locate the emergency release cord hanging from the opener rail. Pull the cord down and away from the door to disengage the opener carriage from the door. This allows you to manually open and close the door without motor assistance.
  4. Position the Door: Manually raise the garage door to the fully open position, ensuring it’s balanced and level. Use caution when lifting the door to avoid injury or damage. Secure the door in place by clamping locking pliers or placing wood blocks underneath the door tracks to prevent accidental closing.
  5. Locate the Carriage Assembly: Identify the carriage assembly on the garage door opener rail, which typically consists of a trolley or carriage mechanism that moves along the rail. The carriage connects to the garage door via an arm or attachment point.
  6. Align the Carriage: Position the carriage assembly beneath the release mechanism on the garage door. Ensure that the carriage is aligned with the attachment point or arm on the door, ready to engage when the opener is activated.
  7. Engage the Carriage: Depress the button or lever on the garage door opener to engage the carriage with the door. This may involve pressing a button on the opener console or activating the remote control or wall switch to initiate the connection process. Listen for a clicking or snapping sound indicating that the carriage has engaged with the door.
  8. Test the Connection: Once the carriage is engaged with the door, test the connection by activating the garage door opener. Use the remote control or wall switch to open and close the door, observing its movement and listening for any unusual sounds or resistance. Ensure that the door operates smoothly and that the opener responds promptly to commands.
  9. Adjustments and Fine-Tuning: If necessary, make adjustments to the opener settings, force limits, travel limits, and safety features to ensure optimal performance and safety. Refer to the manufacturer’s instructions for guidance on adjusting the opener settings and troubleshooting common issues.
  10. Safety Checks: Perform safety checks to verify that the garage door opener reverses properly when encountering an obstruction and that the safety sensors are aligned and functioning correctly. Test the auto-reverse feature by placing an object, such as a roll of paper towels, in the path of the closing door and observing if it reverses direction upon contact.
  11. Final Inspection and Maintenance: Once the garage door is successfully reconnected to the opener, perform a final inspection of the door, opener, and surrounding components. Lubricate moving parts, tighten hardware, and address any issues or concerns that arise during testing. Regular maintenance and inspection of the garage door system are essential for long-term performance and safety.

If you encounter any difficulties or are unsure about the process, consult a professional Garage Door Repair Richmond TX technician for assistance.

20527 Farm to Market 1093 a2

713-248-2684

https://maps.app.goo.gl/t63qb9AmNfom8KU87

How To Close Up A Garage Door Opening – First Call Garage Doors

Closing up a Richmond Garage Door Repair involves transforming the space into a more permanent structure, such as a wall or an alternative entryway.

This process requires careful planning, accurate measurements, and adherence to safety guidelines. Below is a detailed guide on how to close up a garage door opening:

1. Assess Your Goals: Clearly define the purpose of closing the garage door opening. Determine if you want to convert it into a wall, install a new door, or create another feature like a window. Understanding your goals will guide the entire process.

2. Measure the Opening: Accurate measurements are crucial. Measure the width, height, and depth of the garage door opening. This information will help you choose the right materials and ensure a precise fit.

3. Gather Materials and Tools: Depending on your chosen method of closure, gather the necessary materials and tools. Common materials include framing lumber, plywood or drywall, screws, insulation (if needed), paint, and finishing materials. Tools may include a circular saw, hammer, screwdriver, level, and tape measure.

4. Frame the Opening: If you’re closing the garage door with a solid wall, start by framing the opening. Use 2×4 or 2×6 lumber to create a frame that matches the dimensions of the opening. Install horizontal and vertical studs every 16 inches on center, ensuring the frame is sturdy and level.

5. Insulate (if desired): If you want to insulate the wall for energy efficiency, install insulation within the framed opening. Use insulation batts or rigid foam insulation, and secure them in place. This is particularly important if the space will be used as a living area.

6. Install Sheathing: Cover the framed opening with plywood or drywall, depending on your preference and the intended use of the space. Attach the sheathing to the frame using screws, ensuring a secure and flush fit.

7. Finish the Surface: If you used drywall, tape and mud the seams to create a smooth surface. Sand the surface once the mud is dry, and finish it with primer and paint. For plywood, you can paint or apply another finish to match the surrounding walls.

8. Install a New Door: If you’re replacing the garage door with a new entry door, measure and purchase a pre-hung door that fits the opening. Follow the manufacturer’s instructions for installation, securing the door frame in place, attaching the door, and completing finishing touches.

9. Seal Gaps and Cracks: After closing the garage door opening, inspect for any gaps or cracks that might compromise the closure. Use caulk or expanding foam to seal these areas, both inside and outside the new wall or door frame.

10. Consider Adding Windows (if applicable): If you’re converting the garage door opening into a window, measure and purchase the appropriate-sized window. Follow the manufacturer’s instructions for installation, ensuring proper framing and sealing to prevent leaks.

11. Exterior Finishing: If the garage door was on the exterior of your home, make sure the exterior finish matches the rest of the house. This may involve adding siding, stucco, or other finishing materials to create a cohesive appearance.

12. Electrical Considerations: If your garage had electrical outlets or lighting that needs to be retained, consider hiring an electrician to reroute or extend the electrical wiring. Safety is paramount when dealing with electrical components.

13. Consider Local Building Codes: Check with your local building department to ensure compliance with building codes. Depending on your location and the scope of the work, you may need permits for the closure.

14. Dispose of Materials Responsibly: Dispose of the old garage door and any debris responsibly. Depending on the materials, you may be able to recycle them. Check with local recycling facilities or waste management services for guidance.

15. Inspect the Closure: Once the closure is complete, inspect the work thoroughly. Ensure that the new wall or door is secure, weather-tight, and aesthetically pleasing. Address any issues immediately to prevent potential problems.

16. Consider Professional Help: If you’re unsure about any aspect of the closure or if the project involves complex elements like electrical work, it’s advisable to consult with professionals. An experienced contractor or builder can provide guidance and ensure a safe and effective closure.

Closing up a Richmond Garage Door Repair is a significant project that can enhance the functionality and appearance of your home. By following these steps and paying attention to detail, you can successfully complete the closure with a result that meets your needs and complies with local regulations.

First Call Garage Doors

20527 Farm to Market 1093 Unit B205, Richmond, TX 77407, United States

1-713-248-2684

Powered by WordPress & Theme by Anders Norén