
Windows Replacement North TX is a significant home improvement project that can enhance energy efficiency, improve curb appeal, and increase comfort and security in your home.
Whether you’re replacing old, drafty windows or upgrading to more energy-efficient models, the window replacement process involves several steps to ensure a successful and seamless installation. In this guide, we’ll outline the key steps involved in the window replacement process and provide tips for a smooth and efficient installation.
: Assessment and Planning
The first step in the window replacement process is to assess your existing windows and plan for the replacement project. Here are some key considerations:
- Assess Window Condition: Evaluate the condition of your existing windows to determine if replacement is necessary. Look for signs of damage, deterioration, drafts, or energy inefficiency, such as cracked glass, warped frames, or difficulty opening and closing.
- Set Budget and Priorities: Determine your budget for the replacement project and prioritize factors such as window material, style, and energy efficiency. Consider factors such as long-term energy savings, maintenance requirements, and aesthetic preferences when selecting replacement windows.
- Choose Window Type and Style: Select the type and style of replacement windows that best suit your home’s architecture, design aesthetic, and functional requirements. Common window types include double-hung, casement, sliding, awning, and picture windows, each offering unique features and benefits.
- Schedule Consultation with Contractors: Contact reputable window replacement contractors or companies to schedule consultations and obtain quotes for the project. Discuss your goals, preferences, and budget with potential contractors to ensure they understand your needs and can provide suitable recommendations.
: Measurement and Ordering
Once you’ve selected replacement windows and chosen a contractor for the project, the next step is to measure the existing window openings and order the replacement windows. Here’s what’s involved:
- Window Measurement: A professional installer will take precise measurements of each window opening to ensure the replacement windows fit properly and meet building code requirements. Accurate measurements are essential for a seamless installation and proper operation of the new windows.
- Customization and Ordering: Based on the measurements and specifications provided, the replacement windows will be custom-manufactured to fit your home’s unique requirements. Choose features such as window material, glass type, frame color, and hardware options to customize the windows to your preferences.
- Lead Time and Delivery: Once the replacement windows are ordered, they will be manufactured according to the specified lead time and delivered to your home or the installation site. Coordinate with the contractor to schedule a convenient installation date and time.
: Preparation and Removal
Before the installation process begins, proper preparation and removal of existing windows are necessary to ensure a smooth and efficient installation. Here’s what to expect:
- Clearing the Work Area: Clear the area around the windows both inside and outside the home to provide access for the installation crew and minimize disruptions during the project. Remove furniture, window treatments, and any obstacles that may impede the installation process.
- Removal of Old Windows: The existing windows will be carefully removed from their frames using specialized tools and techniques. Dispose of the old windows responsibly, following local regulations and recycling guidelines for materials such as glass, wood, and metal.
- Inspecting Surrounding Structure: Once the old windows are removed, the installation crew will inspect the surrounding structure, including the window frames, sills, and trim, for any damage or deterioration. Any repairs or replacements needed will be addressed before proceeding with the installation of the new windows.
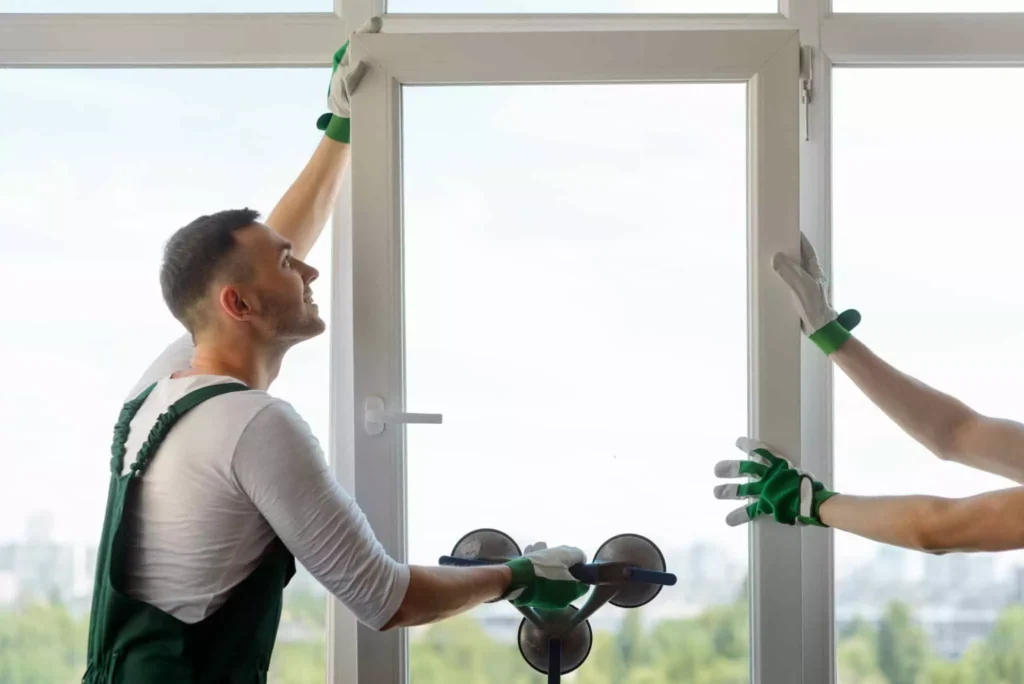
: Installation of Replacement Windows
With the preparation and removal steps completed, it’s time for the installation of the replacement windows. Here’s how the installation process unfolds:
- Prepping the Window Openings: The window openings will be cleaned, leveled, and prepared for the installation of the replacement windows. Any necessary adjustments or repairs to the framing will be made to ensure a secure and weather-tight fit.
- Installing the New Windows: The replacement windows will be carefully positioned and secured in the window openings using shims, screws, and sealants. The installation crew will ensure that the windows are properly aligned, level, and square for optimal performance and appearance.
- Sealing and Insulating: Once the replacement windows are installed, the gaps between the window frames and the surrounding openings will be sealed and insulated to prevent air infiltration, water intrusion, and heat loss. High-quality sealants and insulation materials will be used to create a tight and energy-efficient seal.
- Testing and Adjustments: After the windows are installed, the installation crew will test the operation of each window to ensure smooth opening and closing, proper alignment, and secure locking mechanisms. Any necessary adjustments or fine-tuning will be made to optimize the performance of the windows.
: Finishing Touches and Cleanup
With the replacement windows installed and tested, the final step is to add finishing touches and clean up the work area. Here’s what’s involved:
- Trim and Casing Installation: Exterior trim and interior casing will be installed around the replacement windows to provide a finished appearance and conceal any gaps or rough edges. Choose trim styles and finishes that complement your home’s architecture and design aesthetic.
- Sealing and Caulking: The exterior trim and casing will be sealed and caulked to create a weather-resistant barrier and enhance the durability and longevity of the windows. Use high-quality exterior-grade caulk and sealant to ensure a tight and waterproof seal.
- Cleanup and Debris Removal: The installation crew will clean up the work area both inside and outside the home, removing any debris, dust, or construction materials generated during the installation process. Dispose of waste materials responsibly and leave the property clean and tidy.
: Inspection and Final Walkthrough
Once the installation is complete and the work area is cleaned up, it’s time for a final inspection and walkthrough to ensure customer satisfaction and address any remaining concerns. Here’s what to expect:
- Customer Inspection: Take the time to inspect the installed replacement windows and verify that they meet your expectations in terms of appearance, functionality, and quality. Test each window to ensure smooth operation, proper sealing, and secure locking mechanisms.
- Addressing Concerns: If you have any concerns or questions about the installation or performance of the replacement windows, discuss them with the installation crew or project manager. Address any issues promptly to ensure they are resolved to your satisfaction.
- Final Documentation: Once the installation is approved and finalized, the installation crew will provide documentation such as warranty information, care and maintenance instructions, and contact details for follow-up support or service.
Conclusion:
In conclusion, the window replacement process involves several key steps, from assessment and planning to installation and finishing touches. By following these steps and working with experienced professionals, homeowners can ensure a successful and seamless window replacement project that enhances the comfort, energy efficiency, and value of their home.
North Texas Home Exteriors
1-817-201-6800