Your One Stop Local Business News

Tag: garage door repair los angeles ca

Weather Seals: Enhancing Protection Against the Elements – Rancho Park Garage & Overhead Doors

As a homeowner who cherishes the sanctity of my living space, the battle against the elements has always been a forefront concern. Among the various components safeguarding my home, the garage door emerged as a potential vulnerability to the whims of weather. It was during my quest to bolster the resilience of my home that I discovered the transformative power of weather seals.

In reference to Garage Door Repair, I share my journey of embracing weather seals—those unsung heroes that fortify my garage against rain, wind, and temperature extremes, ensuring a haven of comfort and protection within.

The Unseen Guardian: Understanding the Role of Weather Seals

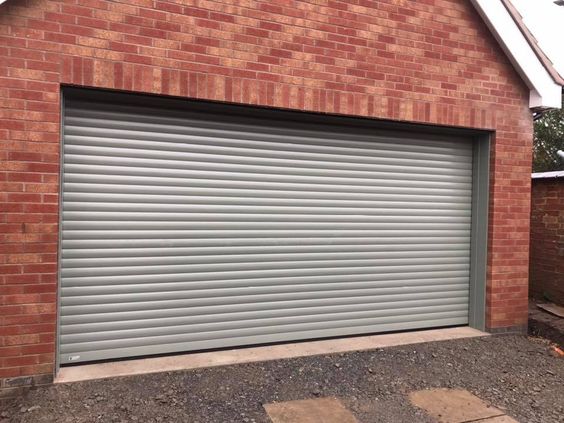
Before delving into the intricacies of weather seals, it’s crucial to comprehend their pivotal role in the grand narrative of home protection. Weather seals, also known as garage door seals or astragal seals, are strips of flexible material installed along the edges of the garage door and at the bottom. These seals create a barrier against external elements, preventing drafts, water infiltration, and debris from entering the garage space. As I embarked on my journey to fortify my home, the realization dawned that weather seals are the unsung guardians, quietly ensuring the comfort and integrity of my living environment.

Drafts, Water, and Debris: The Three Foes Weather Seals Conquer

1. Draft Protection: An End to Unwanted Air Intrusion

Drafts infiltrating through gaps around the garage door not only compromise the temperature within the garage but also contribute to energy inefficiency. Weather seals create a tight seal along the sides and bottom of the garage door, preventing drafts from entering and maintaining a consistent and comfortable temperature within the space. This is particularly significant for homeowners who utilize their garage as a workshop, storage area, or an extension of their living space.

2. Water Infiltration Defense: Keeping Moisture at Bay

Rain, snow, or melting ice can pose a significant threat to the contents of the garage, leading to potential water damage. Weather seals act as a barrier against water infiltration, ensuring that even during heavy rain or snowfall, the garage remains dry and free from moisture-related issues. The protective shield provided by weather seals contributes to the longevity of stored items, the garage floor, and the overall structural integrity of the space.

3. Debris Exclusion: Preserving a Clean and Tidy Environment

Wind-blown debris, dust, leaves, and pests are common challenges faced by garage spaces. Weather seals effectively exclude these elements, creating a clean and tidy environment within the garage. The elimination of debris not only contributes to a more organized space but also reduces the risk of damage to stored items and the garage door mechanism.

The Weather Seal Arsenal: Types and Functions

As I delved into the world of weather seals, I discovered a variety of types, each designed to address specific needs and challenges. Here are the primary types of weather seals and their functions:

1. Bottom Weather Seal: Sealing the Gateway to the Garage

The bottom weather seal is perhaps the most well-known and essential type. It is installed along the bottom edge of the garage door and comes in various materials, including rubber, vinyl, or bulb-style seals. This seal forms a barrier against drafts, water, and debris, ensuring a snug fit between the garage door and the floor.

2. Threshold Seals: Creating a Dam Against Water

Threshold seals are installed at the base of the garage door opening, creating a dam-like barrier against water infiltration. These seals are particularly effective in areas prone to heavy rain or flooding. Threshold seals come in various materials, including rubber and aluminum, and provide an additional layer of protection beyond the bottom weather seal.

3. Side Weather Seals: Securing the Perimeter

Installed along the sides of the garage door, side weather seals create a complete perimeter seal when combined with the bottom seal. These seals are instrumental in preventing drafts, rain, and pests from entering through the sides of the garage door. They enhance the overall effectiveness of weather sealing, creating a comprehensive barrier against external elements.

4. Top Weather Seal: Enhancing Overhead Protection

While the top weather seal is less common, it plays a crucial role in providing overhead protection. Installed along the top edge of the garage door, this seal prevents drafts, rain, and debris from entering through the gap between the garage door and the header. While some garage doors come equipped with integral top seals, others may benefit from the addition of aftermarket seals for enhanced protection.

DIY Installation: A Homeowner’s Endeavor

Armed with the knowledge of weather seal types and functions, I decided to take on the task of installation myself. The DIY approach to weather seal installation is feasible for many homeowners and offers a cost-effective way to enhance garage door protection. Here are the general steps I followed:

1. Gather the Necessary Tools and Materials:

Before beginning the installation, gather the required tools and materials, including a tape measure, a utility knife, a screwdriver, and the chosen weather seal.

2. Measure and Cut:

Measure the dimensions of each side of the garage door and the bottom edge. Using these measurements, cut the weather seal to the appropriate lengths. Ensure precision in cutting to create a seamless and effective seal.

3. Attach the Side Seals:

Starting with the side weather seals, attach them along the vertical edges of the garage door. Use screws or adhesive, depending on the type of weather seal and the garage door material. Ensure a snug fit to create an effective barrier against drafts.

4. Install the Bottom Seal:

Attach the bottom weather seal along the bottom edge of the garage door. Again, use screws or adhesive to secure the seal in place. Ensure that the seal reaches from one end of the door to the other for comprehensive protection.

5. Add Threshold Seals (Optional):

If using threshold seals, install them at the base of the garage door opening. Ensure a secure fit to create a dam against water infiltration. Threshold seals are particularly beneficial in areas prone to flooding or heavy rain.

6. Check and Adjust:

Once all weather seals are installed, check for any gaps or areas where the seal may not be making full contact. Make any necessary adjustments to ensure a complete and effective seal.

Professional Installation: Ensuring Optimal Performance

While the DIY approach to weather seal installation is viable for many homeowners, seeking professional assistance offers an added layer of assurance. Professional installers possess the expertise to navigate specific challenges, ensure optimal alignment, and recommend tailored solutions based on the unique characteristics of each garage door. Additionally, professional installation may be particularly beneficial for garage doors with intricate designs or complex mechanisms.

The Transformative Impact: A Fortress Against the Elements

As I stood back and admired the newly installed weather seals on my garage door, I could sense the transformative impact they would have on my living space. The once potential points of vulnerability were now fortified barriers, standing resilient against drafts, water, and debris. The garage, once a space susceptible to temperature extremes and potential water damage, now exuded a sense of comfort and protection.

The impact of weather seals extended beyond the functional benefits to encompass peace of mind—a reassurance that my home was fortified against the unpredictable forces of nature. The garage, often an overlooked space in terms of weather protection, became a sanctuary where the elements were held at bay, allowing me to fully enjoy the comfort and security of my living environment.

Conclusion: Weather Seals as Silent Guardians

In the symphony of homeownership, weather seals emerged as the silent guardians, diligently performing their duty to fortify my home against the elements. The installation of these unassuming strips of material marked a transformative chapter in my journey, turning potential vulnerabilities into strengths and creating a haven within the confines of my garage.

As I reflect on this journey and as per Garage Door Repair, I am reminded that the protection of our homes extends beyond the visible elements. Weather seals, often hidden in plain sight, play a crucial role in preserving the integrity of our living spaces. With a well-protected garage, I can face the changing seasons with confidence, knowing that my home is shielded against the wind, rain, and whatever else nature may bring—a testament to the resilience and foresight embedded in the simple yet powerful concept of weather seals.

Rancho Park Garage & Overhead Doors

2522 Aiken Ave, Los Angeles, CA 90064, United States

213-214-2651

How To Hide Garage Door Opener Wires – Rancho Park Garage & Overhead Doors

Hiding Garage Door Repair Los Angeles CA opener wires is not only a matter of aesthetics but also safety and functionality. Exposed wires can be unsightly and pose a potential hazard. Concealing them properly can enhance the appearance of your garage and ensure the longevity of your garage door opener system.

Here’s a comprehensive guide on how to hide garage door opener wires:

1. Plan the Wiring Route:

  • Decide on a route: Determine the best route for the wires to travel from the garage door opener unit to the wall or ceiling where they will connect to power and controls.
  • Avoid obstacles: Choose a route that avoids obstacles and potential damage, such as moving parts of the garage door, sharp edges, and areas where the wires could be pinched or crushed.

2. Choose Concealing Methods:

  • Cord covers: Cord covers are plastic or metal channels that can be mounted along walls or ceilings to encase wires. They come in various sizes and colors to match your garage’s aesthetics.
  • Cable management systems: Cable management kits include clips, hooks, and adhesive mounts to organize and secure wires neatly against walls or ceilings.
  • Conduit tubing: Conduit tubing is a protective plastic or metal tube that encases wires, shielding them from damage and providing a polished appearance.
  • Wall molding: Wall molding or baseboard molding can be strategically installed along the wall to conceal wires and create a clean look.

3. Gather Materials:

  • Cord covers, cable management systems, conduit tubing, or wall molding
  • Mounting hardware (screws, adhesive tape)
  • Wire clips or cable ties
  • Power drill and appropriate drill bits
  • Screwdriver
  • Measuring tape
  • Level

4. Installation Steps:

  • Cord Covers:
  • Choose a cord cover that fits the size and number of wires you’re concealing.
  • Hold the cord cover against the wall or ceiling along the planned route.
  • Mark the screw hole positions with a pencil.
  • Drill pilot holes for the screws and attach the cord cover using screws or adhesive tape.
  • Cable Management Systems:
  • Follow the manufacturer’s instructions to install clips, hooks, or adhesive mounts to secure the wires.
  • Arrange the wires within the cable management system, ensuring they are organized and not strained.
  • Conduit Tubing:
  • Cut the conduit tubing to the desired length using a hacksaw or tubing cutter.
  • Feed the wires through the tubing and position the tubing along the planned route.
  • Use mounting hardware or adhesive tape to secure the conduit tubing to the wall or ceiling.
  • Wall Molding:
  • Measure and cut the wall molding to the desired length.
  • Attach the wall molding to the wall using screws or adhesive tape.
  • Route the wires behind the wall molding to conceal them.

5. Secure the Wires:

  • Use wire clips or cable ties to secure the wires along the route, preventing them from sagging or hanging loosely.

6. Test Functionality:

  • Ensure that the concealed wires do not interfere with the operation of the garage door opener and that they are properly connected to power and controls.

7. Regular Maintenance:

  • Periodically check the concealed wires for signs of wear, damage, or loosening. Address any issues promptly to maintain a clean and safe appearance.

8. Consider Professional Help:

  • If you’re uncomfortable with wiring or if the job involves complex electrical work, consider hiring a professional electrician or garage door opener installer to ensure proper installation and safety.

Conclusion:
Hiding Garage Door Repair Los Angeles CA opener wires is a practical and aesthetic improvement that contributes to the overall appearance and safety of your garage. By carefully planning the wiring route and using appropriate concealing methods, you can achieve a tidy and organized look while ensuring the functionality of your garage door opener system. Follow the manufacturer’s instructions for any products you use and prioritize safety throughout the installation process.

Rancho Park Garage & Overhead Doors

2522 Aiken Ave, Los Angeles, CA 90064, United States

1-213-238-6483

How to Repair a Garage Door Opener with a Faulty Circuit – Rancho Park Garage & Overhead Doors

As a homeowner, my garage door opener is an essential part of my daily life, providing convenience and security. Recently, I encountered a frustrating problem—the garage door opener suddenly stopped responding, leaving my garage door stubbornly shut. Determined to resolve the issue on my own, I decided to investigate, and after some troubleshooting, I discovered that the culprit was a faulty circuit. With a strong desire to fix it myself and restore the smooth operation of my garage door, I embarked on a journey to repair the garage door opener with the faulty circuit.

I will share my experiences, the importance of a functioning circuit, the troubleshooting process, and the steps I took to successfully repair my garage door opener based from Garage Door Repair Los Angeles CA.

Section 1: Understanding the Role of the Circuit in a Garage Door Opener

1.1. What is a Circuit in a Garage Door Opener?

The circuit in a garage door opener serves as the central control system responsible for directing the flow of electrical current. It acts as the “brain” of the opener, receiving signals from the remote control or wall switch and instructing the motor to open or close the garage door accordingly.

1.2. Importance of a Functioning Circuit

Realizing the significance of a functioning circuit, I understood that any disruption in this vital component could render the entire garage door opener inoperative. A faulty circuit could prevent the motor from receiving the correct commands, leading to unresponsiveness or erratic door movements.

Section 2: Signs of a Garage Door Opener with a Faulty Circuit

Before diving into repairs, I made sure to identify the signs of a garage door opener with a faulty circuit:

2.1. Unresponsiveness to Remote or Wall Switch

The garage door opener showed no response to commands from the remote control or the wall-mounted switch, indicating a circuit problem.

2.2. Door Moves Erratically

The garage door exhibited erratic movements, such as only partially opening or unexpectedly reversing, which pointed towards a malfunctioning circuit.

2.3. Inconsistent Motor Function

The motor of the garage door opener seemed to function inconsistently, causing delays or difficulties in the opening and closing process.

Section 3: Troubleshooting Steps for a Faulty Circuit

To determine if the circuit was indeed the issue, I followed these troubleshooting steps:

Step 1: Check the Power Source

I made sure the garage door opener was receiving power by verifying the outlet or circuit breaker.

Step 2: Inspect Remote and Wall Switch

I inspected the remote control and wall switch for any visible signs of damage or malfunction, ensuring that the issue was not with these devices.

Step 3: Examine Circuit Board

I carefully examined the circuit board inside the garage door opener unit for any visible signs of damage, such as burnt components or loose connections.

Step 4: Reset the Opener

Performing a proper reset of the garage door opener according to the manufacturer’s instructions was the next step to rule out minor issues.

Step 5: Test with Different Remote

To eliminate the possibility of remote-specific problems, I tested the garage door opener with a different remote, if available.

Step 6: Check Safety Sensors

I ensured that the garage door opener’s safety sensors were correctly aligned and free from obstructions, as they could sometimes interfere with the circuit’s operation.

Step 7: Verify Motor Function

To confirm that the problem was not with the motor, I manually tested the garage door’s movement by disengaging the opener and operating it manually.

Section 4: Repairing the Garage Door Opener with a Faulty Circuit

Once I identified the circuit as the issue, I proceeded with the repair process:

Step 1: Disconnect Power

Before starting any repairs, I prioritized safety and turned off the power supply to the garage door opener to avoid any potential electrical hazards.

Step 2: Identify the Faulty Component

Using my inspection earlier, I identified the specific component on the circuit board that appeared damaged or malfunctioning.

Step 3: Soldering Repairs

If I had the necessary soldering skills and tools, I attempted to repair the faulty circuit component by re-soldering the connection.

Step 4: Replacing the Circuit Board

In cases where the circuit board was severely damaged or beyond repair, I opted to replace it entirely. Carefully removing the old circuit board and installing the new one with secure connections was essential.

Step 5: Test the Garage Door Opener

With the repairs completed, I restored power to the garage door opener and eagerly tested its functionality. I used both the remote control and wall-mounted switch to check if the garage door responded correctly.

Section 5: When to Seek Professional Help

While repairing a garage door opener with a faulty circuit can be a rewarding DIY project, some situations may warrant professional assistance:

5.1. Lack of Technical Knowledge

If I lacked experience with electrical systems or lacked the necessary technical knowledge, seeking professional help would be a safer choice.

5.2. Complex Circuit Repairs

Certain circuit board repairs might require specialized knowledge and tools that only a professional technician possesses.

5.3. Warranty Concerns

If my garage door opener was still under warranty, attempting DIY repairs might void the warranty, making it wiser to seek professional assistance.

In conclusion, according to Garage Door Repair Los Angeles CA, repairing my garage door opener with a faulty circuit was a fulfilling experience that allowed me to regain the convenience and security it provides. Understanding the importance of a functioning circuit and identifying the signs of a fault enabled me to troubleshoot the issue effectively. By following the troubleshooting steps and taking necessary precautions, I successfully repaired the circuit and restored the smooth operation of my garage door opener. As a homeowner, the sense of accomplishment and self-reliance in resolving such issues is truly gratifying. Regular maintenance and timely repairs will ensure the long-lasting performance of my garage door opener, allowing me to continue enjoying the convenience it brings to my daily life.

Rancho Park Garage & Overhead Doors

2522 Aiken Ave, Los Angeles, CA 90064, United States

213-238-6483

Powered by WordPress & Theme by Anders Norén