Your One Stop Local Business News

Tag: garage door repair parker co

How To Tighten Garage Door Chain – Martin Garage Door

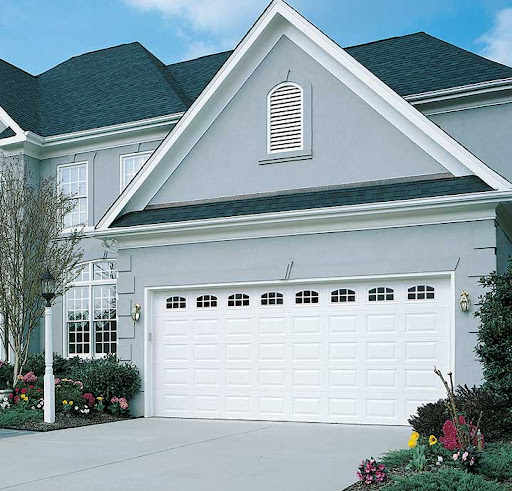
Garage Door Repair Parker CO is a relatively simple maintenance task that can help ensure smooth and reliable operation of your garage door.

The chain connects the motor of the garage door opener to the door itself, and over time, it may become loose due to normal wear and tear. Fortunately, tightening the chain is a straightforward process that can be done with basic tools and a few simple steps. In this comprehensive guide, we’ll walk you through the step-by-step process for tightening the garage door chain to ensure optimal performance and safety.

1. Preparation and Safety

Before beginning any work on your garage door, it’s essential to take proper safety precautions to prevent accidents or injuries. Here’s what you’ll need:

  • Safety Glasses: Protect your eyes from dust, debris, and potential flying objects during the maintenance process.
  • Work Gloves: Wear work gloves to protect your hands from sharp edges and moving parts of the garage door mechanism.
  • Adjustable Wrench or Socket Set: Use an adjustable wrench or socket set to loosen and tighten nuts and bolts.
  • Ladder or Step Stool: Use a ladder or step stool to access the garage door opener mechanism safely.
  • Owner’s Manual: Refer to the owner’s manual for your specific garage door opener model for guidance on maintenance procedures and adjustments.

2. Locate the Chain Tension Adjustment Mechanism

Most garage door openers feature a chain tension adjustment mechanism that allows you to tighten or loosen the chain as needed. The location of this mechanism may vary depending on the model and manufacturer of your garage door opener, but it is typically located near the motor unit. Consult your owner’s manual or look for a set of adjustment screws or bolts on the motor unit.

3. Identify the Correct Adjustment Screw or Bolt

Once you’ve located the chain tension adjustment mechanism, identify the correct adjustment screw or bolt that controls the tension of the chain. In most cases, there will be two adjustment screws or bolts—one for adjusting the up (opening) force of the garage door and one for adjusting the down (closing) force. The screw or bolt for adjusting the chain tension is usually labeled or marked in some way to distinguish it from the others.

4. Loosen the Lock Nuts

Before adjusting the chain tension, you’ll need to loosen the lock nuts that secure the adjustment screws or bolts in place. Use an adjustable wrench or socket set to loosen the lock nuts by turning them counterclockwise. Loosen the nuts enough to allow for adjustment of the chain tension but do not remove them entirely.

5. Adjust the Chain Tension

With the lock nuts loosened, you can now adjust the tension of the garage door chain. Use a screwdriver or wrench to turn the adjustment screw or bolt clockwise to tighten the chain or counterclockwise to loosen it. Turn the screw or bolt in small increments, checking the tension of the chain periodically until it reaches the desired level of tension.

6. Check the Chain Tension

Once you’ve adjusted the chain tension, it’s essential to check the tension of the chain to ensure that it is neither too tight nor too loose. The ideal tension for the garage door chain is typically specified in the owner’s manual for your garage door opener model. Use a tape measure or ruler to measure the slack in the chain, ensuring that it meets the manufacturer’s recommendations.

  • Too Tight: If the chain is too tight, it may cause excessive wear and strain on the garage door opener motor and components. Check for signs of binding or resistance when operating the garage door manually or with the opener.
  • Too Loose: If the chain is too loose, it may sag or droop, increasing the risk of slippage or derailment during operation. Check for excessive slack or play in the chain and ensure that it is properly aligned with the sprocket on the motor unit.

7. Tighten the Lock Nuts

Once you’ve achieved the desired tension for the garage door chain, tighten the lock nuts on the adjustment screws or bolts to secure them in place. Use an adjustable wrench or socket set to tighten the lock nuts by turning them clockwise until snug. Be careful not to over-tighten the nuts, as this may strip the threads or damage the adjustment mechanism.

8. Test the Garage Door Operation

After tightening the garage door chain and securing the lock nuts, it’s essential to test the operation of the garage door to ensure that it moves smoothly and evenly. Use the garage door opener controls to open and close the door several times, observing its movement and listening for any unusual noises or vibrations. Verify that the door opens and closes completely and seals properly against the floor.

9. Make Adjustments as Needed

If you encounter any issues or problems during testing, such as excessive noise, binding, or uneven movement, you may need to make further adjustments to the chain tension. Repeat the adjustment process as needed, making incremental changes to the tension until the desired results are achieved. Be patient and methodical, and take the time to ensure that the garage door operates smoothly and safely.

Conclusion

Tightening the garage door chain is a straightforward maintenance task that can help ensure smooth and reliable operation of your garage door. By following these step-by-step instructions and safety precautions, you can safely and effectively adjust the tension of the garage door chain to achieve optimal performance and safety. Regular maintenance and inspection of the garage door mechanism, including the chain, rollers, and springs, can help prevent issues and prolong the life of your garage door system. If you encounter any difficulties or are unsure about adjusting the chain tension, consider consulting a professional garage door technician for assistance.

Martin Garage Door

10411 S Parker Rd, Parker, CO 80134, United States

1-303-663-1310

How To Program A Remote For Genie Garage Door Opener – Martin Garage Door

Programming a remote for your Garage Door Repair Parker CO is a straightforward process that allows you to control your garage door with convenience and ease.

Whether you’re setting up a new remote or reprogramming an existing one, this comprehensive guide will walk you through the step-by-step process to effectively program your remote to your Genie garage door opener.

1. Identify Your Genie Garage Door Opener Model:

Before you begin programming, it’s crucial to identify the model of your Genie garage door opener. This information can usually be found on the motor unit of the opener or in the owner’s manual. Knowing the model number will help you access the correct programming instructions.

2. Access the Programming Button on Your Opener:

Locate the “Learn” or “Program” button on the motor unit of your Genie garage door opener. This button is typically found near the antenna wire and may be labeled as “Learn,” “Smart,” or “Program.” Press and release the “Learn” button to put the opener into programming mode. The indicator light on the motor unit will typically flash or remain solid to indicate that it’s ready to receive programming signals.

3. Prepare Your Genie Remote:

Ensure that your Genie garage door opener remote is ready for programming. If it’s a new remote, remove the battery cover to access the programming button. Press and hold the programming button until you see the LED indicator light on the remote turn on or flash.

4. Press and Release the Program Button on the Opener:

While holding down the programming button on your remote, quickly press and release the “Learn” or “Program” button on the motor unit of your Genie garage door opener. You’ll need to do this within a few seconds of holding down the programming button on the remote.

5. Wait for Confirmation:

After pressing the programming button on the opener, release the button on your remote and wait for confirmation. The indicator light on the motor unit should flash or turn off briefly to indicate that it has received the programming signal from the remote.

6. Test the Remote:

Once you’ve received confirmation that the remote has been programmed successfully, it’s time to test it. Press the button on your Genie remote to open or close the garage door. If the door responds as expected, the remote has been successfully programmed.

7. Repeat if Necessary:

If you have additional Genie garage door opener remotes that you want to program, repeat the process for each remote individually. Each remote will need to be programmed separately to ensure that they all work correctly with the opener.

8. Finalize Programming (Optional):

Some garage door openers may require additional steps to finalize the programming process. Refer to the owner’s manual for your specific opener model to determine if any additional steps are necessary.

9. Secure the Motor Unit:

Once you’ve finished programming all of your Genie garage door opener remotes, securely close the motor unit of your opener. This may involve pressing the “Learn” or “Program” button again to exit programming mode and lock in the programmed settings.

10. Test for Functionality:

Finally, test all programmed remotes to ensure they’re functioning correctly. Open and close the garage door multiple times using each remote to verify that they all work reliably.

Conclusion:

Programming a remote for your Genie garage door opener is a simple process that allows you to customize and enhance the functionality of your garage door opener system. By following the steps outlined in this guide and referring to the owner’s manual for your specific opener model, you can successfully program your remotes to work seamlessly with your Genie garage door opener. If you encounter any difficulties during the programming process, consult the troubleshooting section of the owner’s manual or contact Genie customer support for assistance.

Martin Garage Door

10411 S Parker Rd, Parker, CO 80134, United States

1-303-663-1310

How Long Does A Garage Door Opener Remote Last – Martin Garage Door

Garage Door Repair Parker CO are essential components of modern garage door systems, providing convenience and security for homeowners.

While the lifespan of a garage door opener remote can vary depending on factors such as usage, battery type, and maintenance, understanding the typical lifespan, signs of wear, battery replacement, and maintenance tips can help ensure optimal performance and longevity of your remote.

1. Typical Lifespan of Garage Door Opener Remotes

The lifespan of a garage door opener remote depends on various factors:

  • Frequency of Use: The more frequently you use the remote to operate your garage door, the quicker its components, such as buttons and circuitry, may wear out. Heavy usage can lead to shorter lifespan compared to occasional use.
  • Battery Life: The type and quality of batteries used in the remote can significantly impact its lifespan. Alkaline batteries typically last longer than cheaper, low-quality batteries. Rechargeable batteries may require more frequent charging but can be cost-effective in the long run.
  • Quality of Construction: The build quality of the remote, including the materials used and manufacturing standards, can affect its durability and longevity. Higher-quality remotes with robust construction are likely to last longer than cheaper, flimsy models.

2. Signs of Wear and When to Replace

It’s essential to recognize the signs of wear and deterioration in a garage door opener remote to address issues promptly and avoid inconvenience:

  • Button Wear: Excessive wear or damage to the buttons on the remote can affect their responsiveness and reliability. If you notice buttons sticking, not registering presses, or becoming unresponsive, it may be time to replace the remote.
  • Battery Life: If the remote requires frequent battery replacements or fails to hold a charge for an extended period, it may indicate issues with battery life or power consumption. Consider replacing the batteries with high-quality replacements or upgrading to a newer remote with more efficient power management.
  • Physical Damage: Visible damage to the remote, such as cracks, dents, or water damage, can compromise its structural integrity and functionality. Physical damage may occur due to drops, impacts, or exposure to moisture, necessitating replacement of the remote.

3. Battery Replacement and Maintenance Tips

Proper maintenance and battery replacement can help prolong the lifespan of your garage door opener remote:

  • Regular Inspection: Periodically inspect the remote for signs of wear, damage, or corrosion. Clean the contacts and interior of the remote with a dry cloth to remove dirt, dust, or debris that may affect performance.
  • Battery Replacement: Replace the batteries in your garage door opener remote as soon as they show signs of depletion or weakness. Follow the manufacturer’s recommendations for battery type, size, and replacement intervals to ensure optimal performance.
  • Battery Type: Consider using high-quality, long-lasting batteries such as alkaline or lithium batteries for your garage door opener remote. While they may cost more upfront, they offer better performance and longevity compared to cheaper alternatives.
  • Storage: Store spare batteries in a cool, dry place away from direct sunlight and extreme temperatures. Avoid storing batteries in humid or damp environments, as moisture can damage them and reduce their lifespan.

Conclusion:

The lifespan of a garage door opener remote can vary depending on factors such as usage, battery type, and maintenance. By understanding the typical lifespan, signs of wear, battery replacement, and maintenance tips, homeowners can ensure optimal performance and longevity of their garage door opener remotes for years to come. Regular inspection, proper battery replacement, and adherence to maintenance practices can help maximize the lifespan of your remote and ensure reliable operation of your garage door system.

Martin Garage Door

10411 S Parker Rd, Parker, CO 80134, United States

1-303-663-1310

How To Set Up Garage Door Opener – Martin Garage Door

Garage Door Repair Parker CO is a simple yet effective way to enhance the security of your home and protect your belongings. Whether you’ve recently moved into a new home, need to update your existing keypad code, or want to revoke access for individuals who no longer require entry, changing the code on your garage door keypad allows you to maintain control over who can enter your garage.

In this comprehensive guide, we’ll walk you through the step-by-step process of changing the code on a garage door keypad, ensuring that you can do so quickly and easily.

1. Locate the Keypad

The first step in changing the code on your garage door keypad is to locate the keypad itself. Garage door keypads are typically mounted on the exterior of the garage door frame, near the entrance to the garage. They may be attached to the wall surface or recessed into the frame, depending on the model and installation method.

2. Access the Programming Menu

Once you’ve located the keypad, you’ll need to access the programming menu to change the code. This usually involves entering a specific sequence of numbers or pressing a designated button on the keypad to enter programming mode. Refer to the user manual for your specific keypad model for instructions on accessing the programming menu.

3. Enter the Current Code (If Required)

If your garage door keypad requires you to enter the current code before changing it, do so now. This step verifies that you have authorized access to the keypad programming menu and prevents unauthorized individuals from changing the code without permission.

4. Select a New Code

With the keypad in programming mode, you can now select a new code for your garage door keypad. Choose a code that is easy for you to remember but difficult for others to guess. Avoid using obvious combinations such as sequential numbers or repeating digits, as these can compromise the security of your garage.

5. Enter the New Code

Once you’ve selected a new code, enter it into the keypad using the numeric keypad. Some keypads may require you to confirm the new code by entering it a second time to ensure accuracy. Follow the prompts on the keypad display or listen for audible feedback to confirm that the new code has been accepted.

6. Test the New Code

After changing the code on your garage door keypad, it’s important to test the new code to ensure that it works correctly. Stand within range of the keypad and enter the new code using the numeric keypad. The garage door should open or close in response to the code input, indicating that the new code has been successfully programmed.

7. Secure the Keypad

Once you’ve confirmed that the new code works correctly, secure the keypad to prevent unauthorized access. This may involve locking the keypad cover or activating a security feature that prevents entry after multiple incorrect code attempts. Refer to the user manual for your specific keypad model for instructions on securing the keypad.

8. Keep the Code Confidential

Finally, remember to keep the new code confidential and only share it with individuals who require access to your garage. Avoid writing down the code or sharing it with others unnecessarily, as this can compromise the security of your garage and home.

9. Periodic Code Changes

For added security, consider changing the code on your garage door keypad periodically, such as every six months or annually. This practice helps prevent unauthorized individuals from gaining access to your garage and reduces the risk of security breaches.

10. Seek Professional Assistance if Needed

If you encounter difficulties or have concerns about changing the code on your garage door keypad, don’t hesitate to seek professional assistance. Contact a reputable garage door technician or the manufacturer of your keypad for guidance on changing the code safely and effectively.

By following these steps and exercising proper caution, you can successfully change the code on your garage door keypad, enhancing the security of your home and providing peace of mind knowing that your garage is protected against unauthorized access.

Martin Garage Door

10411 S Parker Rd, Parker, CO 80134, United States

1-303-663-1310

How to Frame a Garage Door – Martin Garage Doors

Framing a garage door is a critical step in the construction or installation process. Proper framing provides structural support and ensures the garage door operates smoothly.

I’ll provide a step-by-step guide on how I would frame a garage door according to Garage Door Repair:

Step 1: Measure and mark the rough opening I would start by measuring the width and height of the garage door. Adding 2 inches to both measurements would give me the size of the rough opening. Using a tape measure, I would mark these dimensions on the wall above the existing foundation or floor.

Step 2: Determine the header size Next, I would refer to the garage door manufacturer’s specifications or local building codes to determine the required size for the header. The header is a horizontal beam that spans the width of the rough opening and provides support for the garage door.

Step 3: Cut the header Using a saw, I would cut the header to the required length. It’s important to make precise cuts to ensure a proper fit within the marked rough opening.

Step 4: Install the king studs To create vertical support on either side of the rough opening, I would measure the distance from the bottom of the header to the floor or foundation. Then, I would cut two pressure-treated lumber pieces, known as king studs, to this length. Securing the king studs to the floor or foundation and the sides of the header using nails or screws would provide stability.

Step 5: Add cripple studs and jack studs To further strengthen the framing, I would install cripple studs and jack studs. Cripple studs are shorter vertical pieces of lumber that fit between the header and the top plate. I would cut and install these cripple studs, evenly spacing them along the length of the header. Jack studs, on the other hand, are full-length vertical studs that extend from the bottom plate to the underside of the header. I would cut and install the jack studs on both sides of the rough opening, securing them to the bottom plate and the underside of the header.

Step 6: Install the header Now that the supporting elements are in place, I would lift the header and position it on top of the king studs. Making sure the header is level using a level, I would secure it to the king studs using nails or screws, ensuring a strong and stable connection.

Step 7: Add the bottom plate To complete the framing structure, I would cut a pressure-treated lumber piece to the width of the rough opening. This bottom plate would be installed horizontally along the bottom of the wall, providing stability and serving as a base for attaching the studs.

Step 8: Install the jack and cripple studs on the opposite side Following the same procedure as before, I would install jack studs and cripple studs on the opposite side of the rough opening. These studs, along with the header, help distribute the weight of the garage door evenly and maintain the structural integrity of the framing.

Step 9: Install the top plate Similar to the bottom plate, I would cut a pressure-treated lumber piece to the width of the rough opening. This top plate would be installed horizontally along the top of the wall, securing it to the tops of the jack and cripple studs. The top plate adds stability and completes the framing of the garage door.

Step 10: Check for level and plumb Using a level and a framing square, I would carefully check that all the studs, headers, and plates are level, plumb, and square. If any adjustments are needed, I would make them at this stage to ensure the structural integrity of the framing.

By following these steps from Garage Door Repair, I would successfully frame a garage door. The framed structure would provide support and stability for the garage door installation, allowing for proper operation and longevity.

Martin Garage Doors

10411 South Parker Rd. Parker, CO 80134

719-264-8380

Powered by WordPress & Theme by Anders Norén