Your One Stop Local Business News

Tag: Window Cleaning

Cleaning Windows with Insect Screens – DFW Window Cleaning Mckinney

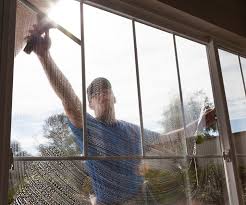
Every spring, as the world outside awakens with vibrant colors and sweet fragrances, I eagerly throw open my windows to welcome the fresh air. However, I’ve often been met with the not-so-welcome sight of dirty insect screens obstructing the view. Cleaning windows is a task most of us are familiar with, but cleaning them with insect screens in place adds an extra layer of complexity.

Based from McKinney Window Cleaning, I’ll share my experiences and insights on the art of cleaning windows with insect screens, ensuring a bug-free view of the world beyond.

The Conundrum of Insect Screens

Insect screens, those fine mesh barriers, are a godsend during warm seasons. They keep pesky bugs and insects at bay while allowing you to enjoy the benefits of fresh air flowing into your home. However, over time, these screens can accumulate dirt, dust, pollen, and even spider webs, turning your clear view into a hazy, obstructed one.

Cleaning windows themselves is relatively straightforward, but when it comes to cleaning windows with insect screens, the process requires a bit more finesse and attention to detail.

1. Assessing the Situation

Before embarking on the task of cleaning windows with insect screens, it’s essential to assess the condition of both the screens and the windows. Here are some key considerations:

  • Screen Material: Determine the material of your screens. Most screens are made from fiberglass, aluminum, or synthetic materials. Knowing the material will help you choose the appropriate cleaning method.
  • Degree of Dirt: Assess the level of dirt, dust, and grime on the screens. Screens that have been in place for an extended period may require more intensive cleaning.
  • Window Frame Condition: Check the condition of the window frames. If they are dirty or deteriorating, it’s a good idea to clean or repair them before reinstalling the screens.

2. Gather Your Cleaning Supplies

Cleaning windows with insect screens requires specific tools and supplies to ensure a thorough and effective cleaning process. Here’s what you’ll need:

  • Vacuum cleaner with brush attachment: A vacuum cleaner is ideal for removing loose dirt and dust from the screens.
  • Soft bristle brush or scrubbing pad: This is for gently scrubbing the screens without damaging the mesh.
  • Bucket: To hold your cleaning solution.
  • Cleaning solution: Depending on the type of screen material, you can use a mild dish soap and water mixture, or a screen-specific cleaning solution.
  • Soft cloths or sponge: These are for applying the cleaning solution and wiping the screens.
  • Garden hose or pressure washer: If your screens are removable and the weather allows, you can rinse them outdoors.

3. Cleaning Insect Screens in Place

Cleaning insect screens while they are still installed in the windows is a practical approach, especially for fixed or hard-to-remove screens. Here’s how to do it:

Step 1: Vacuuming

Use a vacuum cleaner with a brush attachment to gently remove loose dirt and dust from the screens. Be thorough but delicate to avoid damaging the mesh.

Step 2: Preparing the Cleaning Solution

In a bucket, mix a cleaning solution suitable for the type of screen material you have. A simple solution of mild dish soap and water works for most screens. Avoid using harsh chemicals or abrasive cleaners that could damage the screens.

Step 3: Scrubbing

Dip a soft bristle brush or scrubbing pad into the cleaning solution and gently scrub the screens. Start at the top and work your way down in a horizontal motion. Pay attention to any areas with stubborn stains or buildup.

Step 4: Rinsing and Drying

Use a clean, damp cloth or sponge to wipe away the soapy residue from the screens. Then, thoroughly dry the screens with a dry, lint-free cloth to prevent water spots.

Step 5: Reinstalling the Screens

Once the screens are clean and dry, carefully reinstall them in their respective window frames. Make sure they are securely in place and that there are no gaps or wrinkles in the mesh.

4. Removing and Deep Cleaning Removable Screens

For screens that are easily removable, a deep cleaning method can be more effective. Here’s how to go about it:

Step 1: Removal

Carefully remove the screens from the windows. Take note of their location and orientation so you can reinstall them correctly later.

Step 2: Vacuuming

As with cleaning in place, start by using a vacuum cleaner with a brush attachment to remove loose dirt and dust from both sides of the screens.

Step 3: Cleaning Solution

Prepare your cleaning solution in a bucket. Dip a soft bristle brush or scrubbing pad into the solution and gently scrub the screens on both sides, paying extra attention to any stubborn stains or buildup.

Step 4: Rinsing

Rinse the screens thoroughly with a garden hose or pressure washer, if available. Ensure that all traces of the cleaning solution are removed.

Step 5: Drying

Allow the screens to air dry completely before reinstalling them. Be patient and avoid reinstalling them while they are still damp, as this can lead to mold or mildew growth.

Step 6: Reinstallation

Carefully reinstall the screens in their respective window frames, ensuring they are securely in place and properly oriented.

5. Regular Maintenance

To keep your windows and insect screens looking their best, consider implementing a regular maintenance routine:

  • Vacuum Regularly: Use a vacuum cleaner with a brush attachment to remove loose dirt and dust from the screens every few weeks.
  • Quick Wipe: Periodically wipe down the screens with a damp, lint-free cloth to remove any surface dirt or pollen.
  • Inspect for Damage: Regularly inspect screens for tears, holes, or other damage that may require repairs or replacement.

The Joy of a Clear View

As I stand back and admire my freshly cleaned windows with insect screens, I can’t help but feel a sense of accomplishment. The effort put into maintaining these essential barriers between my home and the great outdoors is well worth it. With a clear view and the satisfaction of knowing that I’ve kept the bugs at bay, I’m ready to welcome the warmth of spring and the beauty of nature into my home.

Overall, according to McKinney Window Cleaning, cleaning windows with insect screens may seem like a chore, but the rewards are undeniable. It’s not just about the view; it’s about the sense of freshness and connection to the outside world that clean windows bring. So, the next time you throw open your windows to welcome the season, take a moment to appreciate the clarity and beauty that come with well-maintained screens.

DFW Window Cleaning Mckinney

10701 Smithville Pl, McKinney, TX 75071, United States

972-433-5793

Cleaning Windows in High-Humidity Areas: A Clearer View in Every Season – DFW Window Cleaning Colleyville

As a homeowner living in a high-humidity area, I’ve faced unique challenges when it comes to keeping my windows clean. The constant battle against moisture, mold, and mineral deposits has led me on a quest to discover the most effective techniques and strategies for maintaining crystal-clear windows.

I’ll share my experiences and insights into the art of cleaning windows in high-humidity environments, helping you achieve a clearer view in every season based from Window Cleaning Colleyville TX.

Understanding the Challenges of High-Humidity Areas

Before delving into the techniques for cleaning windows in high-humidity areas, it’s essential to understand the specific challenges posed by such environments:

  1. Condensation: High humidity often leads to condensation on windows, creating water droplets that can leave streaks and water spots when they evaporate.
  2. Mold and Mildew: Excess moisture can promote the growth of mold and mildew on window frames, sills, and even the glass itself.
  3. Mineral Deposits: In humid regions with hard water, mineral deposits can accumulate on windows over time, creating cloudy spots that are challenging to remove.

High-Humidity Window Cleaning Tips:

To combat these challenges and achieve consistently clean windows in high-humidity areas, consider the following tips and techniques:

1. Regular Cleaning Schedule

In high-humidity areas, maintaining a regular window cleaning schedule is crucial. Frequent cleaning prevents the buildup of condensation, mold, and mineral deposits, making the task more manageable.

2. Gather the Necessary Supplies

Before you start cleaning your windows, gather the following supplies:

  • A bucket filled with warm, soapy water (mild dish soap works well).
  • A soft bristle brush or microfiber cloth for scrubbing.
  • A squeegee with a rubber blade.
  • A clean, lint-free microfiber cloth or paper towels.
  • A garden hose with a spray nozzle attachment.
  • An optional window cleaning solution or a mixture of white vinegar and water.

3. Remove Loose Debris

Begin by removing any loose debris, dust, and cobwebs from the window surface, frames, and sills. A soft brush or microfiber cloth is useful for this task.

4. Apply the Cleaning Solution

Dip your soft bristle brush or a microfiber cloth into the warm, soapy water or your chosen cleaning solution. Apply the solution generously to the window surface, ensuring thorough coverage.

5. Scrub Gently

Use your scrubbing tool to gently agitate the surface, paying special attention to areas with mold, mildew, or mineral deposits. Avoid using abrasive materials or excessive force, as this can damage the glass or frames.

6. Squeegee from Top to Bottom

Now comes the crucial step for achieving streak-free results: squeegeeing. Start at the top corner of the window and pull the squeegee down in a single, continuous motion. Wipe the blade of the squeegee with a clean, lint-free cloth after each pass. This removes any residual cleaning solution and prevents streaks.

Pro Tip: To avoid streaks, it’s important to maintain consistent pressure on the squeegee throughout the entire pass. Begin with the squeegee at a slight angle and gradually straighten it as you move down the glass.

7. Wipe the Edges and Sills

After squeegeeing the glass, use a clean microfiber cloth or paper towel to wipe any remaining moisture from the window edges, sills, and frames. This step prevents water from running down and creating streaks.

8. Rinse Thoroughly

Rinse the window thoroughly with a garden hose using a gentle spray nozzle attachment. Ensure that all cleaning solution and residue are completely removed.

9. Detail Work

If you encounter stubborn spots or mineral deposits that haven’t been fully removed, you may need to perform additional scrubbing and squeegeeing in those areas. Patience and persistence are key.

10. Preventative Measures

To minimize the challenges posed by high humidity, consider implementing these preventative measures:

  • Use a dehumidifier indoors to reduce excess moisture in your home.
  • Ensure proper ventilation by using exhaust fans in bathrooms and kitchens.
  • Install weather stripping around windows to reduce condensation.
  • Apply a mold-resistant coating to window frames and sills.
  • Consider using a water softener to address hard water issues if mineral deposits are a recurring problem.

Conclusion: The Art of Clean Windows in High-Humidity Areas

According to Window Cleaning Colleyville TX, living in a high-humidity area has taught me that the battle for clean windows is ongoing, but with the right techniques and strategies, victory is possible. By following a regular cleaning schedule and using the appropriate tools and solutions, you can overcome the challenges of condensation, mold, and mineral deposits.

A clear view through clean windows not only enhances the aesthetics of your home but also improves your quality of life. So, embrace the unique challenges of high-humidity window cleaning, and let your beautifully maintained windows be a source of pride and comfort, no matter the weather outside.

DFW Window Cleaning Colleyville

1808 Maplewood Trail, Colleyville, TX 76034, United States

817-813-8010

Sustainable Window Cleaning: Tips for an Environmentally Friendly Approach – Plano Window Cleaning & Glass Repair

As someone who’s deeply committed to adopting sustainable practices in every aspect of my life, transitioning to an eco-friendly window cleaning routine was a natural step for me. Clean windows enhance the beauty of our spaces, but I also wanted to ensure that my cleaning practices didn’t harm the environment.

By following Window Cleaning Plano TX, I’ll share my personal journey of embracing sustainable window cleaning methods and offer practical tips for anyone who wants to join me in creating a greener, cleaner world.

1. Embracing Green Solutions

My first step was to shift away from traditional cleaning products that often contain harsh chemicals. Instead, I began using eco-friendly cleaning solutions. Vinegar and water became my go-to mixture, offering effective cleaning without the harmful impact on both indoor air quality and the environment.

2. DIY Magic

Creating my own cleaning solutions was not only cost-effective but also satisfyingly sustainable. Mixing water, vinegar, and a hint of lemon juice became my signature window cleaning blend. This DIY approach allowed me to control the ingredients and reduce the waste associated with commercial cleaners.

3. The Power of Microfiber

Microfiber cloths emerged as my sustainable superheroes. These reusable cloths efficiently captured dirt and grime without requiring excessive chemical use. I invested in high-quality microfiber cloths that I could wash and use repeatedly, drastically reducing the need for disposable alternatives.

4. Unconventional Tools: Newspapers

Surprisingly, newspapers found a new purpose in my sustainable window cleaning routine. Crumpled newspapers, paired with my eco-friendly cleaning solution, proved to be a streak-free solution that minimized paper towel waste. Repurposing newspapers not only saved resources but also added a touch of nostalgia to my cleaning routine.

5. Prevention is Key

I realized that sustainable window cleaning goes beyond just using eco-friendly products. Preventing dirt and dust buildup became a priority. Regularly dusting windowsills and frames was a simple yet effective way to reduce the need for frequent deep cleaning.

6. The Rainwater Advantage

Harnessing the power of rainwater was an eco-conscious move that resonated with me. Collecting rainwater in a clean container and using it to rinse my windows after cleaning added a final touch of nature to my routine. Rainwater naturally lacked the minerals found in tap water, contributing to a streak-free shine.

7. Biodegradable Brushes for Exterior Windows

My sustainable journey extended to the exterior of my windows. Biodegradable brushes made from natural fibers became my choice for scrubbing away outdoor dirt and grime. These brushes broke down naturally over time, aligning with my commitment to minimizing plastic pollution.

8. Mindful Water Usage

Conserving water was a crucial part of my sustainable window cleaning approach. Instead of letting the tap run while cleaning, I used a spray bottle to apply my cleaning solution. This targeted method minimized water waste and ensured that I used only the necessary amount of water.

9. Reusable Tools for Longevity

Investing in high-quality, reusable cleaning tools such as squeegees and extension poles became a cornerstone of my sustainable routine. These durable tools, when properly maintained, had the potential to last for years, reducing the need for frequent replacements and the waste associated with disposable alternatives.

10. Spreading the Green Message

As I embarked on my eco-friendly window cleaning journey, I felt a responsibility to share my experience with others. I used social media to document my sustainable practices, engaged in conversations with friends and family, and encouraged them to adopt greener cleaning routines too.

Conclusion: Clear Windows, Cleaner Tomorrow

According to Window Cleaning Plano TX, transitioning to a sustainable window cleaning routine was more than just a personal choice; it was a commitment to a cleaner planet. By choosing eco-friendly solutions, minimizing waste, and sharing the sustainability message, I’ve found a way to enjoy the clarity of clean windows while honoring the environment. With every eco-conscious choice, I’m contributing to a world where sustainability is a way of life, and clean views are a reflection of our collective effort to create a brighter future for our planet.

Plano Window Cleaning & Glass Repair

1201 Legacy Dr #2114, Plano, TX 75023, United States

972-544-1373

The Impact of Professional Window Cleaning on Home Energy Efficiency – NRH Window Cleaning & Glass Repair

As someone who’s always on the lookout for ways to improve the energy efficiency of my home, I was intrigued to discover that a seemingly unrelated task – professional window cleaning – could actually play a significant role in conserving energy. I’ve always understood the aesthetic importance of clean windows, but I was surprised to learn that they have a tangible impact on how efficiently my home uses energy.

By following North Richland Hills Window Cleaning, I’ll share my journey of uncovering the hidden energy-saving benefits of professional window cleaning and how it has transformed the way I approach both window maintenance and home sustainability.

1. Embracing Abundant Natural Light

I’ve always cherished the beauty of natural light streaming through my windows, but I never realized its potential to reduce energy consumption. Clean windows allow uninterrupted sunlight to flood into your home, lessening the need for artificial lighting during the day. This not only enhances the ambiance of your living spaces but also leads to energy savings by minimizing the use of electric lights.

2. Harnessing Solar Heat Gain

The concept of harnessing solar heat gain through windows was new to me. During the colder months, sunlight can provide much-needed warmth, lessening the load on heating systems. However, dirt and streaks on windows can scatter sunlight, diminishing its ability to provide passive heating. Professional window cleaning removes these obstructions, allowing windows to effectively capture and transmit solar heat gain.

3. Keeping Cool in an Eco-Friendly Way

Living in a warmer climate, I’ve always relied on air conditioning to keep my home comfortable. It was a revelation to learn that clean windows can actually help reduce the need for artificial cooling. Unlike dirty windows that absorb and radiate excess heat, clean windows allow sunlight to enter without carrying additional warmth. This natural cooling effect minimizes the demand on air conditioning systems, leading to considerable energy savings.

4. Strengthening Thermal Insulation

Understanding that windows contribute to thermal insulation was eye-opening. Dirty windows compromise this insulation by obstructing the barrier between indoor comfort and external elements. The act of professional window cleaning removes accumulated pollutants that can hinder insulation performance. With a clean and clear surface, windows provide better thermal insulation, resulting in reduced reliance on heating and cooling systems.

5. Easing the Burden on HVAC Systems

My HVAC system has always been vital for maintaining a comfortable indoor environment, but I didn’t realize that clean windows could indirectly contribute to its efficiency. By stabilizing indoor temperatures, clean windows help HVAC systems maintain comfort without working overtime. This translates to decreased energy consumption and reduced strain on heating and cooling equipment.

6. Battling Unwanted Condensation

Condensation on windows is something I’ve dealt with, particularly during humid seasons. What surprised me was learning that dirty windows are more susceptible to condensation due to their uneven surface. Excess condensation can lead to issues like mold growth and window frame damage. Professional window cleaning addresses this problem by creating a smooth surface that resists moisture buildup.

7. A Long-Term Investment in Efficiency

Choosing professional window cleaning isn’t just about immediate results; it’s an investment in the long-term energy efficiency of your home. Regular cleaning prevents the accumulation of pollutants and residues that can degrade windows over time. Maintaining clean windows ensures that they continue to provide energy-saving benefits year after year.

8. Protecting Window Longevity

I never thought about the impact of accumulated pollutants on my windows’ lifespan. Learning that dirt and debris can etch into glass and degrade window frames made me realize that professional window cleaning is about more than just aesthetics. It’s a way to extend the life of your windows, preserving their energy-saving capabilities.

9. Aligning with Eco-Friendly Living

Energy efficiency aligns with my commitment to eco-friendly living. By relying on natural light and minimizing the use of heating and cooling systems, I’m indirectly contributing to lower energy consumption and a reduced environmental footprint. Professional window cleaning is in line with this ethos, allowing me to make eco-conscious choices for my home.

Conclusion: A Window to Sustainable Living

Based from North Richland Hills Window Cleaning, through my journey of understanding the energy-saving benefits of professional window cleaning, I’ve come to realize that even seemingly small choices can have a substantial impact on my home’s energy efficiency. The journey from clean windows to lower utility bills and reduced carbon footprint was unexpected, but it has transformed the way I view window maintenance. By embracing the energy-saving effects of clean windows, I’ve not only enhanced the comfort and aesthetics of my home but also taken a step closer to a sustainable and energy-efficient lifestyle.

NRH Window Cleaning & Glass Repair

7510 Davis Blvd # B, North Richland Hills, TX 76182, United States

817-601-6082

Cleaning Windows in Winter: Preventing Frost and Condensation – Southlake Window Cleaning & Glass Repair

As the winter chill settles in and the world outside transforms into a snowy wonderland, my attention turns to a challenge that every homeowner faces: preventing frost buildup and managing condensation on windows. The magical scenes outside are a stark contrast to the potential foggy mess on my windows. Over time, I’ve developed strategies to tackle these issues and maintain clear, inviting windows throughout the winter.

In this guide, I’ll take you through my journey of understanding and overcoming frost and condensation challenges, offering insights and practical tips to help you enjoy unobstructed views and a comfortable indoor environment during the coldest months as stated from Window Cleaning Southlake TX.

Grasping the Nature of Frost and Condensation

Winter brings with it the beauty of frost-covered landscapes and the cozy allure of indoor warmth. However, it also introduces frost and condensation challenges on windows due to temperature differences between indoor and outdoor environments.

Confronting the Winter Challenges

  1. Hindered Views: The buildup of frost and condensation can blur the view, preventing me from fully enjoying the serene winter scenes outside.
  2. Potential Damage: Prolonged exposure to moisture from condensation or frost can lead to damage to window frames, sills, and even walls surrounding the windows.
  3. Comfort Conundrum: Excessive condensation can create discomfort and, in extreme cases, promote the growth of mold if not addressed.

Effective Tactics for Tackling Frost and Condensation

  1. Humidity Harmony:
    • I keep an eye on indoor humidity levels using a hygrometer, aiming to maintain them between 30% and 50% to minimize condensation.
  2. Ventilation Vigilance:
    • Rooms prone to condensation, such as bathrooms and kitchens, receive special attention with proper ventilation.
  3. Air Circulation Solution:
    • Utilizing ceiling fans or portable fans helps to maintain consistent air circulation, reducing pockets of stagnant air where condensation tends to form.
  4. Sealing and Weatherstripping:
    • Gaps around windows are checked and sealed using weatherstripping or caulking, preventing warm indoor air from meeting cold outdoor air.
  5. Insulation Intervention:
    • Heavy curtains or insulating window film offer an extra layer of defense against temperature differences, deterring frost and condensation.
  6. Window Covering Tactics:
    • By keeping blinds or curtains slightly open during the day, I enable warm air circulation. At night, I close them to keep out the cold air.
  7. Dehumidifier Dependence:
    • To ensure consistent indoor humidity levels, dehumidifiers are strategically placed in areas prone to moisture buildup.
  8. Warm Air Wisdom:
    • Ensuring that warm air vents are unblocked is crucial for maintaining proper air circulation around windows.

A Step-by-Step Guide to Preventing Frost and Condensation

  1. Humidity Check:
    • I start by using a hygrometer to measure indoor humidity levels, aiming for the optimal 30% to 50% range.
  2. Ventilation Assessment:
    • Rooms that are more susceptible to condensation are identified, and I ensure they have proper ventilation.
  3. Air Circulation Planning:
    • By strategically placing fans, I encourage air circulation to prevent pockets of stagnant air.
  4. Sealing Inspection:
    • I meticulously examine windows for gaps or cracks and seal them with weatherstripping or caulking.
  5. Insulation Application:
    • Applying insulating window film or using heavy curtains provides an additional defense against temperature disparities.
  6. Window Covering Strategy:
    • I adjust blinds or curtains during the day and night to regulate warm air circulation and prevent cold air from reaching the glass.
  7. Dehumidifier Management:
    • Dehumidifiers are employed in areas susceptible to moisture buildup, maintaining consistent humidity levels.
  8. Vent Maintenance:
    • I ensure heating vents are unobstructed to allow warm air to circulate around windows effectively.

Year-Round Window Care Reminders

  1. Regular Inspections:
    • Periodic window inspections help detect any moisture-related issues, mold growth, or damage due to frost or condensation.
  2. Window Cleaning Preparation:
    • Before winter’s onset, I clean windows to eliminate any existing dirt or grime that might contribute to condensation or frost buildup.
  3. Temperature Balance:
    • Keeping a steady indoor temperature minimizes the temperature difference between indoor and outdoor air, reducing condensation.
  4. Swift Action:
    • At the first sign of frost or condensation, I promptly wipe it away to prevent potential damage.

Conclusion: Winter’s Beauty, Unobstructed

As per Window Cleaning Southlake TX, winter is a season of contrasts, with its breathtaking outdoor vistas and the cozy comfort of indoor spaces. By understanding the causes of frost buildup and condensation and adopting preventive measures, I’ve discovered that I can savor the magic of winter without compromising the clarity of my windows. Armed with a combination of proper ventilation, insulation, and humidity control, I’m confident in my ability to maintain inviting, frost-free windows and a warm, comfortable indoor atmosphere. As I embrace the winter months, I’m equipped to enjoy the best of both worlds: the captivating scenes outside and the warmth and clarity within my home.

Southlake Window Cleaning & Glass Repair

1052 Summerplace Ln, Southlake, TX 76092, United States

817-839-4773

Page 3 of 3

Powered by WordPress & Theme by Anders Norén