Your One Stop Local Business News

Category: General Page 2 of 3

The Process of Professional Window Replacement – NTHE Window Replacement Mansfield

As a homeowner who recently embarked on the journey of professional window replacement, I’m eager to share my firsthand experience and insights into this essential home improvement project. The process of replacing windows is a significant undertaking, and understanding the various stages involved can help homeowners make informed decisions and prepare for a smoother transition.

I’ll take you through the step-by-step process of professional window replacement based on my own recent project by following Window Replacement Mansfield TX.

Step 1: Assessment and Consultation

The process of professional window replacement typically begins with an assessment and consultation with a reputable window replacement company. In my case, I reached out to a local window specialist to schedule an initial consultation. During this stage, the following key activities took place:

  • On-Site Inspection: A trained technician visited my home to inspect the existing windows and assess their condition. They checked for signs of damage, wear, and energy inefficiency.
  • Needs Assessment: The technician inquired about my specific needs, preferences, and goals for the window replacement project. This included discussing aspects such as style, materials, and energy efficiency.
  • Cost Estimation: Based on the assessment, the technician provided a preliminary cost estimate, outlining the expected expenses for the project. This served as a reference point for budgeting.
  • Customization Options: I was presented with a variety of window styles, frame materials, and features to choose from. This stage allowed for customization to align the replacement windows with my home’s architectural style.

Step 2: Window Selection

Once the assessment and consultation were completed, the next step was selecting the replacement windows. This stage involved careful consideration of various factors, including:

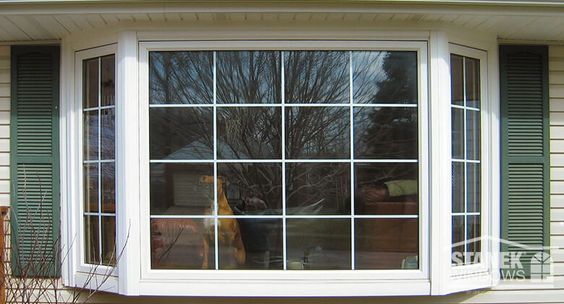
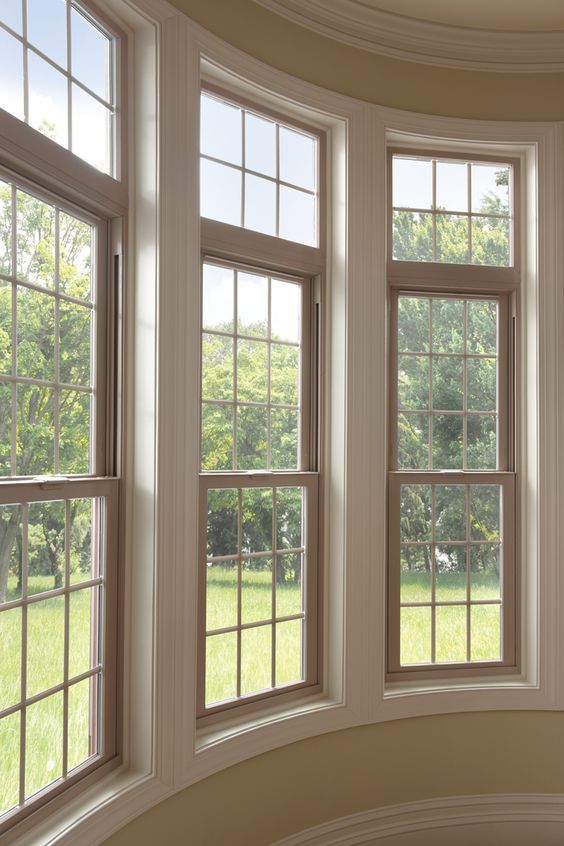
  • Window Style: I opted for a style that matched my home’s aesthetics and offered the functionality I desired. Common options included double-hung, casement, sliding, and awning windows.
  • Frame Material: The choice of frame material was an important decision. I considered options such as vinyl, wood, aluminum, and fiberglass, taking into account factors like durability and maintenance requirements.
  • Glass Options: I had the opportunity to choose the type of glass for my replacement windows. This included options with Low-E coatings for improved energy efficiency and enhanced UV protection.
  • Color and Finish: Personalizing the appearance of my replacement windows allowed me to select colors and finishes that complemented the overall design of my home.

Step 3: Pre-Installation Preparation

Before the installation process could commence, there were several pre-installation preparations to address:

  • Obtaining Permits: In my case, the window replacement company assisted with obtaining the necessary permits, ensuring that the project complied with local building codes and regulations.
  • Clearing the Work Area: I moved furniture, drapes, and decorations away from the windows to create an unobstructed workspace for the installation team.
  • Protecting My Home: The installation team took steps to protect my home’s interior during the project. This included covering floors and furniture to prevent dust and debris from causing any damage.

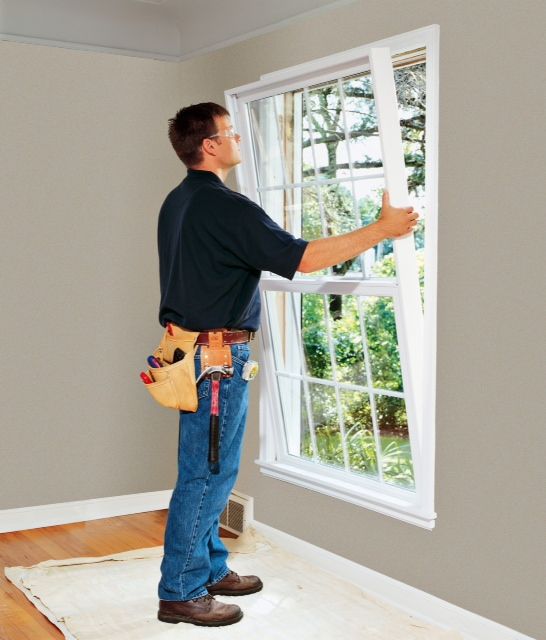
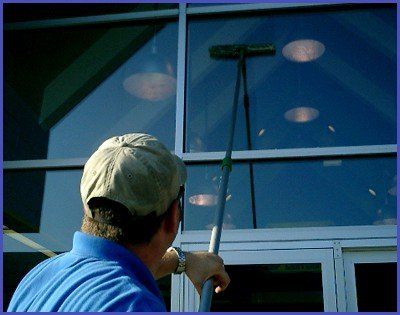
Step 4: Professional Installation

The heart of the window replacement process is the professional installation, which involved several crucial steps:

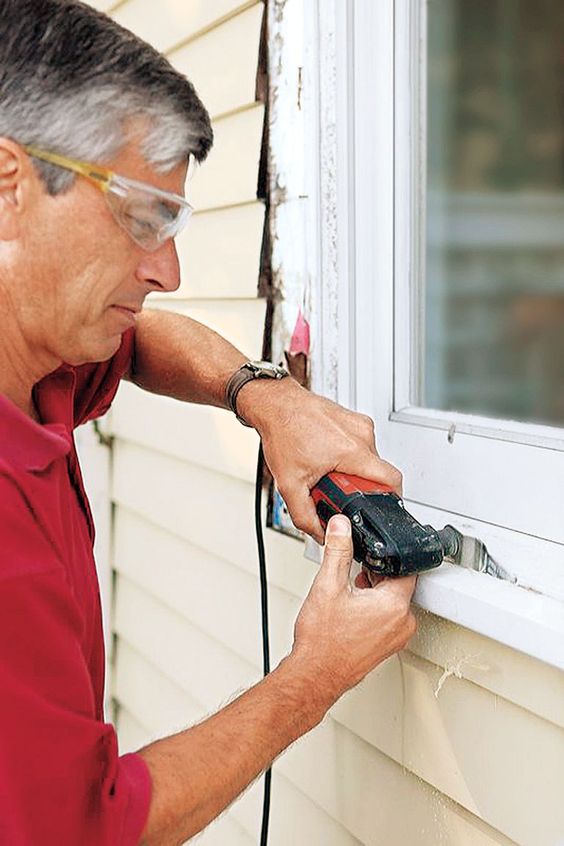
  • Removal of Old Windows: The existing windows were carefully removed by the installation team. This required precision to avoid damaging the surrounding walls.
  • Frame Inspection and Repairs: The window frames and sills were thoroughly inspected for any damage or decay. In my case, minor repairs were conducted to ensure a solid foundation for the new windows.
  • Fitting and Alignment: The replacement windows were custom-fitted to my home’s openings. The installation team ensured that each window was level and properly aligned.
  • Weatherproofing: To prevent moisture infiltration and drafts, high-quality sealants and insulation materials were applied around the window frames. This is a critical step in ensuring energy efficiency.
  • Operational Testing: Each replacement window was tested to ensure smooth operation, proper sealing, and adherence to safety standards. This included checking locks, hinges, and any additional features.

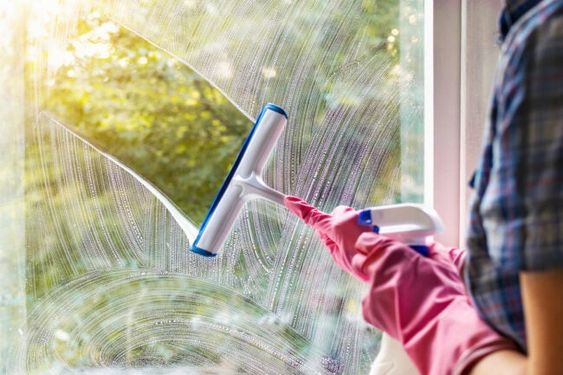
Step 5: Final Inspection and Cleanup

Following the installation, a final inspection and cleanup were conducted to wrap up the project:

  • Quality Assurance: The installation team conducted a final inspection to confirm that each replacement window met quality standards and specifications.
  • Cleanup: Any debris or materials used during the installation were removed, leaving my home clean and free of clutter.

Step 6: Post-Installation Assessment

After the installation, I had the opportunity to assess the new replacement windows and provide feedback to the installation team:

  • Functionality Check: I tested each window to ensure they opened, closed, and locked correctly. This allowed for the identification of any minor adjustments that might be needed.
  • Energy Efficiency: I monitored the impact of the replacement windows on indoor temperature and energy bills, paying attention to any improvements in insulation and comfort.
  • Aesthetics and Satisfaction: I assessed how the replacement windows enhanced the appearance of my home and whether they met my expectations.

Final Thoughts

Overall, as stated in Window Replacement Mansfield TX, the process of professional window replacement is a comprehensive and well-organized journey that requires careful planning and execution. Throughout each stage, from the initial consultation to the post-installation assessment, I felt confident that I was in the hands of experienced professionals. The decision to invest in replacement windows has not only improved the energy efficiency and aesthetics of my home but has also significantly enhanced my overall quality of life. For homeowners considering this type of home improvement project, the process I’ve outlined can serve as a valuable guide to achieving a successful window replacement experience.

NTHE Window Replacement Mansfield

1771 Calender Rd, Mansfield, TX 76063, United States

817-592-8450

How to Find Quality Window Replacement Contractors – Window Replacement Experts Mckinney

When the time came to replace the windows in my home, I knew that finding the right window replacement contractor was a critical part of the process. After all, the installation quality can significantly impact the performance and energy efficiency of the new windows.

I’ll share my experiences and tips on how to find quality window replacement contractors based from Window Replacement McKinney TX.

1. Start with Research

The first step is to research window replacement contractors in your area. There are several ways to do this:

  • Online Searches: I started by searching online for window replacement contractors in my locality. This provided a list of potential candidates to consider.
  • Ask for Recommendations: I also asked friends, family, and neighbors for recommendations. Personal referrals can be a valuable source of information.
  • Check Review Sites: Websites like Yelp, Angie’s List, and the Better Business Bureau are excellent resources for reading reviews and checking the ratings of contractors in your area.

2. Verify Credentials

Once I had a list of potential contractors, I verified their credentials. This involved checking for the following:

  • License: Ensure that the contractor is licensed to perform work in your area. This typically signifies that they meet certain standards and regulations.
  • Insurance: Confirm that the contractor has liability insurance. This is essential in case of accidents or damage during the installation process.
  • Certifications: Some contractors may hold certifications from window manufacturers, which can be a sign of expertise and quality work.

3. Ask for References

I asked each contractor for a list of references from their previous projects. Talking to past customers can provide insights into the contractor’s work quality, professionalism, and reliability. When contacting references, be sure to ask about their overall experience and if they encountered any issues.

4. Request Multiple Quotes

To ensure you get a fair price and avoid overpaying, it’s essential to request multiple quotes. I reached out to several contractors and asked for detailed quotes that included the cost of the windows, labor, materials, and any additional services such as disposal of old windows.

5. Compare Quotes

Once I received the quotes, I carefully compared them. It’s not just about choosing the lowest price; you should consider the overall value, including the quality of materials and workmanship. Keep in mind that significantly lower quotes may be a sign of inferior materials or a lack of experience.

6. In-Person Consultations

I scheduled in-person consultations with the contractors whose quotes and references impressed me the most. This is an opportunity to discuss the project, ask questions, and get a sense of their professionalism and communication.

7. Ask Questions

During the consultations, I asked a series of questions to gauge their expertise and professionalism:

  • How long have you been in business?
  • Can you provide a timeline for the project?
  • What type of windows do you recommend for my specific needs?
  • Do you have experience working with energy-efficient windows?
  • Will you handle any necessary permits?
  • What warranties do you offer on your work and the windows themselves?

8. Check for Clear Communication

Clear communication is crucial throughout the project. It’s essential that the contractor can explain the process, address your concerns, and keep you informed about progress. I assessed their communication skills during the consultation.

9. Visit Ongoing Projects

If possible, I visited ongoing projects or recently completed ones. This allowed me to see the contractor’s work in action and get a sense of the quality and attention to detail.

10. Verify Subcontractors

Some contractors may use subcontractors for certain aspects of the job. I ensured that any subcontractors used were also licensed, insured, and reputable.

11. Get Everything in Writing

Once you’ve selected a contractor, it’s critical to have everything in writing. This includes the project timeline, the scope of work, costs, payment schedule, and warranties. A clear and detailed contract helps protect both you and the contractor.

12. Check for Permits

Before the project begins, confirm if any permits are required. The contractor should handle the permitting process or guide you through it.

13. Follow Your Instincts

Finally, trust your instincts. If something doesn’t feel right or if a contractor is not responsive, it may be best to explore other options. A successful project requires trust and good communication between you and the contractor.

In conclusion, as per Window Replacement McKinney TX, finding quality window replacement contractors requires careful research, verification of credentials, and clear communication. Taking the time to go through this process can help ensure that your window replacement project goes smoothly and results in improved energy efficiency and overall comfort in your home.

Window Replacement Experts Mckinney

9932 Prairie Dog Ln, McKinney, TX 75071, United States

972-895-8221

Windows Replacement: Double or Triple Pane Glass? – NTHE Window Replacement Euless

As a homeowner, I recently found myself facing an important decision when it came to replacing my windows: should I opt for double pane or triple pane glass? The choice between these two options can significantly impact a home’s energy efficiency, comfort, and overall value.

I’ll share my experiences and explore the differences, advantages, and considerations when deciding between double and triple pane glass for window replacement by following Window Replacement Euless TX.

Understanding the Basics: Double Pane vs. Triple Pane Glass

Before delving into the decision-making process, it’s essential to understand the fundamental differences between double and triple pane glass windows.

Double Pane Glass:

Double pane windows, as the name suggests, consist of two layers (panes) of glass that are separated by a space filled with air or insulating gas, typically argon or krypton. These windows provide an extra layer of insulation compared to single-pane windows, making them more energy-efficient and better at reducing heat transfer.

Triple Pane Glass:

Triple pane windows, on the other hand, take the insulation a step further. They feature three layers (panes) of glass, with two insulating spaces. The spaces are filled with insulating gas, usually argon or krypton, creating additional layers of protection against heat transfer, noise, and condensation.

Advantages of Double Pane Glass:

Double pane windows offer several advantages that make them a popular choice for homeowners:

1. Improved Insulation: Double pane glass provides better insulation compared to single-pane windows, reducing heat transfer and enhancing energy efficiency.

2. Energy Savings: With increased insulation, double pane windows help maintain indoor temperatures, reducing the workload on heating and cooling systems. This can lead to lower energy bills.

3. Noise Reduction: Double pane glass is more effective at reducing noise infiltration from the outside, creating a quieter and more peaceful living environment.

4. Reduced Condensation: The extra insulation minimizes the likelihood of condensation forming on the interior of the window, preventing potential damage and mold growth.

Advantages of Triple Pane Glass:

Triple pane windows offer additional benefits that may justify the higher cost:

1. Superior Insulation: Triple pane glass provides the highest level of insulation, significantly reducing heat transfer and enhancing overall energy efficiency.

2. Exceptional Energy Savings: The superior insulation of triple pane windows results in even more substantial energy savings. They can keep your home cooler in the summer and warmer in the winter, reducing the need for heating and cooling.

3. Enhanced Noise Reduction: Triple pane glass is incredibly effective at reducing noise infiltration, making it an ideal choice if you live in a noisy area or near a busy street.

4. Advanced Condensation Control: The added layers of insulation in triple pane windows virtually eliminate the risk of condensation forming on the interior glass, protecting your home from potential damage and mold.

The Decision-Making Process: Double or Triple Pane Glass?

Deciding between double and triple pane glass for your window replacement project involves considering various factors, including your budget, climate, and long-term goals. Here are some essential considerations to help you make an informed choice:

1. Climate:

Your local climate plays a significant role in determining whether double or triple pane windows are the better option. If you live in an area with extreme temperature variations, such as very hot summers and frigid winters, triple pane windows can offer superior insulation, reducing the strain on your heating and cooling systems. They are especially beneficial in cold climates where energy efficiency is critical.

2. Energy Efficiency Goals:

Consider your energy efficiency goals. If you are committed to minimizing energy consumption and reducing your carbon footprint, triple pane windows are the more environmentally friendly choice. They provide the highest level of insulation and can lead to significant long-term energy savings.

3. Budget Constraints:

Your budget is a crucial factor when deciding between double and triple pane windows. Triple pane windows are typically more expensive upfront due to the additional materials and complexity of their construction. Double pane windows, while less expensive, still offer significant energy savings and improved comfort.

4. Return on Investment:

Think about the long-term return on investment (ROI). While triple pane windows may have a higher initial cost, their exceptional energy efficiency and long lifespan can result in significant savings on energy bills over the years. Calculate the potential ROI for both options to make an informed choice.

5. Noise Levels:

Evaluate the noise levels in your area and within your home. If noise infiltration is a significant concern, triple pane windows are exceptionally effective at reducing outside noise, creating a quieter living environment.

6. Window Location:

Consider the location of the windows within your home. Windows that face busy streets, airports, or other sources of noise may benefit from the superior noise reduction of triple pane glass.

7. Home’s Aesthetic and Architectural Style:

Factor in your home’s aesthetic and architectural style. Double pane windows are available in a wide range of styles and designs, making them a versatile choice for various home types. Triple pane windows, while also versatile, may have fewer options in some cases.

8. Installation and Frame Material:

The choice between double and triple pane glass should align with the type of window frame material and installation quality. Ensure that the window frames and installation provide optimal insulation and energy efficiency, as these factors play a significant role alongside the glass type.

9. Future Resale Value:

Consider how your choice of windows may impact the resale value of your home. Energy-efficient windows, whether double or triple pane, are attractive to potential buyers and can enhance your home’s overall value.

Final Thoughts: Making the Right Choice

Deciding between double pane and triple pane glass for your window replacement project is a significant decision that should align with your specific needs, goals, and budget. Both options offer advantages, but the choice ultimately depends on factors such as your local climate, energy efficiency goals, budget constraints, and architectural style.

In my case, I weighed the benefits of triple pane windows against my budget and energy efficiency goals. While triple pane windows offered superior insulation and noise reduction, I ultimately opted for double pane windows, which still provided a substantial improvement in energy efficiency while staying within my budget.

In summary, as stated in Window Replacement Euless TX, whichever option you choose, remember that professionally installed, high-quality windows will maximize their performance and longevity. Investing in well-insulated windows, whether double or triple pane, can enhance the comfort, energy efficiency, and overall value of your home, making it a wise and satisfying decision in the long run.

NTHE Window Replacement Euless

3752 Trinity Hills Ln, Euless, TX 76040, United States

817-402-3539

Energy Efficiency and Vent Hood Cleaning: How Professionals Help Save Costs – Dallas Vent-Hood & Conveyer Oven Cleaning

As a restaurant owner, I’ve always been conscious of the importance of energy efficiency in my commercial kitchen. Not only does it contribute to reducing our environmental footprint, but it also plays a significant role in controlling operational costs. One often-overlooked aspect of energy efficiency in the kitchen is vent hood cleaning.

In Vent Cleaning Dallas TX, I’ll share my experience on how vent hood cleaning professionals have helped us save costs through improved energy efficiency.

Understanding the Impact of Vent Hood Efficiency

Commercial kitchens rely on vent hoods to remove heat, smoke, grease, and odors generated during cooking. These vent hoods are essential for maintaining a comfortable working environment, ensuring the safety of kitchen staff, and complying with health and safety regulations. However, when vent hoods become clogged with grease and dirt, their efficiency diminishes, leading to several costly consequences:

  1. Increased Energy Consumption: Clogged vent hoods force exhaust fans to work harder, consuming more energy to maintain proper airflow. This results in higher utility bills.
  2. Reduced Air Quality: Inefficient vent hoods may not effectively remove smoke and odors, leading to a less pleasant dining experience for customers. Poor air quality can also affect the health and productivity of kitchen staff.
  3. Fire Hazard: Grease buildup in vent hoods is a fire hazard. A fire in the exhaust system can lead to extensive damage and costly repairs.
  4. Non-Compliance and Fines: Health and safety regulations require regular vent hood cleaning to maintain compliance. Failure to do so can result in fines and legal consequences.

The Role of Vent Hood Cleaning Professionals

Vent hood cleaning professionals play a vital role in ensuring the efficient operation of commercial kitchen exhaust systems. Here’s how they help save costs through improved energy efficiency:

1. Grease Removal:

Cleaning professionals specialize in removing grease buildup from vent hoods, ducts, and exhaust fans. By eliminating this obstruction, the exhaust system can operate at peak efficiency, reducing energy consumption.

2. Preventing Fire Hazards:

Grease buildup is a significant fire hazard in commercial kitchens. Vent hood cleaning professionals not only remove existing grease but also assess and address potential fire risks. Preventing a fire is far more cost-effective than dealing with the aftermath.

3. Compliance with Regulations:

Regular vent hood cleaning is often a legal requirement to maintain compliance with health and safety regulations. Non-compliance can result in fines and legal consequences that are far more costly than routine cleaning.

4. Extending Equipment Life:

Efficient vent hood operation reduces wear and tear on exhaust fans and other equipment. This prolongs the lifespan of these expensive components, saving on replacement and maintenance costs.

5. Improved Air Quality:

Clean vent hoods effectively remove smoke and odors from the kitchen, creating a more comfortable dining environment for customers and a healthier workspace for staff. Improved air quality can also reduce absenteeism and boost productivity.

My Experience with Vent Hood Cleaning Professionals

In my restaurant, I’ve experienced firsthand the benefits of regular vent hood cleaning by professionals. Here’s how it has helped us save costs and improve our kitchen’s energy efficiency:

Lower Utility Bills:

After a thorough vent hood cleaning, our exhaust fans no longer had to work as hard to maintain proper airflow. This led to a noticeable reduction in our monthly utility bills. Over time, these savings added up significantly.

Reduced Equipment Maintenance:

Our exhaust fans and ductwork remained in better condition with regular cleaning. We experienced fewer breakdowns and maintenance issues, resulting in lower repair costs.

Enhanced Air Quality:

Improved air quality in the kitchen led to a more pleasant working environment for our staff. With better ventilation, we saw increased productivity and fewer sick days taken by our employees.

Compliance and Peace of Mind:

Knowing that we were compliant with health and safety regulations provided peace of mind. We no longer had to worry about potential fines or legal consequences related to our kitchen’s cleanliness.

Preventing Fire Hazards:

Perhaps the most significant benefit was preventing a potential fire hazard. We had a close call once due to grease buildup, and it made us realize the importance of regular cleaning. Preventing a fire saved us not only the cost of repairs but also potential damage to our reputation.

Conclusion

Vent hood cleaning is a critical aspect of maintaining energy efficiency in a commercial kitchen. While it may seem like an additional expense, it ultimately leads to significant cost savings and operational benefits.

By enlisting the services of vent hood cleaning professionals, restaurant owners and kitchen managers can improve air quality, prevent fire hazards, extend equipment life, and reduce utility bills. It’s an investment in both safety and efficiency that pays off in the long run.

Overall, in my experience and according to Vent Cleaning Dallas TX, vent hood cleaning professionals have been instrumental in helping us save costs and operate a more energy-efficient kitchen. I hope that by sharing my first-person perspective, other restaurant owners and kitchen managers will recognize the value of these services and prioritize energy efficiency in their commercial kitchens.

Dallas Vent-Hood & Conveyer Oven Cleaning

2627 Lewiston Ave, Dallas, TX 75227, United States

972-645-2861

The Difference Between DIY and Professional Vent Hood Cleaning – Denton Vent-Hood & Conveyer Oven Cleaning

In my culinary journey, I’ve learned that the kitchen is not just where the magic happens; it’s also where the mess accumulates. One essential component of kitchen cleanliness is the vent hood, which plays a critical role in keeping the air free of smoke, grease, and odors. As someone who takes pride in cooking, I understand the importance of a clean vent hood.

In this article, I’ll share my perspective on the difference between DIY vent hood cleaning and hiring professional services based from Vent Cleaning Denton TX.

The Importance of Vent Hood Cleaning

Before delving into the DIY vs. professional debate, it’s vital to understand why vent hood cleaning matters:

1. Fire Prevention: Grease buildup in the vent hood and ductwork is a significant fire hazard. A neglected hood can catch fire, endangering your kitchen and home.

2. Air Quality: A clean vent hood ensures that the air in your kitchen remains free of harmful smoke, fumes, and odors. This contributes to a healthier cooking environment.

3. Appliance Longevity: Regular cleaning extends the lifespan of your vent hood and prevents costly repairs or replacements.

4. Efficiency: A clean hood operates more efficiently, ensuring that cooking fumes and heat are properly ventilated.

Now, let’s explore the differences between DIY and professional vent hood cleaning:

DIY Vent Hood Cleaning:

1. Cost-Effective: DIY vent hood cleaning is often more budget-friendly as you’re not paying for professional services.

2. Flexibility: You have control over when and how often you clean your vent hood. This flexibility can be convenient for busy kitchens.

3. Familiarity with Your Equipment: You know your kitchen appliances better than anyone else. DIY cleaning allows you to handle your equipment with care.

4. Sense of Accomplishment: Completing a successful DIY cleaning can be rewarding and give you a sense of achievement.

5. Short-Term Solution: While DIY cleaning can provide immediate results, it often offers only a temporary solution. Grease and grime can quickly build up again.

6. Limited Equipment: You may lack the specialized tools and cleaning agents necessary for a deep and thorough cleaning.

7. Safety Concerns: DIY cleaning can be risky, as it often involves climbing on ladders, reaching high places, and working with cleaning agents. Safety should be a top priority.

Professional Vent Hood Cleaning:

1. Expertise and Experience: Professional cleaners have the knowledge and experience to clean vent hoods thoroughly. They can access hard-to-reach areas that DIY methods may miss.

2. Comprehensive Cleaning: Professionals use specialized equipment and cleaning agents designed for vent hood cleaning, ensuring a deep and thorough process.

3. Fire Prevention: Professionals are trained to identify and mitigate fire hazards. They can assess the condition of your vent hood and ductwork to prevent potential fires.

4. Compliance: Many local health and safety regulations require regular professional vent hood cleaning for commercial kitchens. Compliance can prevent fines and penalties.

5. Time Savings: Hiring professionals saves you time and allows you to focus on cooking and running your kitchen.

6. Long-Term Results: Professional cleaning provides longer-lasting results, reducing the frequency of required cleanings.

7. Improved Air Quality: Professional cleaning ensures that your kitchen’s air quality remains high, creating a healthier environment for you and your staff.

8. Peace of Mind: Knowing that your vent hood has been professionally cleaned provides peace of mind. You can cook with confidence, knowing you’ve taken the necessary steps for safety.

Choosing the Right Option

Deciding whether to opt for DIY or professional vent hood cleaning depends on your specific situation:

DIY Cleaning:

  • If you have a tight budget and the necessary tools and cleaning agents.
  • If you have a small, residential kitchen with light usage.
  • If you’re comfortable with DIY tasks and prioritize short-term cost savings.

Professional Cleaning:

  • If you have a commercial kitchen, as regulations often mandate professional cleaning.
  • If you lack the expertise, time, or specialized equipment for a thorough cleaning.
  • If safety is a concern, especially in kitchens with high ceilings or hard-to-reach vent hoods.
  • If you value long-term results and peace of mind.

Tips for Effective DIY Vent Hood Cleaning:

If you choose to go the DIY route, here are some tips for effective vent hood cleaning:

  1. Safety First: Always prioritize safety. Use proper protective gear, such as gloves and eye protection, and exercise caution when climbing on ladders.
  2. Read the Manual: Consult your vent hood’s manual for specific cleaning instructions and recommendations.
  3. Gather Supplies: Ensure you have all the necessary cleaning agents, tools, and materials, including degreaser, hot water, rags, and a brush.
  4. Turn off Power: Disconnect the vent hood from power sources before cleaning to avoid accidents.
  5. Cover Surfaces: Protect surrounding surfaces and appliances from cleaning agents and splatter.
  6. Soak Filters: Remove and soak filters in hot, soapy water to loosen grease and grime.
  7. Clean Thoroughly: Scrub all accessible parts of the vent hood, including the hood interior, fan blades, and duct cover.
  8. Inspect for Wear: Take the opportunity to inspect the condition of your vent hood and address any maintenance or repair needs.

Conclusion

Overall, as stated in Vent Cleaning Denton TX, in the DIY vs. professional vent hood cleaning debate, the choice ultimately depends on your specific circumstances, budget, and priorities. While DIY cleaning can be cost-effective and convenient for residential kitchens, professional cleaning offers unmatched expertise, long-term results, and peace of mind, especially for commercial kitchens. Whichever option you choose, the goal remains the same: ensuring a clean, safe, and efficient kitchen environment where you can continue to create culinary delights with confidence.

Denton Vent-Hood & Conveyer Oven Cleaning

8412 Bishop Pine Rd, Denton, TX 76208, United States

940-301-0181

Dealing with Mold and Rot During Window Replacement – Denton Siding & Window Replacement

As a homeowner, few things can be as disheartening as discovering mold and rot in your home, especially during a window replacement project. When I embarked on my own window replacement journey, I encountered this unpleasant surprise, and it taught me a valuable lesson about the importance of addressing these issues promptly and effectively.

In Window Replacement, I will share my experiences and insights on dealing with mold and rot during window replacement.

Understanding the Culprits: Mold and Rot

Before delving into how to deal with mold and rot, it’s crucial to understand what they are and how they develop.

1. Mold: Mold is a type of fungus that thrives in damp, humid conditions. It often appears as a black, green, or grayish substance that spreads across surfaces. Mold can cause health issues and structural damage if left unchecked.

2. Rot: Rot refers to the decomposition of wood due to the growth of fungi. Wood rot typically occurs in areas with high moisture levels and poor ventilation. It weakens the structural integrity of wood and can compromise the stability of your home.

Signs of Mold and Rot During Window Replacement

Identifying mold and rot early is crucial to prevent further damage. Here are some common signs to look for during a window replacement project:

1. Visible Mold: Obvious mold growth on walls, window frames, or adjacent surfaces is a clear indicator of a mold issue.

2. Musty Odor: A musty or earthy smell can suggest the presence of mold, even if it’s not visible.

3. Discoloration: Discoloration on walls, ceilings, or window frames may be a sign of mold or rot.

4. Soft or Spongy Wood: When tapping or pressing on wood surfaces, if they feel soft or spongy, it may indicate wood rot.

5. Peeling Paint or Wallpaper: Peeling or bubbling paint or wallpaper can result from moisture issues caused by mold or rot.

6. Deteriorating Window Frames: Window frames that are deteriorating, decaying, or showing signs of damage may be suffering from wood rot.

Dealing with Mold and Rot During Window Replacement

Discovering mold and rot during a window replacement project can be discouraging, but it’s essential to address these issues promptly to prevent further damage and ensure a successful replacement. Here’s a step-by-step guide on how to deal with mold and rot:

1. Identify the Extent of the Problem

Before taking any action, assess the extent of the mold and rot issues. Determine if it’s localized to the window frame or if it has spread to surrounding areas. Knowing the scope of the problem will help you plan the necessary repairs.

2. Prioritize Safety

Safety should be your top priority when dealing with mold. Mold spores can be harmful when inhaled or when they come into contact with your skin or eyes. To protect yourself:

  • Wear appropriate safety gear, including gloves, a mask, and safety goggles.
  • Ensure proper ventilation in the affected area to disperse mold spores.

3. Isolate the Affected Area

Containment is essential to prevent the mold or rot from spreading during the window replacement. Seal off the affected area using plastic sheeting and tape. This will help prevent the contamination of other parts of your home.

4. Remove and Dispose of Moldy Materials

Remove any materials that are beyond repair, such as severely rotted wood or mold-infested drywall. Properly dispose of these materials following local regulations for hazardous waste.

5. Treat and Clean the Affected Area

For mold, you can clean the affected surfaces with a solution of water and mild detergent or a commercial mold cleaner. For wood rot, remove any loose or rotted wood and treat the area with a wood preservative or fungicide to prevent further growth.

6. Replace Damaged Wood

In cases of severe rot, you may need to replace the damaged wood. Ensure that the replacement wood is properly treated and sealed to prevent future rot. Take care to follow best practices for structural integrity.

7. Address the Source of Moisture

Both mold and wood rot thrive in damp environments. It’s crucial to identify and address the source of moisture to prevent future issues. Leaking windows, roof problems, or poor ventilation could contribute to the problem.

8. Consult Professionals

For extensive mold or rot issues, it’s advisable to consult with professionals who specialize in mold remediation or wood rot repair. They have the expertise and equipment to address these issues effectively and safely.

9. Window Replacement

After dealing with mold and rot issues, proceed with the window replacement. Ensure that the replacement is done by experienced professionals who can install the windows correctly and provide proper sealing and insulation to prevent future problems.

10. Preventive Measures

Once the window replacement is complete, take preventive measures to avoid future mold and rot issues:

  • Maintain proper ventilation in your home to reduce humidity levels.
  • Regularly inspect and maintain your windows and the surrounding areas to catch potential issues early.
  • Consider installing mold-resistant drywall or wood in areas prone to moisture.
  • Use exhaust fans in bathrooms and kitchens to reduce humidity.

Conclusion: Addressing Mold and Rot for a Successful Window Replacement

Overall, based from Window Replacement and while discovering mold and rot during a window replacement project can be disheartening, it’s essential to take swift and appropriate action to address these issues. Dealing with mold and rot effectively not only ensures a successful window replacement but also contributes to a healthier and more structurally sound home. Prioritize safety, identify the source of moisture, and consider consulting professionals when needed to tackle these issues comprehensively. By taking these steps, you can transform a challenging situation into an opportunity to improve the overall health and durability of your home.

Denton Siding & Window Replacement

1429 Ridgecrest Cir, Denton, TX 76205, United States

940-283-7300

Exploring the Benefits of Residential Window Cleaning Contracts – Plano Window Cleaning & Glass Repair

As a homeowner who values the aesthetics and maintenance of my residence, I’ve often found myself in a perpetual quest for efficient and cost-effective solutions to various household chores. Window cleaning, in particular, is a task that I’ve grappled with over the years, trying to strike a balance between a pristine, sunlit living space and the time and effort required to achieve it.

According to Window Cleaning Plano TX, here’s the benefits of residential window cleaning contracts, a service I’ve come to rely on for keeping my windows crystal clear and my home inviting.

The Ongoing Battle with Grimy Windows

I’ve lived in different homes over the years, each with its own set of windows, challenges, and views to the outside world. And while I appreciate the natural light and connection to nature that windows provide, I’ve also come to recognize the relentless battle against dirt, dust, and streaks that accompanies them. It’s a battle that often left me with two options: invest hours of my valuable time in DIY window cleaning or endure the less-than-pristine appearance of my windows.

The Appeal of Residential Window Cleaning Contracts

It was during one of my more exasperating window-cleaning endeavors that I stumbled upon the idea of residential window cleaning contracts. Initially, I was skeptical, wondering whether it would be worth the cost. However, as I delved deeper into the concept and began to experience the benefits firsthand, I became a firm believer in the value of these contracts. Here are the key advantages that have convinced me of their worth:

1. Consistent and Scheduled Service

One of the most significant benefits of a window cleaning contract is the reliability it offers. With a contracted service, you can establish a regular cleaning schedule that suits your needs. Whether it’s monthly, quarterly, or semi-annually, you can count on your windows being cleaned consistently without the hassle of scheduling each service individually. This predictability eliminates the worry of neglecting your windows for too long, ensuring they always look their best.

2. Time and Effort Savings

Cleaning windows, especially for a multi-story home or one with numerous windows, can be an arduous task. It often involves gathering the right cleaning supplies, climbing ladders, and spending hours to achieve streak-free results. With a residential window cleaning contract, you can reclaim your valuable time and redirect your efforts toward activities you truly enjoy. Knowing that professionals will handle the job efficiently allows you to focus on other priorities.

3. Professional Expertise and Equipment

Residential window cleaning contracts typically involve hiring trained and experienced professionals who have the knowledge and tools to do the job effectively. These experts understand the intricacies of different window types, the best cleaning methods, and how to handle various challenges, such as hard water stains or mineral deposits. By entrusting your windows to professionals, you can expect superior results that enhance the overall appearance of your home.

4. Extending Window Lifespan

Regular window cleaning isn’t just about aesthetics; it’s also about maintenance. Over time, dirt, dust, and environmental pollutants can accumulate on window surfaces, potentially causing damage or degradation. With scheduled cleanings, you’re effectively preserving the longevity of your windows. Clearing away contaminants and preventing mineral buildup can help extend the lifespan of your windows, reducing the need for costly replacements.

5. Enhanced Curb Appeal

The condition of your windows significantly contributes to your home’s curb appeal. Clean, sparkling windows make your house look well-maintained, inviting, and aesthetically pleasing. Whether you’re welcoming guests, hosting social gatherings, or simply taking pride in your home’s appearance, having a window cleaning contract ensures that your residence consistently looks its best from the outside.

6. Health and Indoor Air Quality

Windows play a crucial role in maintaining indoor air quality and a healthy living environment. Dirty or dusty windows can harbor allergens and pollutants, which can negatively impact the air you breathe inside your home. Regular window cleaning helps remove these contaminants, promoting a healthier indoor atmosphere for you and your family.

7. Customization and Flexibility

Residential window cleaning contracts are highly customizable to meet your specific needs and preferences. You can work with the service provider to determine the cleaning frequency, types of windows to be cleaned, and any additional services you require, such as screen cleaning or track maintenance. This flexibility allows you to tailor the contract to your home’s unique requirements.

8. Cost Efficiency

While some may initially question the cost of a window cleaning contract, it’s essential to consider the long-term savings and value it provides. When you factor in the time and effort saved, the professional quality of service, and the benefits of window maintenance, a contract often represents a cost-efficient solution. Additionally, many service providers offer discounts or cost savings as part of their contract packages.

9. Peace of Mind

Perhaps one of the most underrated benefits of a residential window cleaning contract is the peace of mind it offers. Knowing that your windows are in capable hands, that they will be cleaned regularly, and that any issues will be addressed promptly provides a sense of assurance and relief. It eliminates the worry of having to tackle yet another household chore.

Conclusion: Embracing the Value of Residential Window Cleaning Contracts

As a homeowner who has experienced the challenges of maintaining clean and inviting windows, I can confidently say that residential window cleaning contracts have transformed the way I approach window care. The convenience, professionalism, and overall value they provide have made them an indispensable part of my home maintenance routine.

In summary, based from Window Cleaning Plano TX, if you’re on the fence about whether to invest in a window cleaning contract, I encourage you to consider the benefits discussed here. Beyond the aesthetics, these contracts offer time savings, expert care, and peace of mind that are truly invaluable to homeowners. By embracing the convenience and value of residential window cleaning contracts, you can enjoy clear, pristine windows that enhance the beauty and comfort of your home year-round.

Plano Window Cleaning & Glass Repair

1201 Legacy Dr #2114, Plano, TX 75023, United States

972-544-1373

Replacing Window Glass with Tinted or Privacy Glass – NRH Window Cleaning & Glass Repair

As I sat in my living room one sweltering summer afternoon, squinting to shield my eyes from the blinding sun, I realized it was time for a change. The intense sunlight not only made my home uncomfortably hot but also compromised my privacy. It was then that I embarked on a journey to replace my window glass with tinted or privacy glass.

In reference to North Richland Hills Window Cleaning, I’ll share my personal experience and insights into this transformative process.

The Need for Change

Before diving into the details of replacing window glass, it’s essential to understand why you might consider such an upgrade. There are several reasons why homeowners, like myself, opt for tinted or privacy glass:

1. Sun Protection:

Excessive exposure to sunlight can damage furniture, flooring, and fabrics. Tinted glass provides UV protection, reducing the harmful effects of the sun’s rays and preserving the interior of your home.

2. Energy Efficiency:

Tinted glass can enhance the energy efficiency of your home. It reduces solar heat gain, which can lead to lower cooling costs in the summer.

3. Privacy:

Privacy glass is an excellent solution for rooms facing busy streets or close neighbors. It allows natural light to enter while maintaining privacy by obscuring the view from the outside.

4. Aesthetic Appeal:

Tinted or privacy glass can add a touch of sophistication to your home’s exterior. It can enhance the overall curb appeal and modernize the look of your property.

Choosing the Right Glass

Once I had identified my need for change, the next step was to choose the right type of glass. There are several options to consider:

1. Tinted Glass:

Tinted glass is designed to reduce the amount of visible light and heat transmitted through the window. It comes in various shades, from light to dark, allowing you to customize the level of tint according to your preferences. Tinted glass provides privacy during the day while maintaining your view from the inside. It’s an excellent choice for controlling glare and reducing energy costs.

2. Privacy Glass:

Privacy glass, also known as obscured or frosted glass, is designed to obscure the view from the outside while still allowing light to pass through. It’s commonly used in bathrooms, bedrooms, and areas where privacy is a concern. Privacy glass can be customized with various patterns and designs to suit your aesthetic preferences.

3. Low-E Glass:

Low-emissivity (Low-E) glass is coated with a thin, invisible layer of metal or metallic oxide. This coating reflects heat and UV rays while allowing visible light to pass through. Low-E glass enhances energy efficiency by reducing heat transfer, making it an excellent choice for all seasons.

4. Safety Glass:

Safety glass, such as tempered or laminated glass, is designed to enhance safety and security. Tempered glass is heat-treated to make it stronger and more resistant to breakage. If it does break, it shatters into small, dull-edged pieces, reducing the risk of injury. Laminated glass consists of multiple layers of glass and plastic, which hold the glass together when shattered. It’s commonly used in hurricane-prone areas and for added security.

The Replacement Process

Replacing window glass with tinted or privacy glass is a significant home improvement project that requires careful planning and execution. Here’s a step-by-step overview of the process based on my own experience:

1. Assessment and Measurement:

The first step is to assess your existing windows and measure the dimensions accurately. This information is crucial for ordering the correct size and type of glass. If you’re unsure about the measurements or type of glass you need, consider consulting a professional window installer or glass supplier.

2. Glass Selection:

Choose the type and shade of glass that best suits your needs and preferences. Consider factors such as the orientation of your windows, the amount of sunlight they receive, and the level of privacy required. Consult with experts or visit a glass showroom to see samples and make an informed decision.

3. Removal of Existing Glass:

Removing the existing glass from your windows can be a delicate and labor-intensive process. It typically involves carefully prying off the window stops or moldings, removing any glazing putty or caulk, and gently taking out the old glass. Take your time to avoid damaging the window frame or sash.

4. Cleaning and Preparation:

After removing the old glass, thoroughly clean and prepare the window frame and sash. Remove any debris, old adhesive, or residue to ensure a clean surface for the new glass installation.

5. Installation of New Glass:

Installing the new glass requires precision and attention to detail. Apply a thin, even layer of window sealant or adhesive around the frame or sash, ensuring complete coverage. Carefully place the new glass into the frame, pressing it firmly against the adhesive. Use window stops or moldings to secure the glass in place. Be cautious not to overtighten, as this can damage the glass.

6. Finishing Touches:

Once the glass is securely in place, apply a final layer of sealant or caulk around the edges to create a watertight seal and prevent drafts. Allow the sealant to dry completely before handling the window.

7. Clean-Up and Inspection:

Clean up any excess sealant or debris from the installation process. Inspect the newly installed glass for any visible defects, such as air bubbles or gaps in the sealant. Address any issues promptly to ensure a proper seal and optimal performance.

8. Final Testing:

Test the functionality of the window, including opening and closing, to ensure that the installation hasn’t affected its operation. Check for any drafts or leaks and make adjustments as needed.

Benefits and Considerations

Replacing window glass with tinted or privacy glass offers several benefits:

1. Improved Comfort: Tinted glass reduces heat and glare, creating a more comfortable indoor environment.

2. Energy Efficiency: Tinted and Low-E glass can lower energy costs by reducing heat transfer.

3. Privacy: Privacy glass provides a level of seclusion while still allowing natural light to enter.

4. UV Protection: Tinted and Low-E glass block harmful UV rays, protecting your furnishings from fading.

However, there are considerations to keep in mind:

1. Cost: Replacing window glass can be expensive, depending on the type of glass chosen and the number of windows requiring replacement.

2. Installation: Proper installation is critical to ensure the glass performs as intended. Consider hiring a professional if you’re unsure about your DIY skills.

3. Aesthetic Impact: The choice of glass can impact the aesthetics of your home. Ensure that the selected glass complements your interior and exterior design.

4. Building Codes: Check local building codes and regulations to ensure compliance with safety and energy efficiency standards.

Conclusion

Overall, by following North Richland Hills Window Cleaning and my journey to replace window glass with tinted and privacy glass transformed my living space and enhanced my overall quality of life. It brought comfort, energy efficiency, and privacy to my home, all while adding a touch of sophistication to its appearance. Whether you’re seeking relief from the harsh sun, yearning for privacy, or simply looking to upgrade your windows, the process of replacing window glass can be a rewarding and beneficial home improvement project. It’s a step towards creating a more comfortable, efficient, and aesthetically pleasing living environment.

NRH Window Cleaning & Glass Repair

7510 Davis Blvd # B, North Richland Hills, TX 76182, United States

817-601-6082

The Future of Window Cleaning Services: Trends to Watch – Southlake Window Cleaning & Glass Repair

As I stand here admiring the spotless windows of my home, I can’t help but reflect on the journey that has brought us to this point. Window cleaning, once a routine household chore, has evolved into a specialized service that combines science, technology, and expertise. Over the years, I’ve witnessed significant changes in the industry, and it’s clear that the future of window cleaning services holds even more exciting developments.

By following Southlake Window Cleaning, I’ll delve into the trends and innovations that are shaping the future of window cleaning, promising cleaner, safer, and more sustainable results.

1. Advancements in Cleaning Technology

The traditional image of a window cleaner armed with a squeegee and a bucket of soapy water is evolving. The future of window cleaning is marked by advancements in cleaning technology that make the process more efficient and effective. Here are some key innovations to watch:

a. Purified Water Systems

One of the most transformative technologies in window cleaning is the use of purified water systems. These systems employ reverse osmosis or deionization to remove impurities and minerals from the water. The result is pure water that dries without leaving spots or streaks. Cleaning with purified water reduces the need for detergents and chemicals, making it an eco-friendly and sustainable choice.

b. Water-Fed Poles

Water-fed poles are an integral part of modern window cleaning. They allow window cleaners to reach heights and angles that were previously challenging or dangerous. These extendable poles deliver purified water to a brush or scrubber at the top, enabling thorough cleaning of high windows and architectural features.

c. Robotic Window Cleaners

The development of robotic window cleaners is an exciting trend in the industry. These automated devices are equipped with sensors and algorithms that allow them to navigate and clean windows autonomously. While they may not replace human window cleaners entirely, they offer a valuable addition to the toolkit, especially for hard-to-reach or hazardous locations.

2. Sustainable Practices

As awareness of environmental sustainability grows, the future of window cleaning services is moving toward greener practices. Customers are increasingly seeking out eco-friendly options, and the industry is responding with sustainable solutions:

a. Green Cleaning Solutions

Many window cleaning companies are transitioning to environmentally friendly cleaning solutions. These products are biodegradable, non-toxic, and safe for both the environment and occupants of the buildings being serviced.

b. Reduced Chemical Use

The use of purified water systems, as mentioned earlier, reduces the reliance on chemical detergents. This not only minimizes environmental impact but also contributes to healthier indoor air quality.

c. Solar-Powered Equipment

Some window cleaning companies are adopting solar-powered equipment, such as water purification systems and robotic window cleaners. This reduces energy consumption and further aligns window cleaning practices with sustainability goals.

3. Safety First

Safety has always been a paramount concern in window cleaning, and the future promises even greater advancements in this area. Here are some notable trends in window cleaning safety:

a. Improved Training

Window cleaning companies are investing in comprehensive training programs for their employees. These programs cover safety protocols, equipment operation, and hazard recognition. Well-trained professionals are better equipped to handle the challenges of the job safely.

b. Enhanced Safety Gear

The development of advanced safety gear, including harnesses, helmets, and non-slip footwear, is a significant trend. These innovations improve the safety of window cleaners working at heights, reducing the risk of accidents.

c. Drone-Assisted Inspections

Drones are increasingly being used for window inspections and assessments. They can access hard-to-reach areas and provide real-time visual feedback, allowing window cleaners to plan their work with greater precision and safety.

4. Data-Driven Services

The integration of technology and data into window cleaning services is a trend that promises improved efficiency and customer satisfaction. Here’s how data-driven practices are shaping the future:

a. Predictive Maintenance

Some window cleaning companies are using data analytics to predict when windows will need cleaning based on factors like weather conditions, pollution levels, and historical cleaning schedules. This proactive approach ensures that windows are cleaned at the optimal time, extending their lifespan and appearance.

b. Customer Experience Enhancement

Data-driven practices also enable window cleaning companies to personalize their services. They can track customer preferences, cleaning history, and scheduling preferences to provide a tailored and convenient experience.

5. Expansion of Services

The future of window cleaning services extends beyond glass. Window cleaning companies are diversifying their offerings to provide comprehensive exterior building maintenance. Here are some expanded services to watch for:

a. Gutter Cleaning

Gutter cleaning services are often offered in conjunction with window cleaning. This not only enhances the appearance of a building but also prevents water damage and clogs that can lead to structural issues.

b. Pressure Washing

Pressure washing services are becoming a standard part of the window cleaning toolkit. High-pressure water streams can remove stubborn dirt, grime, and mold from exterior surfaces, including building facades and sidewalks.

c. Facade Restoration

Some window cleaning companies are offering facade restoration services. This involves repairing and restoring building exteriors, including surfaces damaged by pollution, graffiti, or weathering.

6. Accessibility Solutions

In an increasingly urbanized world, many buildings have unique architectural features that pose challenges for window cleaning. The future of the industry is marked by innovative solutions to access hard-to-reach areas:

a. Customized Rigging Systems

Window cleaning companies are designing custom rigging systems that allow for safe access to challenging areas. These systems can be tailored to the specific needs of each building.

b. Compact Lifts and Platforms

Compact lifts and platforms are becoming more versatile and efficient. They can navigate tight spaces and provide access to high or confined windows.

c. Tethered Drones

Tethered drones are being used to access and clean windows on skyscrapers and high-rise buildings. They offer a cost-effective and flexible solution for challenging projects.

7. Transparency and Communication

The future of window cleaning services also emphasizes transparency and communication between service providers and customers:

a. Real-Time Updates

Customers can expect real-time updates on the progress of their window cleaning services. Mobile apps and digital platforms enable window cleaners to communicate efficiently and provide instant feedback.

b. Transparent Pricing

Transparent pricing models are gaining popularity. Customers can receive accurate quotes and understand the costs associated with their window cleaning services upfront.

c. Sustainability Reports

Some window cleaning companies are providing sustainability reports to their customers. These reports detail the environmental impact of the cleaning process, including water and chemical usage, and offer recommendations for further sustainability improvements.

In conclusion, as per Southlake Window Cleaning, the future of window cleaning services is marked by exciting advancements in technology, sustainability, safety, and customer experience. The industry is evolving to meet the growing demands of customers who seek cleaner, safer, and more environmentally responsible solutions. As I gaze through my spotless windows, I can’t help but look forward to the bright future of window cleaning—a future that promises cleaner, safer, and more sustainable living spaces for us all.

Southlake Window Cleaning & Glass Repair

1052 Summerplace Ln, Southlake, TX 76092, United States

817-839-4773

How to Program Marantec Garage Door Opener – Colleyville Gates & Garage Doors

Programming a Marantec garage door repair opener can vary slightly depending on the specific model and features of your opener. However, I’ll provide a general step-by-step guide that should work for most Marantec garage door openers. Please consult your opener’s user manual for model-specific instructions if needed.

Step 1: Gather the Necessary Items Before you start programming your Marantec garage door opener, make sure you have the following items ready:

  1. Garage door opener remote control (if you have one).
  2. Ladder (if needed to reach the opener unit).
  3. The garage door opener’s user manual (for model-specific guidance).

Step 2: Locate the “Learn” Button Typically, Marantec garage door openers have a “Learn” button on the opener unit. This button is usually located on the back or side of the motor unit, near the hanging antenna wire. This button is essential for programming.

Step 3: Clear Existing Codes If you’re reprogramming your remote or adding a new one, it’s a good practice to clear existing codes from the opener memory first. To do this, follow these steps:

  1. Press and hold the “Learn” button on the opener unit until the indicator light (usually an LED) blinks or turns on.
  2. Release the “Learn” button. This indicates that the memory has been cleared.

Step 4: Program the Remote Control Now, you’ll program your remote control to work with the garage door opener. Follow these steps:

  1. Press and release the “Learn” button on the opener unit. The indicator light should start blinking or stay lit.
  2. Within 30 seconds of pressing the “Learn” button, press the button on your remote control that you want to use to open and close the garage door. Hold the remote control close to the opener unit for better reception.
  3. The indicator light on the opener unit should flash or go off and then come back on, indicating that the remote control has been successfully programmed.

Step 5: Test the Remote Control To ensure that the remote control is working correctly, test it by pressing the programmed button. The garage door should open or close in response.

Step 6: Programming Additional Remotes (Optional) If you have more remote controls to program, repeat Step 4 for each additional remote within the 30-second window provided.

Step 7: Programming Keypad Entry (Optional) If your Marantec garage door opener has a wireless keypad entry system, you can program it by following these steps:

  1. Locate the “Learn” button on the opener unit.
  2. Press and release the “Learn” button.
  3. Enter your desired PIN code on the keypad.
  4. Press the “Enter” or “Send” button on the keypad.

The opener should respond by flashing or turning off and back on, indicating that the keypad entry has been successfully programmed.

Step 8: Final Test After programming all remotes and keypads, conduct a final test to ensure everything is working correctly. Open and close the garage door using all programmed devices to confirm that they operate smoothly.

Step 9: Safety and Maintenance Remember to periodically check and replace the batteries in your remote controls and keypad entry. Additionally, conduct regular maintenance on your garage door opener according to the manufacturer’s recommendations to ensure it functions correctly and safely.

In conclusion, programming a Marantec garage door repair opener involves locating the “Learn” button, clearing existing codes (if necessary), programming remote controls, and testing the system. The exact steps may vary depending on your opener’s model, so refer to your user manual for model-specific instructions.

Colleyville Gates & Garage Doors

6508 Colleyville Blvd, Colleyville, TX 76034, United States

1-817-755-6231

Page 2 of 3

Powered by WordPress & Theme by Anders Norén